IBM 8681 Hardware Maintenance Manual - Page 122
do not, Attention, Before you begin
 |
UPC - 087944642503
View all IBM 8681 manuals
Add to My Manuals
Save this manual to your list of manuals |
Page 122 highlights
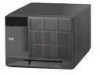
Attention 1. Before you hot-swap a drive, refer to the amber hard-disk status light for that drive to make sure that it is defective. If the server has a ServeRAID adapter installed and you assigned RAID level 1 or 5 to the logical drives in the disk array, make sure that the drive is defective. If you partially or completely remove a good drive instead of a defective one, the server might lose valuable data. However, the ServeRAID adapter can rebuild the data that you need, provided that certain conditions are met. Refer to the ServeRAID adapter documentation for further details. 2. To avoid damage to a hard disk drive, do not remove the drive from the hot-swap bay until it has had time to spin down (approximately 30 seconds after disconnecting). Handle the drive gently. Before you begin: Read "Safety information" on page 240. Read the documentation that comes with the drive. Refer to the following illustration while you perform the steps in this procedure. 1 Filler panel (tray and slim filler bezel) 2 Hot-swap hard disk drive 3 Drive tray handle (open position) To install or replace a hard disk drive: 1. Determine the bay in which you want to install the drive. Otherwise, continue with step 2 on page 115. Remove the defective hard disk drive 2 by pressing on the lock to release the handle 3 , placing the handle in the open position (perpendicular to the drive), and pulling the hot-swap tray from the bay. Continue with step 3 on page 115. 114 Netfinity Server HMM
-
 1
1 -
2
-
3
-
4
-
5
-
6
-
7
-
8
-
9
-
10
-
11
-
12
-
13
-
14
-
15
-
16
-
17
-
18
-
19
-
20
-
21
-
22
-
23
-
24
-
25
-
26
-
27
-
28
-
29
-
30
-
31
-
32
-
33
-
34
-
35
-
36
-
37
-
38
-
39
-
40
-
41
-
42
-
43
-
44
-
45
-
46
-
47
-
48
-
49
-
50
-
51
-
52
-
53
-
54
-
55
-
56
-
57
-
58
-
59
-
60
-
61
-
62
-
63
-
64
-
65
-
66
-
67
-
68
-
69
-
70
-
71
-
72
-
73
-
74
-
75
-
76
-
77
-
78
-
79
-
80
-
81
-
82
-
83
-
84
-
85
-
86
-
87
-
88
-
89
-
90
-
91
-
92
-
93
-
94
-
95
-
96
-
97
-
98
-
99
-
100
-
101
-
102
-
103
-
104
-
105
-
106
-
107
-
108
-
109
-
110
-
111
-
112
-
113
-
114
-
115
-
116
-
 117
117 -
 118
118 -
 119
119 -
 120
120 -
 121
121 -
 122
122 -
 123
123 -
 124
124 -
 125
125 -
 126
126 -
 127
127 -
128
-
129
-
130
-
131
-
132
-
133
-
134
-
135
-
136
-
137
-
138
-
139
-
140
-
141
-
142
-
143
-
144
-
145
-
146
-
147
-
148
-
149
-
150
-
151
-
152
-
153
-
154
-
155
-
156
-
157
-
158
-
159
-
160
-
161
-
162
-
163
-
164
-
165
-
166
-
167
-
168
-
169
-
170
-
171
-
172
-
173
-
174
-
175
-
176
-
177
-
178
-
179
-
180
-
181
-
182
-
183
-
184
-
185
-
186
-
187
-
188
-
189
-
190
-
191
-
192
-
193
-
194
-
195
-
196
-
197
-
198
-
199
-
200
-
201
-
202
-
203
-
204
-
205
-
206
-
207
-
208
-
209
-
210
-
211
-
212
-
213
-
214
-
215
-
216
-
217
-
218
-
219
-
220
-
221
-
222
-
223
-
224
-
225
-
226
-
227
-
228
-
229
-
230
-
231
-
232
-
233
-
234
-
235
-
236
-
237
-
238
-
239
-
240
-
241
-
242
-
243
-
244
-
245
-
246
-
247
-
248
-
249
-
250
-
251
-
252
-
253
-
254
-
255
-
256
-
257
-
258
-
259
-
260
-
261
-
262
-
263
-
264
-
265
-
266
-
267
-
268
-
269
-
270
-
271
-
272
-
273
-
274
-
275
-
276
-
277
-
278
-
279
-
280
-
281
-
282
-
283
-
284
-
285
-
286
-
287
-
288
-
289
-
290
 |
 |
