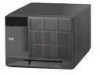
IBM 8681 Hardware Maintenance Manual - Page 146
Removing the memory-access panel, memory-access panel
 |
UPC - 087944642503
View all IBM 8681 manuals
Add to My Manuals
Save this manual to your list of manuals |
Page 146 highlights
Removing the memory-access panel: Refer to the following illustration while you perform the steps in this procedure. Before you begin: Read "Safety information" on page 240. To remove the server memory-access panel: 1. If you are installing a DIMM in an empty connector, go to step 2. If you are replacing a failed DIMM, verify that you have selected the correct DIMM for replacement. To do this, remove the front bezel (see "Removing the front bezel" on page 137) and check the LEDs at the front of the processor housing assembly, above the processor fans, to see which one is lit. 2. Run the shutdown procedure for the operating system. Turn off the server and peripheral devices, and disconnect all external cables and power cords (see "Preparing to install options" on page 134); then, remove the front bezel (see "Removing the front bezel" on page 137). 3. Pull out the two plastic fasteners 1 on the memory-access panel 2 to the unlocked position and remove the memory-access panel. Note Do not remove the plastic fasteners from the memory-access panel. 4. To install or remove DIMMs, see "DIMM and memory board installation" on page 63. Then, return here. Attention: To ensure proper EMC containment and cooling for the server, reinstall the memory-access panel before turning on the server. 5. Reinstall the memory-access panel: 138 Netfinity Server HMM
-
 1
1 -
2
-
3
-
4
-
5
-
6
-
7
-
8
-
9
-
10
-
11
-
12
-
13
-
14
-
15
-
16
-
17
-
18
-
19
-
20
-
21
-
22
-
23
-
24
-
25
-
26
-
27
-
28
-
29
-
30
-
31
-
32
-
33
-
34
-
35
-
36
-
37
-
38
-
39
-
40
-
41
-
42
-
43
-
44
-
45
-
46
-
47
-
48
-
49
-
50
-
51
-
52
-
53
-
54
-
55
-
56
-
57
-
58
-
59
-
60
-
61
-
62
-
63
-
64
-
65
-
66
-
67
-
68
-
69
-
70
-
71
-
72
-
73
-
74
-
75
-
76
-
77
-
78
-
79
-
80
-
81
-
82
-
83
-
84
-
85
-
86
-
87
-
88
-
89
-
90
-
91
-
92
-
93
-
94
-
95
-
96
-
97
-
98
-
99
-
100
-
101
-
102
-
103
-
104
-
105
-
106
-
107
-
108
-
109
-
110
-
111
-
112
-
113
-
114
-
115
-
116
-
117
-
118
-
119
-
120
-
121
-
122
-
123
-
124
-
125
-
126
-
127
-
128
-
129
-
130
-
131
-
132
-
133
-
134
-
135
-
136
-
137
-
138
-
139
-
140
-
 141
141 -
 142
142 -
 143
143 -
 144
144 -
 145
145 -
 146
146 -
 147
147 -
 148
148 -
 149
149 -
 150
150 -
 151
151 -
152
-
153
-
154
-
155
-
156
-
157
-
158
-
159
-
160
-
161
-
162
-
163
-
164
-
165
-
166
-
167
-
168
-
169
-
170
-
171
-
172
-
173
-
174
-
175
-
176
-
177
-
178
-
179
-
180
-
181
-
182
-
183
-
184
-
185
-
186
-
187
-
188
-
189
-
190
-
191
-
192
-
193
-
194
-
195
-
196
-
197
-
198
-
199
-
200
-
201
-
202
-
203
-
204
-
205
-
206
-
207
-
208
-
209
-
210
-
211
-
212
-
213
-
214
-
215
-
216
-
217
-
218
-
219
-
220
-
221
-
222
-
223
-
224
-
225
-
226
-
227
-
228
-
229
-
230
-
231
-
232
-
233
-
234
-
235
-
236
-
237
-
238
-
239
-
240
-
241
-
242
-
243
-
244
-
245
-
246
-
247
-
248
-
249
-
250
-
251
-
252
-
253
-
254
-
255
-
256
-
257
-
258
-
259
-
260
-
261
-
262
-
263
-
264
-
265
-
266
-
267
-
268
-
269
-
270
-
271
-
272
-
273
-
274
-
275
-
276
-
277
-
278
-
279
-
280
-
281
-
282
-
283
-
284
-
285
-
286
-
287
-
288
-
289
-
290
 |
 |
