Icom VE-PG4 Installation Guide ver.1.34 - Page 53
Connecting the IC-SAT100M to the IP Network
 |
View all Icom VE-PG4 manuals
Add to My Manuals
Save this manual to your list of manuals |
Page 53 highlights
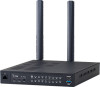
2 Setting up the transceivers Connecting the IC-SAT100M Connection Port Settings > RoIP Gateway ■■Connecting the IC-SAT100M to the IP Network Connect the IC-SAT100M to the network, and then set up the connection and desttination settings on the RoIP Gateway setting screen. LLThis instruction describes as the IP transceiver setup has been completed. VE-PG4 192.168.0.1 [LAN] HUB RoIP Gateway 1 RoIP Gateway 2 IP Network Transceiver A IC-SAT100M 192.168.0.50 Voice Port Number: 51000 Control Port Number: 53000 Transceiver B IC-SAT100M 192.168.0.60 Voice Por Number: 51002 Control Port Number: 53000 1 Open the RoIP Gateway screen. (Connection Port Settings > RoIP Gateway) 2 In [RoIP Gateway Mode], set Mode to "Transceiver" in the RoIP Gateway (1 ~ 8) that you want to connect the Transceiver A (IC-SAT100M) to. (Example: RoIP Gateway 1) q Select w Click 3 In [RoIP Gateway], select a RoIP Gateway port (1 ~ 8) that you set in the step 2, and then confirm that the [Transceiver Model] is set to "IC-SAT100M." (Example: RoIP Gateway 1) q Select w Confirm (☞ Continued on the next page) 2-28
-
 1
1 -
2
-
3
-
4
-
5
-
6
-
7
-
8
-
9
-
10
-
11
-
12
-
13
-
14
-
15
-
16
-
17
-
18
-
19
-
20
-
21
-
22
-
23
-
24
-
25
-
26
-
27
-
28
-
29
-
30
-
31
-
32
-
33
-
34
-
35
-
36
-
37
-
38
-
39
-
40
-
41
-
42
-
43
-
44
-
45
-
46
-
47
-
 48
48 -
 49
49 -
 50
50 -
 51
51 -
 52
52 -
 53
53 -
 54
54 -
 55
55 -
 56
56 -
 57
57 -
 58
58 -
59
-
60
-
61
-
62
-
63
-
64
-
65
-
66
-
67
-
68
-
69
-
70
-
71
-
72
-
73
-
74
-
75
-
76
-
77
-
78
-
79
-
80
-
81
-
82
-
83
-
84
-
85
-
86
-
87
-
88
-
89
-
90
-
91
-
92
-
93
-
94
-
95
-
96
-
97
-
98
-
99
-
100
-
101
-
102
-
103
-
104
-
105
-
106
-
107
-
108
-
109
-
110
-
111
-
112
-
113
-
114
-
115
-
116
-
117
-
118
-
119
-
120
-
121
-
122
-
123
-
124
-
125
-
126
-
127
-
128
-
129
 |
 |
