Lexmark X644E User's Guide - Page 121
Confidential Print Setup, Encrypting the hard disk
 |
UPC - 734646093156
View all Lexmark X644E manuals
Add to My Manuals
Save this manual to your list of manuals |
Page 121 highlights
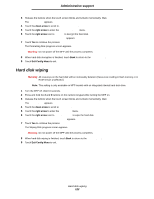
Administrative support 6 Indicate the setting for each sub-item as required for the network environment. 7 Click Submit. Confidential Print Setup Confidential Print Setup allows the designation of a maximum number of PIN entry attempts and allows setting an expiration time for print jobs. When a user exceeds a specific number of PIN entry attempts, all of that user's print jobs are deleted. When a user has not printed their jobs within a designated time period, the print jobs are deleted. To activate Confidential Print Setup: 1 Open a Web browser. In the address line, enter the IP address of the MFP being configured using the format: http://ip_address/. 2 Click Configuration. 3 Under Other Settings, click Security. 4 Click Confidential Print Setup. 5 Set the value for the maximum number of invalid PINs allowed. Set Job Expiration to the maximum amount of time before a submitted confidential print job is deleted. 6 Click Submit. Encrypting the hard disk Warning: All resources on the hard disk will be deleted. Resources residing in flash memory or in RAM remain unaffected. Note: This setting is only available on MFP models with an integrated internal hard disk drive. 1 Turn the MFP off. Wait 10 seconds. 2 Press and hold the 2 and 6 buttons on the numeric keypad while turning the MFP on. 3 Release the buttons when the touch screen blinks and is blank momentarily. Wait. The Config Menu appears. 4 Touch the down arrow to scroll to Disk Encryption. 5 Touch the right arrow to enter the Disk Encryption menu. 6 Touch the right arrow next to Enable to encrypt the hard disk. Contents will be lost. Continue? appears. 7 Touch Yes to continue the process. The Encrypting Disk progress bar appears. Warning: Do not power off the MFP until the process completes. 8 When hard disk encryption is finished, touch Back to return to the Config Menu. 9 Touch Exit Config Menu to exit. To disable disk encryption: 1 Turn the MFP off. Wait 10 seconds. 2 Press and hold the 2 and 6 buttons on the numeric keypad while turning the MFP on. Encrypting the hard disk 121
-
 1
1 -
2
-
3
-
4
-
5
-
6
-
7
-
8
-
9
-
10
-
11
-
12
-
13
-
14
-
15
-
16
-
17
-
18
-
19
-
20
-
21
-
22
-
23
-
24
-
25
-
26
-
27
-
28
-
29
-
30
-
31
-
32
-
33
-
34
-
35
-
36
-
37
-
38
-
39
-
40
-
41
-
42
-
43
-
44
-
45
-
46
-
47
-
48
-
49
-
50
-
51
-
52
-
53
-
54
-
55
-
56
-
57
-
58
-
59
-
60
-
61
-
62
-
63
-
64
-
65
-
66
-
67
-
68
-
69
-
70
-
71
-
72
-
73
-
74
-
75
-
76
-
77
-
78
-
79
-
80
-
81
-
82
-
83
-
84
-
85
-
86
-
87
-
88
-
89
-
90
-
91
-
92
-
93
-
94
-
95
-
96
-
97
-
98
-
99
-
100
-
101
-
102
-
103
-
104
-
105
-
106
-
107
-
108
-
109
-
110
-
111
-
112
-
113
-
114
-
115
-
 116
116 -
 117
117 -
 118
118 -
 119
119 -
 120
120 -
 121
121 -
 122
122 -
 123
123 -
 124
124 -
 125
125 -
 126
126 -
127
-
128
-
129
-
130
-
131
-
132
-
133
-
134
-
135
-
136
-
137
-
138
-
139
-
140
-
141
-
142
-
143
-
144
-
145
-
146
-
147
-
148
 |
 |
