McAfee DTP-1650-MGRA Installation Guide - Page 38
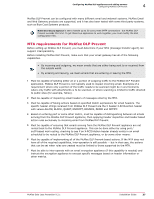
Con McAfee DLP Prevent, Data Loss Prevention
 |
View all McAfee DTP-1650-MGRA manuals
Add to My Manuals
Save this manual to your list of manuals |
Page 38 highlights
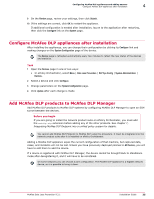
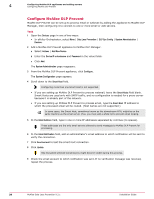
4 Configuring McAfee DLP appliances and adding servers Configuring McAfee DLP Prevent Configure McAfee DLP Prevent McAfee DLP Prevent can be set up to process email or webmail by adding the appliance to McAfee DLP Manager, then configuring it to connect to one or more email or web servers. Task 1 Open the Devices page in one of two ways: • In ePolicy Orchestrator, select Menu | Data Loss Prevention | DLP Sys Config | System Administration | Devices. 2 Add a McAfee DLP Prevent appliance to McAfee DLP Manager. a Select Actions | Add New Device. b Enter the Device IP or hostname and Password in the value fields. c Click Add. The System Administration page reappears. 3 From the McAfee DLP Prevent appliance, click Configure. The System Configuration page appears. 4 Scroll down to the Smart Host field. Configuring more than one Smart Host is not supported. • If you are setting up McAfee DLP Prevent to process webmail, leave the Smart Hosts field blank. Smart Hosts are used only with SMTP traffic, and no configuration is needed for a proxy server because it is already part of the network. • If you are setting up McAfee DLP Prevent to process email, type the Smart Host IP address to which the processed email will be routed. (Host names are not supported.) In some cases, the Smart Host, sometimes known as the downstream MTA, might be on the same machine as the email server. If so, you must add a white list to prevent email looping. 5 In the Email Address field, type in one or more IP addresses separated by commas (no spaces). These addresses are the only email servers allowed to send messages to McAfee DLP Prevent for processing. 6 In the Email Notification field, add an administrator's email address to which notification will be sent to verify the connection. 7 Click Send test mail to test the smart host connection. 8 Click Update. SSL‑encrypted webmail transmissions might become visible during this process. 9 Check the email account to which notification was sent. If no verification message was received, repeat the process. 38 McAfee Data Loss Prevention 9.2.1 Installation Guide
-
 1
1 -
2
-
3
-
4
-
5
-
6
-
7
-
8
-
9
-
10
-
11
-
12
-
13
-
14
-
15
-
16
-
17
-
18
-
19
-
20
-
21
-
22
-
23
-
24
-
25
-
26
-
27
-
28
-
29
-
30
-
31
-
32
-
 33
33 -
 34
34 -
 35
35 -
 36
36 -
 37
37 -
 38
38 -
 39
39 -
 40
40 -
 41
41 -
 42
42 -
 43
43 -
44
-
45
-
46
-
47
-
48
-
49
-
50
-
51
-
52
-
53
-
54
-
55
-
56
-
57
-
58
-
59
-
60
-
61
-
62
-
63
-
64
-
65
-
66
-
67
-
68
-
69
-
70
-
71
-
72
-
73
-
74
-
75
-
76
-
77
-
78
 |
 |