McAfee DTP-1650-MGRA Installation Guide - Page 61
Restrict AD searches to default domain, Evidence Replication, Finish, Option, Description, required
 |
View all McAfee DTP-1650-MGRA manuals
Add to My Manuals
Save this manual to your list of manuals |
Page 61 highlights
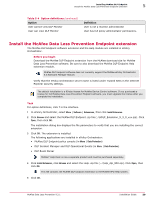
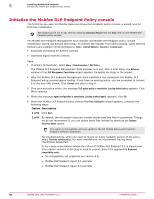
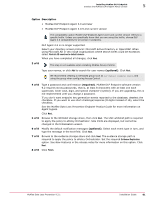
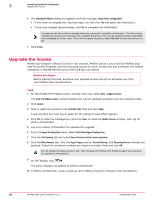
Installing McAfee DLP Endpoint Initialize the McAfee DLP Endpoint Policy console 5 Option Description • McAfee DLP Endpoint Agent 3.0 and later • McAfee DLP Endpoint Agent 3.0.5 and current version The compatibility option McAfee DLP Endpoint Agent 3.0.5 and current version refers to a specific hotfix. Unless you specifically know that you are using this hotfix, choose DLP Agent 3.0 compatibility for all version 3 endpoints. DLP Agent 2.2 is no longer supported. Select your directory access protocol: Microsoft Active Directory or OpenLDAP. When using Microsoft AD in very large organizations where search times could be excessive, select Restrict AD searches to default domain. When you have completed all changes, click Next. 3 of 8 This step is not available when installing McAfee Device Control. Type user names, or click Add to search for user names (optional). Click Next. We recommend creating a role‑based group such as DLP Manual Tagging Users, and using the group when configuring Access Control. 4 of 8 Type a password and confirmation (required). McAfee DLP Endpoint software version 9.2 requires strong passwords, that is, at least 8 characters with at least one each uppercase, lower case, digit, and special character (symbol). If you are upgrading, this is not implemented until you change a password. If you don't want endpoint key generation events reported to the database, deselect the checkbox. If you want to use short challenge/response (8 digits instead of 16), select the checkbox. See the McAfee Data Loss Prevention Endpoint Product Guide for more information on Agent bypass. Click Next. 5 of 8 Browse to the Whitelist storage share, then click Next. The UNC whitelist path is required to apply the policy to ePolicy Orchestrator. Size limits are displayed, but cannot be changed in the Initialization wizard. 6 of 8 Modify the default notification messages (optional). Select each event type in turn, and type the message in the text field. Click Next. 7 of 8 Browse to the evidence storage share and click Next. The evidence storage path is required to apply the policy to ePolicy Orchestrator. Set the required Evidence Replication option. See New Features in the release notes for more information on this option. Click Next. 8 of 8 Click Finish. McAfee Data Loss Prevention 9.2.1 Installation Guide 61
-
 1
1 -
2
-
3
-
4
-
5
-
6
-
7
-
8
-
9
-
10
-
11
-
12
-
13
-
14
-
15
-
16
-
17
-
18
-
19
-
20
-
21
-
22
-
23
-
24
-
25
-
26
-
27
-
28
-
29
-
30
-
31
-
32
-
33
-
34
-
35
-
36
-
37
-
38
-
39
-
40
-
41
-
42
-
43
-
44
-
45
-
46
-
47
-
48
-
49
-
50
-
51
-
52
-
53
-
54
-
55
-
 56
56 -
 57
57 -
 58
58 -
 59
59 -
 60
60 -
 61
61 -
 62
62 -
 63
63 -
 64
64 -
 65
65 -
 66
66 -
67
-
68
-
69
-
70
-
71
-
72
-
73
-
74
-
75
-
76
-
77
-
78
 |
 |