Samsung SM-N900V User Manual Verizon Wireless Sm-n900v Galaxy Note 3 Jb Englis - Page 46
Creating Contacts from Business cards, Updating Contacts, Updating Contacts from the Phone Keypad
 |
View all Samsung SM-N900V manuals
Add to My Manuals
Save this manual to your list of manuals |
Page 46 highlights
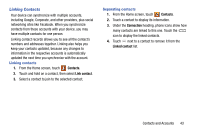
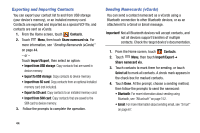
Creating Contacts from Business cards From your Contacts list, you can quickly and easily capture the information on a business card and save it to a new Contact entry and to your Business cards list. 1. From the Home screen, tap Contacts ➔ Menu ➔ Business cards. The Business cards screen displays, showing images of the business cards you have captured. 2. To capture a new business card, tap Capture. The Camera view finder screen displays. 3. Move your phone until the business card image fills the area within the guidelines, then tap Take. The new Contact entry screen displays with information from the business card populating the Contact information fields. 4. Review the Contact information and make any needed corrections or changes, then tap Save. The saved Contact entry screen appears with an image of the business card as the Contact photo ID. 5. To return to the Business cards screen, tap Back. Updating Contacts Make changes to update an existing contact. 1. From the Home screen, touch Contacts. 2. Touch a contact to view its information, then touch Edit. - or - Touch and hold a contact, then select Edit from the menu. 3. Continue entering contact information. For more information, see "Creating Contacts" on page 38. Updating Contacts from the Phone Keypad Enter a phone number with the Phone Keypad, then save it. 1. From the Home screen, touch Phone. 2. Touch the digits of the phone number on the Keypad. 3. Touch Add to Contacts, then select Update existing from the pop-up menu. 4. Select a contact to update, then continue entering contact information. For more information, see "Creating Contacts" on page 38. 40
-
 1
1 -
2
-
3
-
4
-
5
-
6
-
7
-
8
-
9
-
10
-
11
-
12
-
13
-
14
-
15
-
16
-
17
-
18
-
19
-
20
-
21
-
22
-
23
-
24
-
25
-
26
-
27
-
28
-
29
-
30
-
31
-
32
-
33
-
34
-
35
-
36
-
37
-
38
-
39
-
40
-
 41
41 -
 42
42 -
 43
43 -
 44
44 -
 45
45 -
 46
46 -
 47
47 -
 48
48 -
 49
49 -
 50
50 -
 51
51 -
52
-
53
-
54
-
55
-
56
-
57
-
58
-
59
-
60
-
61
-
62
-
63
-
64
-
65
-
66
-
67
-
68
-
69
-
70
-
71
-
72
-
73
-
74
-
75
-
76
-
77
-
78
-
79
-
80
-
81
-
82
-
83
-
84
-
85
-
86
-
87
-
88
-
89
-
90
-
91
-
92
-
93
-
94
-
95
-
96
-
97
-
98
-
99
-
100
-
101
-
102
-
103
-
104
-
105
-
106
-
107
-
108
-
109
-
110
-
111
-
112
-
113
-
114
-
115
-
116
-
117
-
118
-
119
-
120
-
121
-
122
-
123
-
124
-
125
-
126
-
127
-
128
-
129
-
130
-
131
-
132
-
133
-
134
-
135
-
136
-
137
-
138
-
139
-
140
-
141
-
142
-
143
-
144
-
145
-
146
-
147
-
148
-
149
-
150
-
151
-
152
-
153
-
154
-
155
-
156
-
157
-
158
-
159
-
160
-
161
-
162
-
163
-
164
-
165
-
166
-
167
-
168
-
169
-
170
-
171
-
172
-
173
-
174
-
175
-
176
-
177
-
178
-
179
-
180
-
181
-
182
-
183
-
184
-
185
-
186
-
187
-
188
-
189
-
190
-
191
-
192
-
193
-
194
-
195
-
196
-
197
-
198
-
199
-
200
-
201
-
202
-
203
-
204
-
205
-
206
-
207
-
208
-
209
-
210
-
211
-
212
-
213
-
214
-
215
-
216
-
217
-
218
-
219
-
220
-
221
-
222
-
223
-
224
-
225
-
226
-
227
-
228
-
229
-
230
-
231
-
232
-
233
-
234
-
235
-
236
-
237
-
238
-
239
-
240
-
241
-
242
-
243
-
244
-
245
-
246
-
247
-
248
-
249
-
250
-
251
-
252
-
253
-
254
-
255
-
256
-
257
-
258
-
259
-
260
-
261
 |
 |
