Sony HDWS280 Product Manual (Operation Manual 1st Edition (Revised 5)) - Page 23
Using the Battery Pack
 |
View all Sony HDWS280 manuals
Add to My Manuals
Save this manual to your list of manuals |
Page 23 highlights
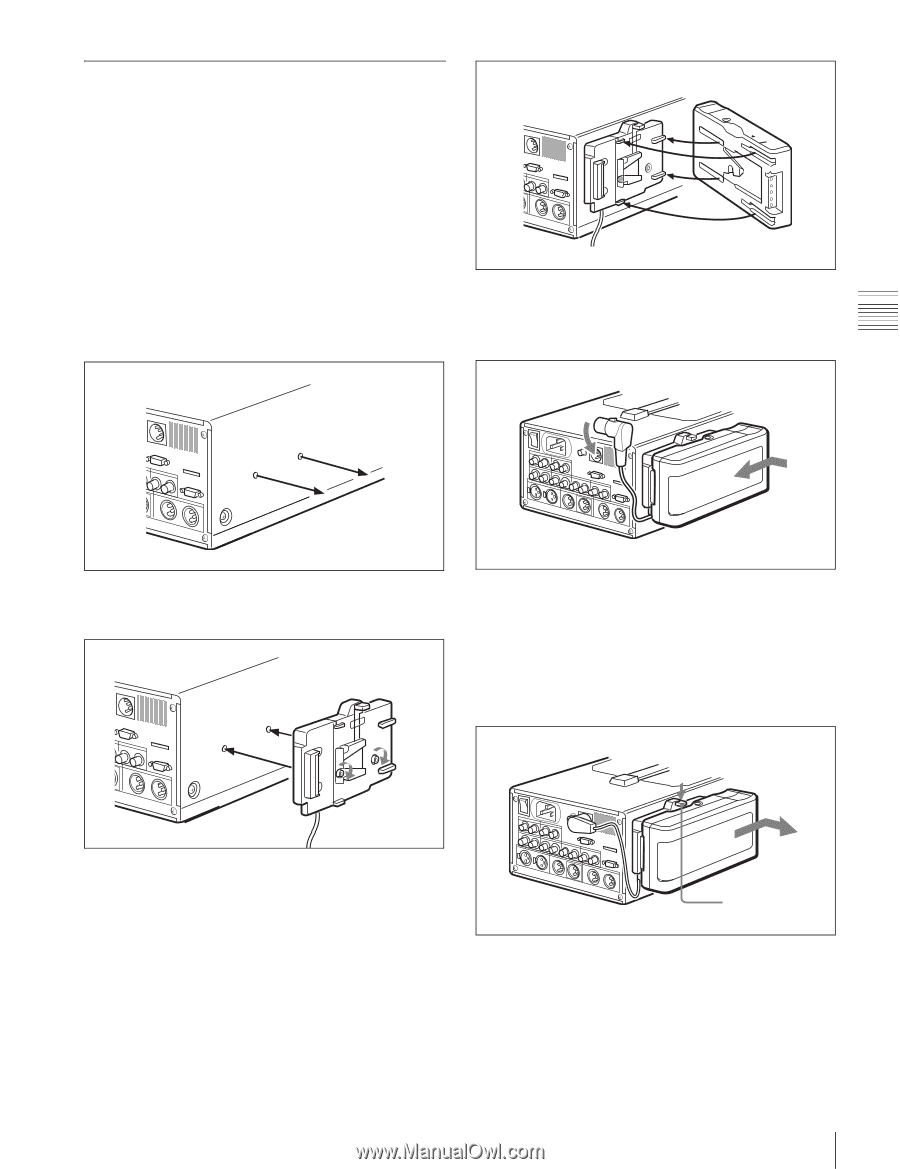
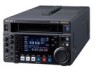
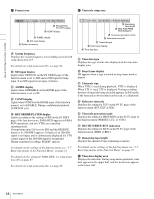
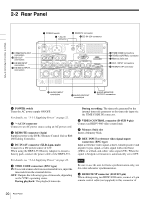
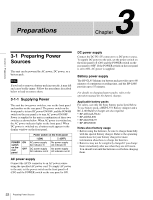
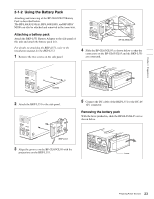
Chapter 3 Preparations 3-1-2 Using the Battery Pack Attaching and removing of the BP-GL65/GL95 Battery Pack is described below. The BP-L60(A)/L90(A), BP-L60S/L80S, and BP-M50/ M100 can also be attached and removed in the same way. Attaching a battery pack Attach the BKP-L551 Battery Adaptor to the side panel of this unit and attach the battery pack in it. For details on attaching the BKP-L551, refer to the installation manual for the BKP-L551. 1 Remove the two screws on the side panel. BP-GL65/GL95 4 Slide the BP-GL65/GL95 as shown below so that the connectors on the BP-GL65/GL95 and the BKP-L551 are connected. Screws 2 Attach the BKP-L551 to the side panel. 5 Connect the DC cable of the BKP-L551 to the DC IN 12V connector. Removing the battery pack With the lever pushed in, slide the BP-GL65/GL95 out as shown below. BKP-L551 3 Align the grooves on the BP-GL65/GL95 with the projections on the BKP-L551. Lever 23 Preparing Power Sources
-
 1
1 -
2
-
3
-
4
-
5
-
6
-
7
-
8
-
9
-
10
-
11
-
12
-
13
-
14
-
15
-
16
-
17
-
 18
18 -
 19
19 -
 20
20 -
 21
21 -
 22
22 -
 23
23 -
 24
24 -
 25
25 -
 26
26 -
 27
27 -
 28
28 -
29
-
30
-
31
-
32
-
33
-
34
-
35
-
36
-
37
-
38
-
39
-
40
-
41
-
42
-
43
-
44
-
45
-
46
-
47
-
48
-
49
-
50
-
51
-
52
-
53
-
54
-
55
-
56
-
57
-
58
-
59
-
60
-
61
-
62
-
63
-
64
-
65
-
66
-
67
-
68
-
69
-
70
-
71
-
72
-
73
-
74
-
75
-
76
-
77
-
78
-
79
-
80
-
81
-
82
-
83
-
84
-
85
-
86
-
87
-
88
-
89
-
90
-
91
-
92
-
93
-
94
 |
 |