Sony STR-DN2010 Operating Instructions (Large File - 11.22 MB)
Sony STR-DN2010 - Audio Video Receiver Manual
 |
UPC - 027242779938
View all Sony STR-DN2010 manuals
Add to My Manuals
Save this manual to your list of manuals |
Sony STR-DN2010 manual content summary:
- Sony STR-DN2010 | Operating Instructions (Large File - 11.22 MB) - Page 1
4-182-049-11(1) Multi Channel AV Receiver Operating Instructions STR-DN2010 ©2010 Sony Corporation - Sony STR-DN2010 | Operating Instructions (Large File - 11.22 MB) - Page 2
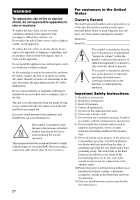
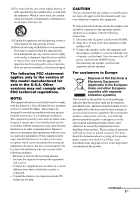
For customers in the United States Owner's Record The model and serial numbers are located on the rear of the unit. Record these numbers in the space provided below. Refer to them whenever you call upon your Sony dealer regarding this product. Model No Serial No This symbol is intended to alert - Sony STR-DN2010 | Operating Instructions (Large File - 11.22 MB) - Page 3
has been dropped. The following FCC statement applies only to the version of this model manufactured for sale in the U.S.A. Other versions may not comply with FCC technical regulations. NOTE: This equipment has been tested and found to comply with the limits for a Class B digital device, pursuant to - Sony STR-DN2010 | Operating Instructions (Large File - 11.22 MB) - Page 4
is Sony Deutschland GmbH, Hedelfinger Strasse 61, 70327 Stuttgart, Germany. For any service or guarantee matters please refer to the addresses given in separate service or guarantee documents. About This Manual • The instructions in this manual are for model STR-DN2010. Check your model number by - Sony STR-DN2010 | Operating Instructions (Large File - 11.22 MB) - Page 5
of their respective holders. In this manual, ™ and ® marks are not specified Sony Corporation. DLNA and DLNA CERTIFIED are trademarks and/or service marks of the Digital Living Network Alliance. VAIO is a trademark of Sony coding technology and patents licensed from Fraunhofer IIS and Thomson. 5GB - Sony STR-DN2010 | Operating Instructions (Large File - 11.22 MB) - Page 6
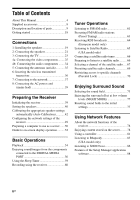
3: Connecting the TV 23 4a: Connecting the video components......... Resetting sound fields to the initial settings 77 Using Network Features About the network functions of the receiver 78 Enjoying content stored on the server......... 78 Using a controller 81 Listening to Rhapsody 83 (USA model - Sony STR-DN2010 | Operating Instructions (Large File - 11.22 MB) - Page 7
menu 114 Video Settings menu 116 HDMI Settings menu 117 Network Settings menu 118 System Settings menu 121 Operating without connecting to a TV ......122 Using the Remote Programming the remote 130 Clearing all the contents of the remote's memory 135 Additional Information Precautions 135 - Sony STR-DN2010 | Operating Instructions (Large File - 11.22 MB) - Page 8
Supplied accessories • Operating Instructions (this manual) • Quick Setup Guide • GUI Menu List • Software License Information (1) • Setup Manager CD-ROM (1) • VAIO Media plus CD-ROM (1) • FM wire antenna (aerial) (1) • AM loop antenna (aerial) (1) Inserting batteries into the remote Insert two R6 - Sony STR-DN2010 | Operating Instructions (Large File - 11.22 MB) - Page 9
67 8 qh qg qf A ?/1 (on/standby) Turns the receiver on or off (page 39, 63, 77). B Remote sensor Receives signals from remote commander. C White indicator Lights up when the receiver is turned on. D MULTI CHANNEL DECODING indicator Lights up when multi channel audio signals are decoded (page 139 - Sony STR-DN2010 | Operating Instructions (Large File - 11.22 MB) - Page 10
The receiver recognizes a component connected via an HDMI IN jack. COAX Lights up when digital signal is input through the COAXIAL jack (page 103). OPT Lights up when digital signal is input through the OPTICAL jack (page 103). ARC Lights up when TV input is selected and the Audio Return Channel - Sony STR-DN2010 | Operating Instructions (Large File - 11.22 MB) - Page 11
receiver tunes in radio stations, or satellite radio stations. RDS (European model only) A station that provides RDS services is tuned in. CAT (USA model channel indicators The letters (L, C, R, etc.) indicate the channels being played back. The boxes around the letters vary to show how the receiver - Sony STR-DN2010 | Operating Instructions (Large File - 11.22 MB) - Page 12
jack (page 29, 30, 31) HDMI IN/OUT* jacks (page 23, 26) B ANTENNA section FM ANTENNA jack (page 35) AM ANTENNA terminals (page 35) SIRIUS jack (USA model only) (page 66) C DMPORT section page 23, 34) Red (R) Black AUDIO OUT jack (page 21) D NETWORK section LAN ports (switching hubs) (page 38) 12GB - Sony STR-DN2010 | Operating Instructions (Large File - 11.22 MB) - Page 13
* You can watch the selected input image when you connect the MONITOR OUT or HDMI TV OUT jack to a TV (page 23). Remote commander You can use the supplied remote to operate the receiver and to control the Sony audio/video components that the remote is assigned to operate. You can also program the - Sony STR-DN2010 | Operating Instructions (Large File - 11.22 MB) - Page 14
) Turns the receiver on or sets it to the standby mode. Saving the power in standby mode When "Control for HDMI" (page 90), "Network Standby" (page 120) and "S-AIR Standby" (page 102) are set to "OFF". B AV ?/1a) (on/standby) Turns on or off the audio/video components that the remote is programmed - Sony STR-DN2010 | Operating Instructions (Large File - 11.22 MB) - Page 15
the on-screen program guide. T DISPLAYa) Views information on the display. (RM-AAP055 only) Press TV (W), then press DISPLAY to display information of TV. , (Info, Text reveal) (RM-AAP056 only) Press TV (W), then press to display information such as current channel number and screen mode. In - Sony STR-DN2010 | Operating Instructions (Large File - 11.22 MB) - Page 16
reference when operating the receiver. - RM-AAP055 only: number 5, VIDEO 1, N, CATEGORY MODE, TV CH +, PRESET + - RM-AAP056 only: number 5, VIDEO 1, N, PROG +, PRESET +, c Notes • Some functions explained in this section may not work depending on the model. • The - Sony STR-DN2010 | Operating Instructions (Large File - 11.22 MB) - Page 17
To control other Sony components Name B AV ?/1 TV VCR DVD Blu-ray HDD PSX MUTINGa), z b) O MASTER VOL +/-a), TV VOL +/-a), +/-b) P DISC SKIP Q RETURN/ EXIT O R V/v/B/b, S GUIDEa), b) (Guide) T DISPLAY a) RM-AAP055 only. b) RM-AAP056 only. c) DVD player only. d) LD player only. z z zz z zz - Sony STR-DN2010 | Operating Instructions (Large File - 11.22 MB) - Page 18
channel digital audio, check the digital audio output setting on the connected components. For a Blu-ray Disc player, check that "Audio (HDMI (with system software version 3.15). For details, refer to the operating instructions supplied with the connected components. Preparing the receiver See "8: - Sony STR-DN2010 | Operating Instructions (Large File - 11.22 MB) - Page 19
1: Installing the speakers This receiver allows you to use a 7.1 channel system (7 speakers and one subwoofer software recorded sound in 6.1 channel or 7.1 channel format if you connect additional one surround back speaker (6.1 channel) or two surround back speakers (7.1 channel). 7.1 channel - Sony STR-DN2010 | Operating Instructions (Large File - 11.22 MB) - Page 20
high speakers - at an angle between 22° to 45°. - at least 3.3 feet (1 meter) directly above the front speakers. • When you connect a 6.1 channel speaker system, place the surround back speaker behind the listening position. • Since the subwoofer does not emit highly directional signals, you can - Sony STR-DN2010 | Operating Instructions (Large File - 11.22 MB) - Page 21
Connections 2: Connecting the speakers Before connecting cords, be sure to disconnect the AC power cord (mains lead). Center speaker Surround speaker Right Left B B A B B Right Left Subwoofer ** Surround back/Front high/ Bi-amplifier/Front B speaker * Right Left Front A speaker 13/ - Sony STR-DN2010 | Operating Instructions (Large File - 11.22 MB) - Page 22
Assign" to "SPEAKER B" in the Speaker Settings menu (page 41). You can select the front speaker system you want using the SPEAKERS button on the receiver (page 42). - If you are not using surround back speaker or front high speakers, you can connect the front speakers to this terminals using bi - Sony STR-DN2010 | Operating Instructions (Large File - 11.22 MB) - Page 23
input image when you connect the HDMI TV OUT or MONITOR OUT jack to a TV. You can operate this receiver using a GUI (Graphical User Interface an HDMI jack A Optical digital cord (not supplied) B HDMI cable (not supplied) Sony recommends that you use an HDMIauthorized cable or Sony HDMI cable - Sony STR-DN2010 | Operating Instructions (Large File - 11.22 MB) - Page 24
MODE (page 103). To enjoy TV multi channel surround sound broadcasting from the speakers connected to the receiver Connect the OPTICAL output jack of the TV to the TV OPTICAL IN jack of the receiver. If your TV is compatible with ARC function, use HDMI connection. Set the sound output jack of the - Sony STR-DN2010 | Operating Instructions (Large File - 11.22 MB) - Page 25
Digital, DTS, and Linear PCM. For details, see "Digital audio formats supported by the receiver" (page 76). • The receiver can receive Multi Linear PCM (up to 8 channels) with a sampling frequency of 192 kHz or less with an HDMI connection. • Analog video signals input to the VIDEO jack or COMPONENT - Sony STR-DN2010 | Operating Instructions (Large File - 11.22 MB) - Page 26
TV to the receiver, see page 23. Notes • HDMI 4 input has a better sound quality. When you need a higher sound quality, connect your component to the HDMI IN 4 (for AUDIO) jack and select HDMI 4 as input. • Be sure to change the initial setting of the HDMI 1-4 input button on the remote so that you - Sony STR-DN2010 | Operating Instructions (Large File - 11.22 MB) - Page 27
3D image formats supported by the receiver (page 146). • Not every HDMI component supports all functions that are defined by the specified HDMI version. For example, components that support HDMI, version 1.4, may not support Audio Return Channel (ARC). • Refer to the operating instructions of each - Sony STR-DN2010 | Operating Instructions (Large File - 11.22 MB) - Page 28
Connecting components without HDMI jacks Connect your video components according to not necessary to connect all the cords. Connect according to the availability of jacks on the connected components. • Be sure to turn on the receiver when the video and audio signals of a playback component are being - Sony STR-DN2010 | Operating Instructions (Large File - 11.22 MB) - Page 29
Assign" in the Input Option menu (page 104). • To input multi channel digital audio from the Blu-ray Disc player, set the digital audio output setting on the Blu-ray Disc player. Refer to the operating instructions supplied with the Blu-ray Disc player. Recommended connection Alternative connection - Sony STR-DN2010 | Operating Instructions (Large File - 11.22 MB) - Page 30
change the initial setting of the DVD input button on the remote. For details, see "Programming the remote" (page 130). • You can also rename the DVD Assign" in the Input Option menu (page 104). • To input multi channel digital audio from the DVD player or DVD recorder, set the digital audio output - Sony STR-DN2010 | Operating Instructions (Large File - 11.22 MB) - Page 31
Connections To connect a satellite tuner, cable TV tuner Satellite tuner, Cable TV tuner Video signals or Audio signals or AB C D A Component video cord (not supplied) B Video cord (not supplied) C Audio cord (not supplied) D Optical digital cord (not supplied) Note The initial setting of - Sony STR-DN2010 | Operating Instructions (Large File - 11.22 MB) - Page 32
(not supplied) Notes • Be sure to change the initial setting of the VIDEO 1 input button on the remote so that you can use the button to control your DVD recorder. For details, see "Programming the remote" (page 130). • You can also rename the VIDEO 1 input so that it can be displayed on - Sony STR-DN2010 | Operating Instructions (Large File - 11.22 MB) - Page 33
signals • When video signals from a VCR, etc., are converted on this receiver and then output to your TV, depending on the status of the video signal output MONITOR OUT jacks when both are connected. • Converted HDMI image output does not support x.v.Color (x.v.Colour), Deep Color (Deep Colour) - Sony STR-DN2010 | Operating Instructions (Large File - 11.22 MB) - Page 34
connector straight in. • As the connector of the DIGITAL MEDIA PORT adapter is fragile, be sure to handle with care when placing or moving the receiver. • When connecting the DIGITAL MEDIA PORT adapter, be sure the connector is inserted with the arrow mark facing towards the arrow mark on the - Sony STR-DN2010 | Operating Instructions (Large File - 11.22 MB) - Page 35
FM wire antenna (aerial) (supplied) AM loop antenna (aerial) (supplied) Notes • To prevent noise pickup, keep the AM loop antenna (aerial) away from the receiver and other components. • Be sure to fully extend the FM wire antenna (aerial). • After connecting the FM wire antenna (aerial), keep it as - Sony STR-DN2010 | Operating Instructions (Large File - 11.22 MB) - Page 36
with g and G marks. Do not remove other screws. • The slot cover is no longer necessary. However, keep it after detaching. 2 Insert the wireless transmitter. EZW-T100 slot Wireless S-AIR sub unit Refer to the operating instructions supplied with the surround amplifier and S-AIR receiver. 36GB - Sony STR-DN2010 | Operating Instructions (Large File - 11.22 MB) - Page 37
is required to use the network function of the receiver. A Broadband line connection A Broadband line connection to the Internet is required in order to listen to Rhapsody® or SHOUTcast and to use the software update function of the receiver. Rhapsody is only available in the U.S. Modem This is - Sony STR-DN2010 | Operating Instructions (Large File - 11.22 MB) - Page 38
Configuration example The following illustration is a configuration example of a home network with the receiver, a computer. We recommend that you use a wired connection. LAN cable (not supplied) Internet Modem Computer LAN cable (not supplied) Router Notes • An audio or video - Sony STR-DN2010 | Operating Instructions (Large File - 11.22 MB) - Page 39
down MUTING and MUSIC, then press ?/1 to turn on the receiver. 3 Release MUTING and MUSIC after a few seconds. After "CLEARING" appears on the display for a while, "CLEARED!" appears. All the settings you have changed or adjusted are reset to the initial settings. Note It takes about 30 seconds for - Sony STR-DN2010 | Operating Instructions (Large File - 11.22 MB) - Page 40
If the buttons on the receiver or the remote do not work due to a malfunction of the receiver, reboot the receiver. 1 Press ?/1 to turn off the receiver. 2 Hold down ?/1 until the white indicator flashes. The receiver is rebooted. Setting the speakers Selecting the speaker pattern Select the - Sony STR-DN2010 | Operating Instructions (Large File - 11.22 MB) - Page 41
Receiver 3 Press V/v repeatedly to select "Speaker", then press . Speaker Settings Speaker Pattern Sur Back Assign : Manual Setup Crossover Freq Test in accordance with the intended use. Notes • This setting is only available if the "Speaker Pattern" is set to a setting without surround back - Sony STR-DN2010 | Operating Instructions (Large File - 11.22 MB) - Page 42
drive. Be sure to use the buttons on the receiver for this operation. SPEAKERS Press SPEAKERS repeatedly to select the received. The DCAC is designed to obtain proper sound balance in your room. However, you can adjust the speaker levels manually according to your preference. For details, see "Test - Sony STR-DN2010 | Operating Instructions (Large File - 11.22 MB) - Page 43
Preparing the Receiver Before you perform Auto Calibration Before you perform Auto Calibration, check the following items. • Set up and connect the speakers (page 19, 21). • Connect only - Sony STR-DN2010 | Operating Instructions (Large File - 11.22 MB) - Page 44
On setting up the active subwoofer • When a subwoofer is connected, turn on the subwoofer and turn up the volume beforehand. Turn the LEVEL to just before the mid-point. • If you connect a subwoofer with a crossover frequency function, set the value to maximum. • If you connect a subwoofer with an - Sony STR-DN2010 | Operating Instructions (Large File - 11.22 MB) - Page 45
Preparing the Receiver 3 Press measurement process will take approximately 30 seconds with a test tone. Wait until the measurement process completes. When the a beep sounds and the screen switches. Note If an error code appears on the screen, see "Message list after Auto Calibration measurement - Sony STR-DN2010 | Operating Instructions (Large File - 11.22 MB) - Page 46
remote or press the INPUT SELECTOR +/- repeatedly on the receiver. - Press MUTING (RM-AAP055 only) or (RM-AAP056 only) on the remote. Press MUTING on the receiver. - Press SPEAKERS on the receiver frequency to one that matches that of the Sony listening room standard. • Front Reference Adjusts the - Sony STR-DN2010 | Operating Instructions (Large File - 11.22 MB) - Page 47
Auto Calibration" (page 45) then press . If a warning message appears, check the message and use the receiver without change. Or if necessary, perform Auto Calibration again. When "Error Code" appears Check the error and perform Auto Calibration again. 1 Press to select "Enter". "Retry?" appears on - Sony STR-DN2010 | Operating Instructions (Large File - 11.22 MB) - Page 48
There is no warning information. Tip Depending on the position of the subwoofer, the measurement results for polarity may vary. However, there will be no problems even if you continue to use the receiver with that value. 48GB - Sony STR-DN2010 | Operating Instructions (Large File - 11.22 MB) - Page 49
the required network settings for the receiver by following the instructions provided by an initial setup wizard. The procedure used to set up the IP address automatically (DHCP) is explained below. In this case, the router that is connected to the receiver or the Internet provider must support DHCP - Sony STR-DN2010 | Operating Instructions (Large File - 11.22 MB) - Page 50
plus application software supplied with the receiver. See " external hard disk drive or in Network- Network 100Base-TX or higher Sound Direct Sound compatible sound card card Note Sony does not guarantee trouble-free operation on all computers that satisfy the system requirements. Other software - Sony STR-DN2010 | Operating Instructions (Large File - 11.22 MB) - Page 51
as server software, install on your computer the VAIO Media plus application software provided on the CD-ROM supplied with the receiver by ROM (VAIO Media plus application software) (supplied) 3 Install the VAIO Media plus application software following the instructions given in the message on - Sony STR-DN2010 | Operating Instructions (Large File - 11.22 MB) - Page 52
Guide to on-screen display operation You can display the menu of the receiver on the TV screen and select the function you want to use on the TV screen by pressing V/v/B/b and on the remote. To display the menu of the receiver on the TV screen, make sure that the receiver is in "GUI MODE - Sony STR-DN2010 | Operating Instructions (Large File - 11.22 MB) - Page 53
from the server on the home network, "My Library" or the audio component connected to the DIGITAL MEDIA PORT adapter (page 56). Rhapsody Selects the Rhapsody radio service (page 83). Rhapsody is only available in the U.S. SHOUTcast Selects the SHOUTcast radio service (page 86). FM/AM/SR Selects - Sony STR-DN2010 | Operating Instructions (Large File - 11.22 MB) - Page 54
3 Press TOOLS/OPTIONS while the menu item list is displayed. The option menu appears. Basic Operations Playback ?/1 4 Press V/v repeatedly to select the option menu item you want, then press or b. 5 Press V/v repeatedly to select the parameter you want, then press . To exit the option menu Press - Sony STR-DN2010 | Operating Instructions (Large File - 11.22 MB) - Page 55
the button and release it immediately. To activate the muting function Press MUTING (RM-AAP055 only) or (RM-AAP056 only) on the remote. You can also use MUTING on the receiver. The muting function will be canceled when you do the following. • Press MUTING (RM-AAP055 only) or (RM-AAP056 only) again - Sony STR-DN2010 | Operating Instructions (Large File - 11.22 MB) - Page 56
MEDIA PORT adapters are available for purchase depending on the 34). You can use the following Sony DIGITAL MEDIA PORT adapters: • TDM- network function such as TDM-NC1 Wireless Network Audio Client to the receiver. You can use the network function of the receiver The iPod model recognized is - Sony STR-DN2010 | Operating Instructions (Large File - 11.22 MB) - Page 57
VOL +/- (RM-AAP055 only) or 2 +/- (RM-AAP056 only) to adjust the volume. You can also use MASTER VOLUME on the receiver. Operating the TDM-iP50 using the GUI menu of the receiver 1 Make sure that "System GUI" is selected in step 4 in "Changing the operation screen using the DIGITAL MEDIA PORT" (page - Sony STR-DN2010 | Operating Instructions (Large File - 11.22 MB) - Page 58
is supported by the DIGITAL MEDIA PORT adapters such as TDM-iP50. This mode is not supported by not displayed, refer to the operating instructions supplied with component for details on operating tracks will be displayed on the GUI screen of the receiver. You can select a track you want and play it - Sony STR-DN2010 | Operating Instructions (Large File - 11.22 MB) - Page 59
using the DIGITAL MEDIA PORT" (page 58). For details on operating the iPod, refer to the operating instructions supplied with the iPod. Using the Sleep Timer You can set the receiver to turn off automatically at a specified time. AMP Basic Operations SLEEP Press AMP, then press SLEEP repeatedly - Sony STR-DN2010 | Operating Instructions (Large File - 11.22 MB) - Page 60
SA-CD/CD/CD-R AUDIO OUT jacks. Input buttons GUI MODE V/v/B/b, Recording onto a CD-R You can record onto a CD-R using the receiver. Refer to the operating instructions supplied with your CD recorder. 1 Press one of the input buttons to select the playback component. You can also use INPUT SELECTOR - Sony STR-DN2010 | Operating Instructions (Large File - 11.22 MB) - Page 61
. • Only analog input signals are output from the analog output jack (for recording). • HDMI sound cannot be recorded. • While only composite video signals are being recorded, the auto standby function of the receiver may start up and interrupt the recording. In this case, set "Auto Standby" to - Sony STR-DN2010 | Operating Instructions (Large File - 11.22 MB) - Page 62
high, press v to scan from high to low. The receiver stops scanning whenever a station is received. In case of poor FM stereo reception 1 Tune in the 2: AM 1,350 kHz Select 1 b 3 b 5 b 0 * Press 0 for European model only. Tip If you have tuned in an AM station, adjust the direction of the AM loop - Sony STR-DN2010 | Operating Instructions (Large File - 11.22 MB) - Page 63
off the receiver. 2 While holding down DISPLAY, press ?/1 on the receiver. 3 Change the current AM tuning scale to 9 kHz (or 10 kHz). To reset the scale 4 Press V/v repeatedly to select a preset number, then press . The station is stored as the selected preset number. 5 Repeat steps 1 to 4 to preset - Sony STR-DN2010 | Operating Instructions (Large File - 11.22 MB) - Page 64
broadcasts (European model only) This receiver allows you to use Radio Data System (RDS), which enables radio stations to send additional information along with the regular program signal. This receiver offers convenient RDS features, such as Program Service name display. RDS is available only for - Sony STR-DN2010 | Operating Instructions (Large File - 11.22 MB) - Page 65
programming to the SIRIUS service. The "Best of XM" service is not available to SIRIUS Canada subscribers at this time. Please check with SIRIUS Canada for any updates using the numbers and web address below. Family friendly packages are also available to restrict channels featuring content that may - Sony STR-DN2010 | Operating Instructions (Large File - 11.22 MB) - Page 66
Home tuner. When you use the SiriusConnect Home tuner with this receiver, be sure to connect the AC power adaptor supplied with the tuner from the speaker cords and the power cord to avoid picking up noise. Checking the ID number 1 Press GUI MODE. After "GUI ON" appears on the display for a while, - Sony STR-DN2010 | Operating Instructions (Large File - 11.22 MB) - Page 67
Tuner Operations Checking receiving conditions (Antenna Aiming) 1 Select " SR SR" from the menu, then press reception, adjust the direction of the antenna to obtain the best reception. To exit the menu Press MENU. Selecting a channel of the satellite radio SHIFT Numeric buttons V/v/b, GUI MODE - Sony STR-DN2010 | Operating Instructions (Large File - 11.22 MB) - Page 68
not be the one in the category you want. This is because one channel may belong to more than one category. Selecting a channel by inputting the channel number directly (Direct Tuning) You can enter the channel number directly by using the numeric buttons. 1 Press GUI MODE. After "GUI ON" appears - Sony STR-DN2010 | Operating Instructions (Large File - 11.22 MB) - Page 69
to select the preset number you want to use as the preset channel, then press . Preset channels from 1 to 30 are available, and a default channel is preset for all the preset channels when you purchase the receiver. The selected channel is registered as the preset channel you selected in step - Sony STR-DN2010 | Operating Instructions (Large File - 11.22 MB) - Page 70
." appears. 5 Press SHIFT, then press the numeric buttons to enter your 4-digit lock code. "The channel has been locked." appears and the Parental Lock is set. To delete the numbers you have entered, go back to step 2 by pressing RETURN/ EXIT O, and then repeat the procedure above from step 2. To - Sony STR-DN2010 | Operating Instructions (Large File - 11.22 MB) - Page 71
buttons to enter your 4-digit lock code. "The channel has been unlocked." appears and the channel is unlocked. Notes • When you select a channel using Category Mode, locked channels are skipped. • When the receiver is reset to the initial settings, the lock code returns to the default (0000), but - Sony STR-DN2010 | Operating Instructions (Large File - 11.22 MB) - Page 72
a wall socket. Invalid Channel [INVALID CHANNEL] You have entered an invalid channel number. The channel to be tuned-in is void due to the change by the broadcast service, or the receiving condition is not good. Locked Channel The selected channel is locked. - [LOCKED CH] Sub Updated [SUB UPDT - Sony STR-DN2010 | Operating Instructions (Large File - 11.22 MB) - Page 73
receiver. 2 channel sound mode You can switch the output sound to 2 channel sound regardless of the recording formats of the software on devices on a home network. - When you select DVD and HDMI 1- 4 as input. Reproduces the sound characteristics of the Sony Pictures Entertainment "Kim Novak Theater" - Sony STR-DN2010 | Operating Instructions (Large File - 11.22 MB) - Page 74
Studio EX C DCS ) Reproduces the sound characteristics of the Sony Pictures Entertainment scoring stage. This mode is ideal for watching in 2 channel format is decoded into 7 channels. Music mode You can take advantage of surround sound simply by selecting one of the receiver's preprogrammed sound - Sony STR-DN2010 | Operating Instructions (Large File - 11.22 MB) - Page 75
(s). - PLIIz is available only when the speaker pattern is set to a setting with front high speakers. • The sound fields for music and movie do not work in the following cases. - Signals with a sampling frequency of more than 48 kHz are being received. - Signals with more than 5.1 channel are being - Sony STR-DN2010 | Operating Instructions (Large File - 11.22 MB) - Page 76
supported by the receiver Digital audio formats that this receiver can decode depend on digital audio input jacks for the components connected. This receiver supports Connection of the playback component and Maximum number the receiver of channels COAXIAL/OPTICAL HDMI 5.1 a a 6.1 a a 7.1 - Sony STR-DN2010 | Operating Instructions (Large File - 11.22 MB) - Page 77
is being used. - Signals with a sampling frequency of more than 48 kHz are being received. Tip While this function is on, the Bass, Treble, and Effect Levels increase, and "D.Range Comp" is automatically set to "MAX". Resetting sound fields to the initial settings Be sure to use the buttons on the - Sony STR-DN2010 | Operating Instructions (Large File - 11.22 MB) - Page 78
Rhapsody and SHOUTcast (page 83, 86) and upgrade the software of the receiver. Rhapsody is only available in the U.S. • You can change the settings of the receiver using a computer on your home network (page 88). About DLNA DLNA (Digital Living Network Alliance) is a standard organization made up of - Sony STR-DN2010 | Operating Instructions (Large File - 11.22 MB) - Page 79
The confirmating message appears. 5 Select "Yes", then press . The updated server list appears. Registering your favorite content You can register your Add track (picture, movie) to My Library", then press . 3 Select the number you want to use to register the content from the list, then press . - Sony STR-DN2010 | Operating Instructions (Large File - 11.22 MB) - Page 80
AMP to operate the receiver using the remote. Type of content Remote N button x Music Photo Video z z z z z z X z >z z** z z** .z z** M z* z* m z* z* * This button may not work depending on the connected server or the content type. **This button is available when photos are played - Sony STR-DN2010 | Operating Instructions (Large File - 11.22 MB) - Page 81
on the device used as a controller, the content type, or the server. For details, refer to the operating instructions of each device. • If you operate the receiver using the supplied remote together with a controller, the receiver may not work properly. Using Network Features continued 81GB - Sony STR-DN2010 | Operating Instructions (Large File - 11.22 MB) - Page 82
be used as a server using a controller on the home network. 2 Select the content you want to play back using a controller on the home network. 3 Select the receiver to be used to play back the content using a controller on the home network. Refer to the operating instructions of each device. This - Sony STR-DN2010 | Operating Instructions (Large File - 11.22 MB) - Page 83
Using Network Features Listening to Rhapsody (USA model only) You can enjoy the Rhapsody Digital Music Service by connecting your receiver to the Internet. Rhapsody is only available in the U.S. Rhapsody Digital Music Service Play all the music you want with Rhapsody® Thousands of artists. Millions - Sony STR-DN2010 | Operating Instructions (Large File - 11.22 MB) - Page 84
then press . The account type and the customer support ID appear on the TV screen. To delete an then press or b. 2 Press V/v repeatedly to select "Network", then press . 3 Press V/v repeatedly to select "Rhapsody selected is received. Selecting the track using Music Guide The Music Guide displays a - Sony STR-DN2010 | Operating Instructions (Large File - 11.22 MB) - Page 85
Using Network Features 4 Press V/v/B/b to select the track you want to listen to from the list, then press . The playback screen appears on the TV screen and - Sony STR-DN2010 | Operating Instructions (Large File - 11.22 MB) - Page 86
(s)* > Album(s)* > Track(s)* My Tracks > Track(s)* My Playlists > Playlist(s)* > Track(s)* My Stations > Station(s)* *The number of lists displayed on the screen depends on the status of the Rhapsody Digital Music Service you are using. The playback screen appears on the TV screen and the track you - Sony STR-DN2010 | Operating Instructions (Large File - 11.22 MB) - Page 87
received. Notes • When the number of stations is large, up to 100 stations can be displayed (in order) on this receiver. • The audio supplied in a format that is not supported by this receiver press . 3 Press V/v repeatedly to select the preset number station you want to listen to, then press . The - Sony STR-DN2010 | Operating Instructions (Large File - 11.22 MB) - Page 88
software provided on the CD-ROM supplied with the receiver. The following settings cannot be set using the computer with the Setup Manager application software. • Auto Calibration • Speaker - Test 65536 colors) Network: 100Base-TX or higher Installing the Setup Manager application software on a - Sony STR-DN2010 | Operating Instructions (Large File - 11.22 MB) - Page 89
path of the update program, and click "Start Update". The MULTI CHANNEL DECODING indicator on the front panel flashes while updating. When updating complete, the receiver will restart automatically. Notes • Do not turn the receiver off or disconnect the network cable during software updating. It may - Sony STR-DN2010 | Operating Instructions (Large File - 11.22 MB) - Page 90
Turn on the Control for HDMI function of the TV. The Control for HDMI function of the receiver and all the connected components are turned on simultaneously. When the setup is completed, "COMPLETE" will appear. For details on setup of the TV, refer to the operating instructions of your TV. If your - Sony STR-DN2010 | Operating Instructions (Large File - 11.22 MB) - Page 91
setting the TV and connected components, refer to the operating instructions of the respective components. Notes • Before you do the "Control for HDMI-Easy Setting" from the TV, be sure to turn on the TV, connected components and receiver. • If the playback components cannot function after you have - Sony STR-DN2010 | Operating Instructions (Large File - 11.22 MB) - Page 92
System Audio Control function using the TV menu. For details, refer to the operating instructions of the TV. TV Sets System Audio Control to on Receiver • Turns on (if in standby mode) • Switches to appropriate HDMI input Notes • If System Audio Control does not function according to your TV - Sony STR-DN2010 | Operating Instructions (Large File - 11.22 MB) - Page 93
use the receiver's remote to turn off the TV. AV ?/1 TV Press TV, then press AV ?/1. The TV, receiver and the components connected via HDMI are turned off. Notes • Set the TV Standby Synchro to "ON" before using the System Power-Off function. For details, refer to the operating instructions of the - Sony STR-DN2010 | Operating Instructions (Large File - 11.22 MB) - Page 94
S-AIR main unit (this receiver): The S-AIR main unit is for transmitting sound. You can use up to 3 S-AIR main units. (The number of usable S-AIR main or instructions for the S-AIR sub unit in this manual only when the S-AIR sub unit is used. Notes • The S-AIR menu and parameters only available when - Sony STR-DN2010 | Operating Instructions (Large File - 11.22 MB) - Page 95
About environments where S-AIR products (S-AIR main unit and sub unit) are used S-AIR products use a radio frequency of 2.4 GHz. Certain electronic equipment or other factors may cause lost connection or instability in S-AIR reception. • Electronic equipment influence The following may cause - Sony STR-DN2010 | Operating Instructions (Large File - 11.22 MB) - Page 96
on setting the ID of the surround amplifier and S-AIR receiver, refer to the operating instructions supplied with the surround amplifier and S-AIR receiver. Sound transmission is established as follows (example): S-AIR main unit (this receiver) Other S-AIR main unit ID A ID B ID A ID A S-AIR - Sony STR-DN2010 | Operating Instructions (Large File - 11.22 MB) - Page 97
and S-AIR sub unit(s) only. Your room Neighbor S-AIR main unit (this receiver) No transmission ID A S-AIR sub unit ID A S-AIR sub unit Pairing 95). • To set the ID of the S-AIR sub unit, refer to the operating instructions supplied with the S-AIR sub unit. 3 Press GUI MODE. After "GUI ON" - Sony STR-DN2010 | Operating Instructions (Large File - 11.22 MB) - Page 98
If you reset the ID (even the same ID again), pairing is canceled. Enjoying the system's sound in another room (For the S-AIR receiver only 95). • To set the ID of the S-AIR receiver, refer to the operating instructions supplied with the S-AIR receiver. Notes • When you are using another S-AIR sub - Sony STR-DN2010 | Operating Instructions (Large File - 11.22 MB) - Page 99
, you can select input other than network functions on the S-AIR receiver. 9 Adjust the volume on the S-AIR receiver. Notes • The sound of the S-AIR receiver may be cut off by operation of the S-AIR main unit. • When the sound is other than 2 channel stereo, multi channel sound is downmixed to - Sony STR-DN2010 | Operating Instructions (Large File - 11.22 MB) - Page 100
buttons. Press N, X, x, ./> S-AIR CH Operation Share the same operations on the remote Change the function of the system For details, refer to the operating instructions of the S-AIR receiver. Changing the channel for better sound transmission If you use multiple wireless systems which share the - Sony STR-DN2010 | Operating Instructions (Large File - 11.22 MB) - Page 101
AIR ID B: equivalent channel for IEEE 802.11b/g channel 6 - S-AIR ID C: equivalent channel for IEEE 802.11b/g channel 11 • The transmission may be improved by changing the transmission channel (frequency) of the other wireless system(s). For details, refer to the operating instructions of the other - Sony STR-DN2010 | Operating Instructions (Large File - 11.22 MB) - Page 102
wireless adapters of the S-AIR main unit and sub unit are closer. Enjoying the S-AIR receiver while the S-AIR main unit is in standby mode (For the S-AIR receiver only (not supplied)) You can enjoy the S-AIR receiver while the S-AIR main unit is in standby mode by setting "S-AIR Standby" to "ON - Sony STR-DN2010 | Operating Instructions (Large File - 11.22 MB) - Page 103
+/- on the receiver to select the input. You can also use the input buttons on the remote. 2 Press INPUT MODE repeatedly on the receiver to select the is given to the Audio Return Channel (ARC) signals. If your TV is not compatible with the Audio Return Channel (ARC) function, the digital optical - Sony STR-DN2010 | Operating Instructions (Large File - 11.22 MB) - Page 104
in the following cases. - Your TV is not compatible with the Audio Return Channel (ARC) function. - "Control for HDMI" is set to "OFF". - When you do not connect the receiver to the ARC compatible TV's HDMI jack via an HDMI cable. Enjoying the sound/ images from other inputs (Input Assign) You can - Sony STR-DN2010 | Operating Instructions (Large File - 11.22 MB) - Page 105
the COMPONENT VIDEO MONITOR OUT jack. In this case, the resolution of the GUI output is set to "480p" for both component video input and HDMI video input. Notes • You cannot assign other optical input to the inputs to which optical input jack is initially assigned. • When you assign the digital - Sony STR-DN2010 | Operating Instructions (Large File - 11.22 MB) - Page 106
Using a bi-amplifier connection 1 Press GUI MODE. After "GUI ON" appears on the display for a while, the GUI menu appears on the TV screen. Press MENU if the GUI menu does not appear on the TV screen. 2 Press V/v repeatedly to select " Settings" then press or b. The Settings menu list appears on the - Sony STR-DN2010 | Operating Instructions (Large File - 11.22 MB) - Page 107
menu You can adjust various settings for speakers, surround effects, etc. using the Settings menu. To display the menu of the receiver on the TV screen, make sure that the receiver is in "GUI MODE" by following the steps in "To turn "GUI MODE" on and off" (page 52). 2 Press V/v repeatedly to - Sony STR-DN2010 | Operating Instructions (Large File - 11.22 MB) - Page 108
116). Makes settings for sound/ images from components connected to the HDMI jacks (page 117). Makes settings for the network (page 118). Makes settings for S-AIR operations (page 94). Makes settings for the system of the receiver (page 121). Auto Calibration menu Calibration Start Lets you perform - Sony STR-DN2010 | Operating Instructions (Large File - 11.22 MB) - Page 109
step 4 to input a character one by one, then press . The name you entered is registered. Speaker Settings menu You can adjust each speaker manually. You can also adjust the speaker levels after the Auto Calibration is completed. Note The speaker settings are only for the current seating position - Sony STR-DN2010 | Operating Instructions (Large File - 11.22 MB) - Page 110
manually on the "Manual Notes • Depending on the speaker pattern setting, some parameters may not be available. • This function does not work in the following cases. - "A. DIRECT with a sampling frequency of more than 96 kHz are being received. To adjust the size of each speaker You can adjust each - Sony STR-DN2010 | Operating Instructions (Large File - 11.22 MB) - Page 111
MASTER VOL +/- (RM-AAP055 only) or 2 +/- (RM-AAP056 only). You can also use MASTER VOLUME on the receiver. • The adjusted value is shown on the TV screen during adjustment. To output test tone from each speaker You can output test tone from the speakers in sequence. 1 Press B/b repeatedly to select - Sony STR-DN2010 | Operating Instructions (Large File - 11.22 MB) - Page 112
L/SR, L/RH, LH/RH, LH/R Lets you output front 2 channel source sound (instead of the test tone) sequentially from adjacent speakers. Some items may not be displayed, depending • The speaker cords may have the short-circuit problem. When a test tone is output from a different speaker than the - Sony STR-DN2010 | Operating Instructions (Large File - 11.22 MB) - Page 113
D.Range Comp (Dynamic range compression) Lets you compress the dynamic range of the soundtrack. This may be useful when you want to watch movies at low volumes late at night. Dynamic range compression is possible with Dolby Digital sources only. x OFF The dynamic range is not compressed. x AUTO The - Sony STR-DN2010 | Operating Instructions (Large File - 11.22 MB) - Page 114
This function does not work in the following cases. - "A. DIRECT" is being used. - Signals with a sampling frequency of more than 96 kHz are being received. Dual Mono (Digital broadcast language selection) Lets you select the language you want when you listen to the dual audio of a digital broadcast - Sony STR-DN2010 | Operating Instructions (Large File - 11.22 MB) - Page 115
on the format. In this case, set this item to "AUTO". When signals from the HDMI IN jack are selected, only PCM signals are output from the connected player. When signals other than PCM are received, set this item to "AUTO". x AUTO Automatically switches the input mode between DTS, Dolby Digital - Sony STR-DN2010 | Operating Instructions (Large File - 11.22 MB) - Page 116
are not output from the COMPONENT VIDEO MONITOR OUT or MONITOR VIDEO OUT jacks when the monitor, etc., is connected to HDMI TV OUT jack. • If you select a resolution that the connected TV does not support in the "Resolution" parameter, the images from the TV cannot be output correctly. • Converted - Sony STR-DN2010 | Operating Instructions (Large File - 11.22 MB) - Page 117
component connected to the receiver via an HDMI connection. x TV+AMP The sound is output from TV's speaker and the speakers connected to the receiver. Notes • The sound quality of the playback component depends on the TV's sound quality, such as the number of channels, and the sampling frequency - Sony STR-DN2010 | Operating Instructions (Large File - 11.22 MB) - Page 118
The low-pass filter works when PCM signals are input via an HDMI connection. Turn the function on if you connect a subwoofer without receiver is now connected to network." appears on the TV screen. 4 Press to select "Finish". To set the IP address manually 1 Press V/v repeatedly to select "Network - Sony STR-DN2010 | Operating Instructions (Large File - 11.22 MB) - Page 119
Test Connection", then press . "Success! The receiver is now connected to network." appears on the TV screen. 10Press to select "Finish". To set the Proxy server manually 1 Press V/v repeatedly to select "Network press . 7 Press b to select the Port number box, then press . The soft keyboard appears - Sony STR-DN2010 | Operating Instructions (Large File - 11.22 MB) - Page 120
the receiver, the receiver will restart automatically. Tip The default device name is "STR-DN2010". Rhapsody Account Lets you enter the Rhapsody Account to listen to the Rhapsody Internet radio service. For details, see "Setting an account" (page 83). Rhapsody is only available in the U.S. Network - Sony STR-DN2010 | Operating Instructions (Large File - 11.22 MB) - Page 121
. - When all versions are the latest one. - When the receiver cannot retrieve the data, such as when the network has not been set up, or when the server is down, etc. • Do not turn the receiver off or disconnect the network cable during software updating. It may cause a malfunction. • It may take 50 - Sony STR-DN2010 | Operating Instructions (Large File - 11.22 MB) - Page 122
fixed and unchangeable. RETURN/ EXIT O GUI MODE V/v/B/b, MENU Using the menu in the display Press GUI MODE repeatedly to select "GUI OFF". The receiver is switched to front panel display mode. 1 Press AMP. 2 Press MENU. 3 Press V/v repeatedly to select the menu you want, then press or b. 4 Press - Sony STR-DN2010 | Operating Instructions (Large File - 11.22 MB) - Page 123
Overview of the menus The following options are available in each menu. For details on navigating through menus, [CAL TYPE] Position [POSITION] Level settings [] Naming position [NAME IN] Test tonea) [TEST TONE] Phase noisea) [P. NOISE] Phase audioa) [P. AUDIO] Front left speaker levela - Sony STR-DN2010 | Operating Instructions (Large File - 11.22 MB) - Page 124
Menu [Display] Speaker settings [] Parameters [Display] Subwoofer levela) [SW LEVEL] Settings SW -20.0 dB to SW +10.0 dB (0.5 dB per step) Dynamic range compression [D. RANGE] COMP. MAX, COMP. STD, COMP. AUTO, COMP. OFF Speaker pattern [SP PATTERN] 5/2.1 to 2/0 (20 patterns) Front - Sony STR-DN2010 | Operating Instructions (Large File - 11.22 MB) - Page 125
FM station receiving mode [FM MODE] Naming preset stations [NAME IN] Sirius parental lockg) [PARENTAL] Sirius lock code editg) [CODE EDIT] channels (Parental Lock)" (page 70). For details, see "Checking receiving conditions (Antenna Aiming)" (page 67). For details, see "Checking the ID number - Sony STR-DN2010 | Operating Instructions (Large File - 11.22 MB) - Page 126
audio input decoding priority [DEC. PRIO] Digital audio input assignment [A. ASSIGN] Resolution [RESOLUTION] Video input assignment [V. ASSIGN] Control for HDMI [CTRL: HDMI] Pass Through [PASS THRU] Audio out [AUDIO OUT] Subwoofer level for HDMIh) [SW LEVEL] Subwoofer Low Pass Filter for HDMIh - Sony STR-DN2010 | Operating Instructions (Large File - 11.22 MB) - Page 127
from a SIRIUS (USA model only) Channel name t Channel number t Category name t Artist name/Feature t Song/program title t Composer name t Signal strength t Sound field currently applied t Volume level When receiving RDS broadcasts (European model only) Program Service name3), Preset name, Band - Sony STR-DN2010 | Operating Instructions (Large File - 11.22 MB) - Page 128
select the FM or AM band. You can also use INPUT SELECTOR +/- on the receiver. 2 Press TUNING + or TUNING -. Press TUNING + to scan from low to - to select a preset number. 30 FM and 30 AM preset numbers are available. If "MEM" disappears before you select the preset number, start again from step 2. - Sony STR-DN2010 | Operating Instructions (Large File - 11.22 MB) - Page 129
model only) For details on SIRIUS Radio service , aim your antenna to where the best reception will be received. For details on the parameter, see number 1 Press TUNER repeatedly to select "SIRIUS". You can also use INPUT SELECTOR +/- on the receiver. 2 Press TUNING + or TUNING - to select channel - Sony STR-DN2010 | Operating Instructions (Large File - 11.22 MB) - Page 130
Press PRESET + or PRESET - to select a preset number. You can also select the number by pressing SHIFT, then numeric buttons. Preset numbers from 1 to 30 are available. Channel 1 is initial setting for the preset numbers when you purchase the receiver. 4 Press ENTER. If SHIFT indicator is light off - Sony STR-DN2010 | Operating Instructions (Large File - 11.22 MB) - Page 131
accepts differs depending on the model and year of the component, more than one numeric code may be assigned to a component. If you fail to program your remote using one of the codes, try using other codes. Notes • The numeric codes are based on the latest information available for each brand. There - Sony STR-DN2010 | Operating Instructions (Large File - 11.22 MB) - Page 132
112, 113, 114 115 116 117 115, 118, 119 120, 121, 122 To control a DAT deck Maker SONY PIONEER Code(s) 203 219 To control a tape deck Maker SONY DENON KENWOOD NAKAMICHI PANASONIC PHILIPS PIONEER TECHNICS YAMAHA Code(s) 201, 202 204, 205 206, 207, 208, 209 210 216 211, 212 213, 214 215, 216 217 - Sony STR-DN2010 | Operating Instructions (Large File - 11.22 MB) - Page 133
, 549, 558 517, 518, 567 503, 517, 566 566 542, 543, 567 503, 509, 510, 544 515, 534, 556 To control an LD player Maker SONY PIONEER Code(s) 601, 602, 603 606 To control a Video CD player Maker SONY Code(s) 605 continued 133GB Using the Remote - Sony STR-DN2010 | Operating Instructions (Large File - 11.22 MB) - Page 134
for AIWA, enter the code for Sony instead. To control a satellite tuner (box) Maker SONY AMSTRAD BskyB GENERAL ELECTRIC (GE) GRUNDIG HUMAX THOMSON PACE PANASONIC PHILIPS NOKIA RCA/PROSCAN BITA/HITACHI HUGHES JVC/Echostar/Dish Network MITSUBISHI SAMSUNG TOSHIBA Code(s) 801, 802, 803, 804, 824, 825 - Sony STR-DN2010 | Operating Instructions (Large File - 11.22 MB) - Page 135
times. 2 Release all buttons. All the contents of the remote's memory (i.e., all the programmed data) are cleared. Additional Information Precautions On safety Should any solid object or liquid fall into the cabinet, unplug the receiver and have it checked by qualified personnel before operating it - Sony STR-DN2010 | Operating Instructions (Large File - 11.22 MB) - Page 136
improved by changing the transmission channel (frequency) of the other wireless system(s). For details, refer to the operating instructions of the other wireless system S-AIR product(s). If you have any questions or problems concerning your receiver, please consult your nearest Sony dealer. 136GB - Sony STR-DN2010 | Operating Instructions (Large File - 11.22 MB) - Page 137
receiver, use this troubleshooting guide to help you remedy the problem. Should any problem persist, consult your nearest Sony dealer. General The receiver from the front left/right speakers. There is no sound from analog 2 channel sources. • Check that the selected digital audio input jack is not - Sony STR-DN2010 | Operating Instructions (Large File - 11.22 MB) - Page 138
is output from each speaker correctly, using "Test Tone" in the Speaker Settings menu. There of more than 48 kHz. Dolby Digital or DTS multi channel sound is not reproduced. • Check that the DVD, receiver, make sure the setting for the digital audio output of the connected component is available. - Sony STR-DN2010 | Operating Instructions (Large File - 11.22 MB) - Page 139
. • Check that the playback component is connected to a digital jack and the input is selected properly on this receiver. • Check whether the input source of the software being played back corresponds to the multi channel format. • Check whether the setup on the playback component is set to multi - Sony STR-DN2010 | Operating Instructions (Large File - 11.22 MB) - Page 140
program on a component connected via HDMI connection to the receiver. - Change the TV channel when you want to watch a TV broadcast. - Select the component or input you want to watch when you watch a program on the component connected to the TV. Refer to the operating instructions of the TV on this - Sony STR-DN2010 | Operating Instructions (Large File - 11.22 MB) - Page 141
remote cannot be used to control the connected component when using the Control for HDMI function. • Depending on the connected component and TV, you may need to set up the component and TV. Refer to the operating instructions supplied with each component and TV. • Change the input of the receiver - Sony STR-DN2010 | Operating Instructions (Large File - 11.22 MB) - Page 142
of the receiver becomes minimum receiver to an outdoor FM antennas (aerial) as shown below. If you connect the receiver ) Receiver Radio remote so that the frequency appears on the display. The receiver cannot receive satellite channels at all.* • The receiving service in question. If so, the service - Sony STR-DN2010 | Operating Instructions (Large File - 11.22 MB) - Page 143
receiver. • Replace all the batteries in the remote with new ones, if they are weak. • Make sure you select the correct input on the remote. • When you operate a programmed nonSony component, the remote may not function properly depending on the model and the maker of the component. Network Cannot - Sony STR-DN2010 | Operating Instructions (Large File - 11.22 MB) - Page 144
. Note that if service personnel changes some parts during repair, these parts may be retained. In the event of a problem with S-AIR function, have a Sony dealer check the entire system together (S-AIR main unit and S-AIR sub unit). Reference sections for clearing the receiver's memory To clear - Sony STR-DN2010 | Operating Instructions (Large File - 11.22 MB) - Page 145
DISTORTION: (USA model only) With 8 ohm loads, both channels driven, from 20 Hz - 20,000 Hz; rated 100 watts per channel minimum RMS power 0.5 dB step 3)INPUT SHORT (with sound field and equalizer bypassed). 4)Weighted network, input level. FM tuner section Tuning range 87.5 MHz - 108.0 MHz - Sony STR-DN2010 | Operating Instructions (Large File - 11.22 MB) - Page 146
HD Pass Through HDMI Video Input/Output (HDMI Repeater block) 640 network needs to support the following formats for you to play back content on this receiver. Type of content Music Format Other conditions Linear PCM LPCM defined in DLNA guidelines 1.0 Sampling Rate: 44.1 kHz, 48 kHz Channels - Sony STR-DN2010 | Operating Instructions (Large File - 11.22 MB) - Page 147
Hz Power output (DIGITAL MEDIA PORT) DC OUT: 5V, 0.7A MAX Power consumption 250 W Power consumption (during standby mode) 0.5 W (When "Control for HDMI", "Network Standby" and "S-AIR Standby" are set to "OFF") Dimensions (width/height/depth) (Approx.) 17 in × 6 1/4 in × 12 7/8 in (430 mm × 157 - Sony STR-DN2010 | Operating Instructions (Large File - 11.22 MB) - Page 148
129 Audio Out 117, 126 Audio Return Channel 103 Audio Settings 114, 126 Auto remote 135 sound field 77 Connection antennas 35 audio components 34 Network 37 speakers 21 TV 23 video components 25 Control for HDMI G GUI (Graphical User Interface) 52 H HDMI Settings 117, 126 I Input 54 Input Assign 104 - Sony STR-DN2010 | Operating Instructions (Large File - 11.22 MB) - Page 149
(Auto Calibration) 108, 123 Preset channels 69, 130 Preset Mode 68 Preset stations 63, 128 PROTECTOR 144 R RDS 64 Recording 60 Remote 13, 130 Repeat 80 Resetting 39 Resolution 116, 126 Rhapsody Account 83 Music Guide 84 My Library 85, 86 Rhapsody Digital Music Service 83 Rhapsody Stations 84 Search - Sony STR-DN2010 | Operating Instructions (Large File - 11.22 MB) - Page 150
- Sony STR-DN2010 | Operating Instructions (Large File - 11.22 MB) - Page 151
- Sony STR-DN2010 | Operating Instructions (Large File - 11.22 MB) - Page 152
Sony Corporation Printed in Malaysia
-
 1
1 -
 2
2 -
 3
3 -
 4
4 -
 5
5 -
 6
6 -
 7
7 -
8
-
9
-
10
-
11
-
12
-
13
-
14
-
15
-
16
-
17
-
18
-
19
-
20
-
21
-
22
-
23
-
24
-
25
-
26
-
27
-
28
-
29
-
30
-
31
-
32
-
33
-
34
-
35
-
36
-
37
-
38
-
39
-
40
-
41
-
42
-
43
-
44
-
45
-
46
-
47
-
48
-
49
-
50
-
51
-
52
-
53
-
54
-
55
-
56
-
57
-
58
-
59
-
60
-
61
-
62
-
63
-
64
-
65
-
66
-
67
-
68
-
69
-
70
-
71
-
72
-
73
-
74
-
75
-
76
-
77
-
78
-
79
-
80
-
81
-
82
-
83
-
84
-
85
-
86
-
87
-
88
-
89
-
90
-
91
-
92
-
93
-
94
-
95
-
96
-
97
-
98
-
99
-
100
-
101
-
102
-
103
-
104
-
105
-
106
-
107
-
108
-
109
-
110
-
111
-
112
-
113
-
114
-
115
-
116
-
117
-
118
-
119
-
120
-
121
-
122
-
123
-
124
-
125
-
126
-
127
-
128
-
129
-
130
-
131
-
132
-
133
-
134
-
135
-
136
-
137
-
138
-
139
-
140
-
141
-
142
-
143
-
144
-
145
-
146
-
147
-
148
-
149
-
150
-
151
-
152
 |
 |

©2010 Sony Corporation
4-182-049-
11
(1)
Multi Channel AV
Receiver
Operating Instructions
STR-DN2010