Sony STR-DN2010 Operating Instructions (Large File - 11.22 MB) - Page 49
Configuring the network settings of the receiver, To set the network settings, manually
 |
UPC - 027242779938
View all Sony STR-DN2010 manuals
Add to My Manuals
Save this manual to your list of manuals |
Page 49 highlights
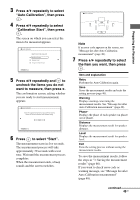
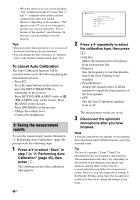
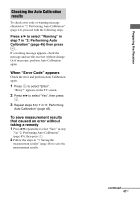
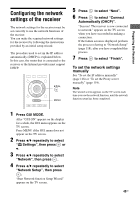
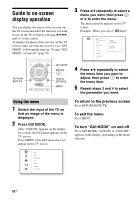
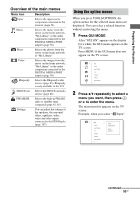
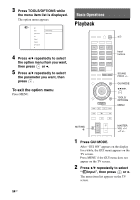
Preparing the Receiver Configuring the network settings of the receiver The network settings for the receiver must be set correctly to use the network functions of the receiver. You can make the required network settings for the receiver by following the instructions provided by an initial setup wizard. The procedure used to set up the IP address automatically (DHCP) is explained below. In this case, the router that is connected to the receiver or the Internet provider must support DHCP. V/v/b, MENU 5 Press to select "Next". 6 Press to select "Connect Automatically (DHCP)". "Success! The receiver is now connected to network." appears on the TV screen when you have succeeded in making a connection. If the failure screen is displayed, perform the process referring to "Network Setup" (page 118), after you have completed this process. 7 Press to select "Finish". To set the network settings manually See "To set the IP address manually" (page 118) or "To set the Proxy server manually" (page 119). Note The wizard screen appears on the TV screen each time you use the network function, until the network function setup has been completed. 1 Press GUI MODE. After "GUI ON" appears on the display for a while, the GUI menu appears on the TV screen. Press MENU if the GUI menu does not appear on the TV screen. 2 Press V/v repeatedly to select " Settings", then press or b. 3 Press V/v repeatedly to select "Network", then press . 4 Press V/v repeatedly to select "Network Setup", then press . "Start Network function Setup Wizard" appears on the TV screen. 49GB
-
 1
1 -
2
-
3
-
4
-
5
-
6
-
7
-
8
-
9
-
10
-
11
-
12
-
13
-
14
-
15
-
16
-
17
-
18
-
19
-
20
-
21
-
22
-
23
-
24
-
25
-
26
-
27
-
28
-
29
-
30
-
31
-
32
-
33
-
34
-
35
-
36
-
37
-
38
-
39
-
40
-
41
-
42
-
43
-
 44
44 -
 45
45 -
 46
46 -
 47
47 -
 48
48 -
 49
49 -
 50
50 -
 51
51 -
 52
52 -
 53
53 -
 54
54 -
55
-
56
-
57
-
58
-
59
-
60
-
61
-
62
-
63
-
64
-
65
-
66
-
67
-
68
-
69
-
70
-
71
-
72
-
73
-
74
-
75
-
76
-
77
-
78
-
79
-
80
-
81
-
82
-
83
-
84
-
85
-
86
-
87
-
88
-
89
-
90
-
91
-
92
-
93
-
94
-
95
-
96
-
97
-
98
-
99
-
100
-
101
-
102
-
103
-
104
-
105
-
106
-
107
-
108
-
109
-
110
-
111
-
112
-
113
-
114
-
115
-
116
-
117
-
118
-
119
-
120
-
121
-
122
-
123
-
124
-
125
-
126
-
127
-
128
-
129
-
130
-
131
-
132
-
133
-
134
-
135
-
136
-
137
-
138
-
139
-
140
-
141
-
142
-
143
-
144
-
145
-
146
-
147
-
148
-
149
-
150
-
151
-
152
 |
 |
