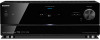
Sony STR-DN2010 Operating Instructions (Large File - 11.22 MB) - Page 53
Overview of the main menus, Using the option menus
 |
UPC - 027242779938
View all Sony STR-DN2010 manuals
Add to My Manuals
Save this manual to your list of manuals |
Page 53 highlights
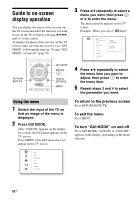
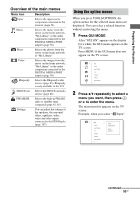
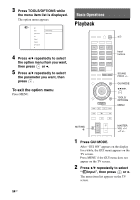
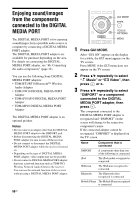
Preparing the Receiver Overview of the main menus Menu icon Description Input Selects the input source component connected to the receiver (page 54). Music Selects the music from the server on the home network, "My Library" or the audio component connected to the DIGITAL MEDIA PORT adapter (page 56). Photo Selects the photos from the server on the home network or "My Library". Video Selects the images from the server on the home network, "My Library" or the audio component connected to the DIGITAL MEDIA PORT adapter (page 56). Rhapsody Selects the Rhapsody radio service (page 83). Rhapsody is only available in the U.S. SHOUTcast Selects the SHOUTcast radio service (page 86). FM/AM/SR Selects the built-in FM/AM radio or satellite tuner connected (page 61, 65). Settings You can adjust the settings of the speakers, the surround effect, equalizer, audio, video and other inputs connected to the HDMI jacks (page 107). Using the option menus When you press TOOLS/OPTIONS, the option menus for the selected main menu are displayed. You can select a related function without reselecting the menu. 1 Press GUI MODE. After "GUI ON" appears on the display for a while, the GUI menu appears on the TV screen. Press MENU if the GUI menu does not appear on the TV screen. 2 Press V/v repeatedly to select a menu you want, then press or b to enter the menu. The menu item list appears on the TV screen. Example: when you select " Input". continued 53GB
-
 1
1 -
2
-
3
-
4
-
5
-
6
-
7
-
8
-
9
-
10
-
11
-
12
-
13
-
14
-
15
-
16
-
17
-
18
-
19
-
20
-
21
-
22
-
23
-
24
-
25
-
26
-
27
-
28
-
29
-
30
-
31
-
32
-
33
-
34
-
35
-
36
-
37
-
38
-
39
-
40
-
41
-
42
-
43
-
44
-
45
-
46
-
47
-
 48
48 -
 49
49 -
 50
50 -
 51
51 -
 52
52 -
 53
53 -
 54
54 -
 55
55 -
 56
56 -
 57
57 -
 58
58 -
59
-
60
-
61
-
62
-
63
-
64
-
65
-
66
-
67
-
68
-
69
-
70
-
71
-
72
-
73
-
74
-
75
-
76
-
77
-
78
-
79
-
80
-
81
-
82
-
83
-
84
-
85
-
86
-
87
-
88
-
89
-
90
-
91
-
92
-
93
-
94
-
95
-
96
-
97
-
98
-
99
-
100
-
101
-
102
-
103
-
104
-
105
-
106
-
107
-
108
-
109
-
110
-
111
-
112
-
113
-
114
-
115
-
116
-
117
-
118
-
119
-
120
-
121
-
122
-
123
-
124
-
125
-
126
-
127
-
128
-
129
-
130
-
131
-
132
-
133
-
134
-
135
-
136
-
137
-
138
-
139
-
140
-
141
-
142
-
143
-
144
-
145
-
146
-
147
-
148
-
149
-
150
-
151
-
152
 |
 |
