TP-Link EAP245 EAP Controller V2.4.7 User Guide - Page 51
Apply, Wireless Control > Scheduler Association, Associated with SSID
 |
View all TP-Link EAP245 manuals
Add to My Manuals
Save this manual to your list of manuals |
Page 51 highlights
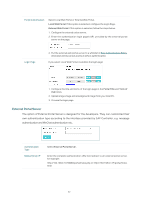
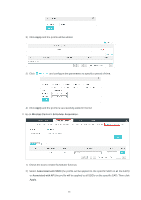
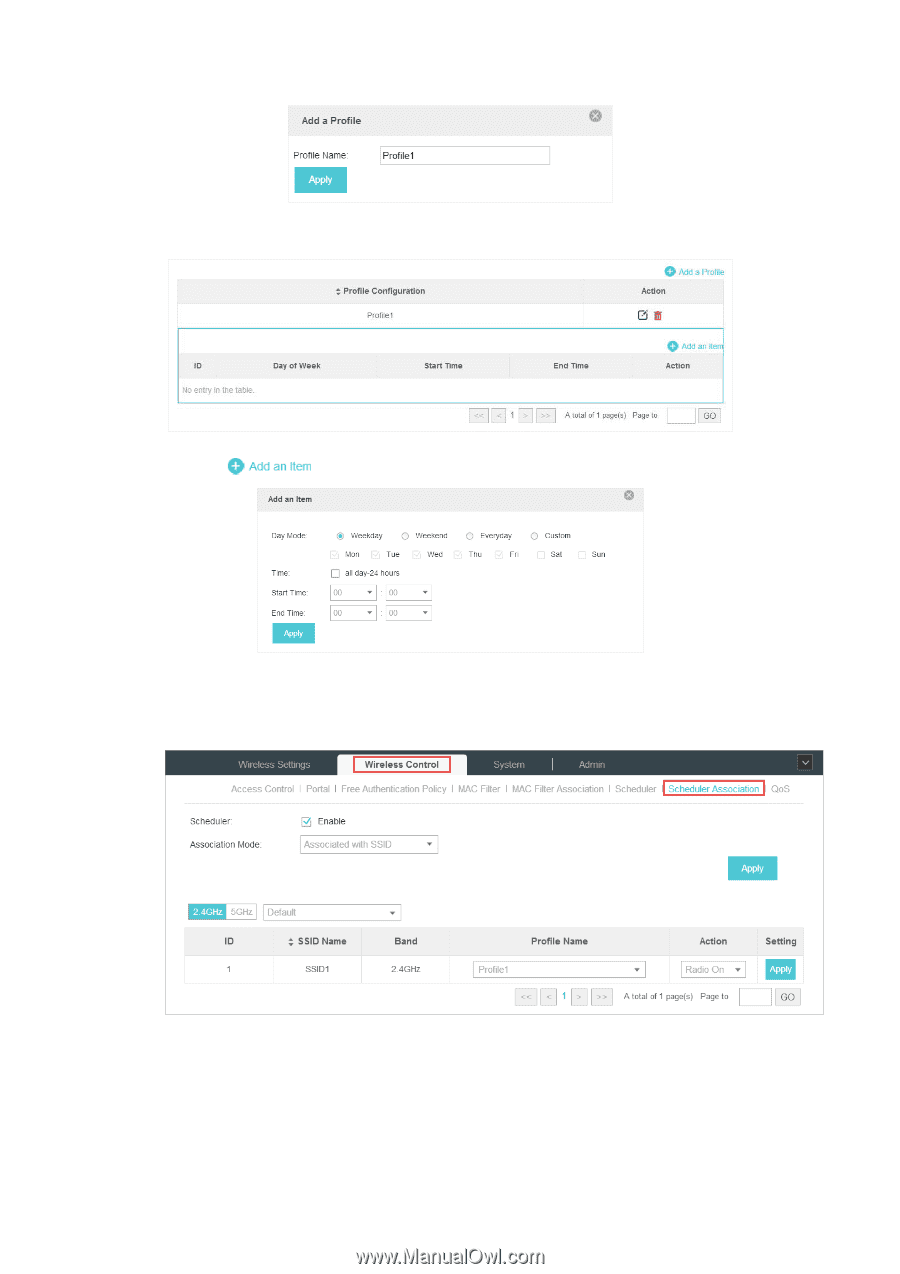
2 ) Click Apply and the profile will be added. 3 ) Click and configure the parameters to specify a period of time. 4 ) Click Apply and the profile is successfully added in the list. 2. Go to Wireless Control > Scheduler Association. 1 ) Check the box to enable Scheduler function. 2 ) Select Associated with SSID (the profile will be applied to the specific SSID on all the EAPs) or Associated with AP (the profile will be applied to all SSIDs on the specific EAP). Then click Apply. 46
-
 1
1 -
2
-
3
-
4
-
5
-
6
-
7
-
8
-
9
-
10
-
11
-
12
-
13
-
14
-
15
-
16
-
17
-
18
-
19
-
20
-
21
-
22
-
23
-
24
-
25
-
26
-
27
-
28
-
29
-
30
-
31
-
32
-
33
-
34
-
35
-
36
-
37
-
38
-
39
-
40
-
41
-
42
-
43
-
44
-
45
-
 46
46 -
 47
47 -
 48
48 -
 49
49 -
 50
50 -
 51
51 -
 52
52 -
 53
53 -
 54
54 -
 55
55 -
 56
56 -
57
-
58
-
59
-
60
-
61
-
62
-
63
-
64
-
65
-
66
-
67
-
68
-
69
-
70
-
71
-
72
-
73
-
74
-
75
-
76
-
77
-
78
 |
 |
46
2 )
Click
Apply
and the profile will be added.
3 )
Click
and configure the parameters to specify a period of time.
4 )
Click
Apply
and the profile is successfully added in the list.
2.
Go to
Wireless Control > Scheduler Association
.
1 )
Check the box to enable Scheduler function.
2 )
Select
Associated with SSID
(the profile will be applied to the specific SSID on all the EAPs)
or
Associated with AP
(the profile will be applied to all SSIDs on the specific EAP). Then click
Apply
.