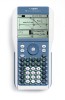
Texas Instruments NS/CLM/1L1/B User Guide - Page 12
Changing the keypad, in from the bottom edge of
 |
UPC - 033317190256
View all Texas Instruments NS/CLM/1L1/B manuals
Add to My Manuals
Save this manual to your list of manuals |
Page 12 highlights
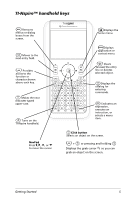
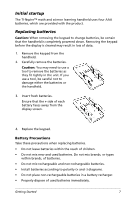
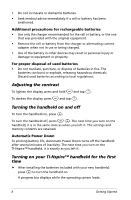
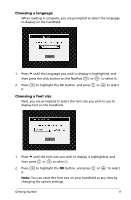
Changing the keypad Caution: When changing keypads, be certain that the handheld is completely powered down before removing the keypad. Removing the keypad before the display clears may result in loss of data. 1. Remove the cover, and turn the handheld over. Slide the latch release to the right. The keypad releases. 2. Turn the handheld right side up, and slide the keypad away from the display screen. 3. Lift the keypad off the handheld. 4. Insert the other keypad. Ensure that it fits comfortably into the guides on the bottom and sides of the handheld. Note: The keypad does not slide in from the bottom edge of the unit. Instead, fit it into the guides just above the batteries. 5. When the keypad is properly seated on the handheld, push the keypad toward the display screen. The keypad clicks into place when properly seated and completely inserted into the handheld. 4 Getting Started
-
 1
1 -
2
-
3
-
4
-
5
-
6
-
 7
7 -
 8
8 -
 9
9 -
 10
10 -
 11
11 -
 12
12 -
 13
13 -
 14
14 -
 15
15 -
 16
16 -
 17
17 -
18
-
19
-
20
-
21
-
22
-
23
-
24
-
25
-
26
-
27
-
28
-
29
-
30
-
31
-
32
-
33
-
34
-
35
-
36
-
37
-
38
-
39
-
40
-
41
-
42
-
43
-
44
-
45
-
46
-
47
-
48
-
49
-
50
-
51
-
52
-
53
-
54
-
55
-
56
-
57
-
58
-
59
-
60
-
61
-
62
-
63
-
64
-
65
-
66
-
67
-
68
-
69
-
70
-
71
-
72
-
73
-
74
-
75
-
76
-
77
-
78
-
79
-
80
-
81
-
82
-
83
-
84
-
85
-
86
-
87
-
88
-
89
-
90
-
91
-
92
-
93
-
94
-
95
-
96
-
97
-
98
-
99
-
100
-
101
-
102
-
103
-
104
-
105
-
106
-
107
-
108
-
109
-
110
-
111
-
112
-
113
-
114
-
115
-
116
-
117
-
118
-
119
-
120
-
121
-
122
-
123
-
124
-
125
-
126
-
127
-
128
-
129
-
130
-
131
-
132
-
133
-
134
-
135
-
136
-
137
-
138
-
139
-
140
-
141
-
142
-
143
-
144
 |
 |
