Toshiba Satellite E305 PSE30C-00E00C Users Manual Canada; English - Page 76
Video mode, Dolby Advanced Audio
 |
View all Toshiba Satellite E305 PSE30C-00E00C manuals
Add to My Manuals
Save this manual to your list of manuals |
Page 76 highlights
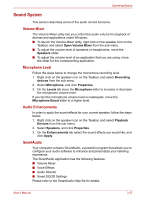
Operating Basics Starting SmartAudio Application To launch the SmartAudio, click Start → Control Panel → Hardware and Sound → SmartAudio. Opening SmartAudio Help Clicking "?" in the top right corner of the SmartAudio window will open the Help file in your selected language, or in English if your selected language is not supported. Dolby Advanced Audio Dolby Advanced Audio provides a stunning listening experience from any pair of speakers or headphones. Adding a new level of realism to movies, music, and games, this is the quality audio customers have been missing from your computers. Dolby Advanced Audio includes: ■ High-Frequency Enhancer: Analyzes and restores high frequencies lost during encoding. Works on any speaker for a higher level of audio than was previously possible. ■ Audio Optimization: Corrects common audio problems caused by laptop limitations for a better entertainment experience. ■ Natural Bass: Extends the bass response of any speakers by up to an octave. ■ Dolby Headphone: Enables personal surround sound using any set of headphones. To access Dolby Advanced Audio function, follow the steps as detailed below: 1. Right-click on the speaker icon on the Taskbar, and select Playback Devices from the sub menu. 2. Select Speakers, and click Properties. 3. Click the Dolby tab. Video mode Video mode settings are configured via the Screen Resolution dialog. To open the Screen Resolution dialog, click Start → Control Panel → Appearance and Personalization → Display → Change display settings. If you are running some applications (for example a 3D application or video playback and so on), you may see some disturbance, flickering or frame dropping on your screen. If that occurs, adjust the resolution of display, lowering it until the screen is displayed properly. Disabling Windows AeroTM may also help correct this issue. User's Manual 3-38
-
 1
1 -
2
-
3
-
4
-
5
-
6
-
7
-
8
-
9
-
10
-
11
-
12
-
13
-
14
-
15
-
16
-
17
-
18
-
19
-
20
-
21
-
22
-
23
-
24
-
25
-
26
-
27
-
28
-
29
-
30
-
31
-
32
-
33
-
34
-
35
-
36
-
37
-
38
-
39
-
40
-
41
-
42
-
43
-
44
-
45
-
46
-
47
-
48
-
49
-
50
-
51
-
52
-
53
-
54
-
55
-
56
-
57
-
58
-
59
-
60
-
61
-
62
-
63
-
64
-
65
-
66
-
67
-
68
-
69
-
70
-
 71
71 -
 72
72 -
 73
73 -
 74
74 -
 75
75 -
 76
76 -
 77
77 -
 78
78 -
 79
79 -
 80
80 -
 81
81 -
82
-
83
-
84
-
85
-
86
-
87
-
88
-
89
-
90
-
91
-
92
-
93
-
94
-
95
-
96
-
97
-
98
-
99
-
100
-
101
-
102
-
103
-
104
-
105
-
106
-
107
-
108
-
109
-
110
-
111
-
112
-
113
-
114
-
115
-
116
-
117
-
118
-
119
-
120
-
121
-
122
-
123
-
124
-
125
-
126
-
127
-
128
-
129
-
130
-
131
-
132
-
133
-
134
-
135
-
136
-
137
-
138
-
139
-
140
-
141
-
142
-
143
-
144
-
145
-
146
-
147
-
148
-
149
-
150
-
151
-
152
-
153
-
154
-
155
-
156
 |
 |