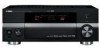
Yamaha RXV1800 Owner's Manual - Page 124
Tuner frequency step, Asia and General models only, Bi-amplifier setting, Parameter initialization - reset
 |
UPC - 027108928463
View all Yamaha RXV1800 manuals
Add to My Manuals
Save this manual to your list of manuals |
Page 124 highlights
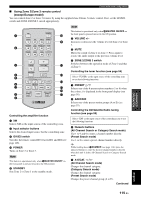
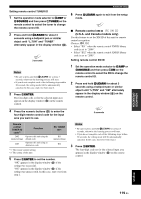
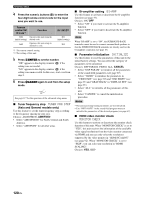
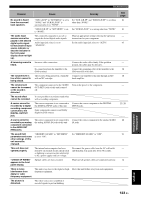
Advanced setup 4 Press the numeric buttons (5) to enter the four-digit remote control code for the input area you want to use. Remote control XM ID code*1 Function 2604 Operates this unit using the (initial setting) default code. 2605 Operates this unit using an alternative code. *1 The remote control setting. *2 The setting of this unit. RC XM ID*2 ID1 (initial setting) ID2 5 Press 3ENTER to set the number. "OK" appears in the display window (A) if the setting was successful. "NG" appears in the display window (A) if the setting was unsuccessful. In this case, start over from step 2. 6 Press LLEARN again to exit from the setup mode. LEARN See page 117 for the operation of the advanced setup menu. ■ Tuner frequency step TUNER FRQ STEP (Asia and General models only) Use this feature to set the tuner frequency step according to the frequency spacing in your area. Choices: AM10/FM100, AM9/FM50 • Select "AM10/FM100" for North, Central and South America. • Select "AM9/FM50" for all other areas. ■ Bi-amplifier setting BI-AMP Use this feature to activate or deactivate the bi-amplifier function (see page 19). Choices: ON, OFF • Select "ON" if you want to activate the bi-amplifier function. • Select "OFF" if you want to deactivate the bi-amplifier function. Note When "BI-AMP" is set to "ON", the SURROUND BACK terminals cannot be used to connect surround back speakers in that the SURROUND BACK terminals are already used for the bi-amplifier connection (see page 19). ■ Parameter initialization INITIALIZE Use this feature to reset the parameters of this unit to the initial factory settings. You can select the category of parameters to be initialized. Choices: DSP PARAM, VIDEO, ALL, CANCEL • Select "DSP PARAM" to initialize all the parameters of the sound field parameters (see page 67). • Select "VIDEO" to initialize the parameters in "VIDEO SET" (see page 92) and "OSD SHIFT" (see page 91) and "GRAY BACK" in "DISPLAY SET" (see page 91). • Select "ALL" to initialize all the parameters of this unit. • Select "CANCEL" to cancel the initialization procedure. Notes • The advanced setup menu parameters are not initialized. • Use "INITIALIZE" in the sound field program menu to initialize the parameters of the desired program (see page 67). ■ HDMI video monitor check MONITOR CHECK Use this feature to activate or deactivate the monitor check function of this unit. When "MONITOR CHECK" is set to "YES", this unit receives the information of the available video signal resolutions from the video monitor connected via HDMI and you can only select the resolutions supported by the video monitor in "HDMI SCALING" (see page 92). When "MONITOR CHECK" is set to "SKIP", you can select any resolution in "HDMI SCALING". Choices: YES, SKIP 120 En
-
 1
1 -
2
-
3
-
4
-
5
-
6
-
7
-
8
-
9
-
10
-
11
-
12
-
13
-
14
-
15
-
16
-
17
-
18
-
19
-
20
-
21
-
22
-
23
-
24
-
25
-
26
-
27
-
28
-
29
-
30
-
31
-
32
-
33
-
34
-
35
-
36
-
37
-
38
-
39
-
40
-
41
-
42
-
43
-
44
-
45
-
46
-
47
-
48
-
49
-
50
-
51
-
52
-
53
-
54
-
55
-
56
-
57
-
58
-
59
-
60
-
61
-
62
-
63
-
64
-
65
-
66
-
67
-
68
-
69
-
70
-
71
-
72
-
73
-
74
-
75
-
76
-
77
-
78
-
79
-
80
-
81
-
82
-
83
-
84
-
85
-
86
-
87
-
88
-
89
-
90
-
91
-
92
-
93
-
94
-
95
-
96
-
97
-
98
-
99
-
100
-
101
-
102
-
103
-
104
-
105
-
106
-
107
-
108
-
109
-
110
-
111
-
112
-
113
-
114
-
115
-
116
-
117
-
118
-
 119
119 -
 120
120 -
 121
121 -
 122
122 -
 123
123 -
 124
124 -
 125
125 -
 126
126 -
 127
127 -
 128
128 -
 129
129 -
130
-
131
-
132
-
133
-
134
-
135
-
136
-
137
-
138
-
139
-
140
-
141
-
142
-
143
-
144
-
145
-
146
-
147
-
148
-
149
-
150
-
151
-
152
-
153
-
154
-
155
-
156
-
157
 |
 |
