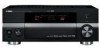
Yamaha RXV1800 Owner's Manual - Page 15
What do you want to do with this unit?, Additional features - setup
 |
UPC - 027108928463
View all Yamaha RXV1800 manuals
Add to My Manuals
Save this manual to your list of manuals |
Page 15 highlights
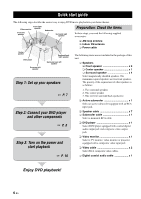
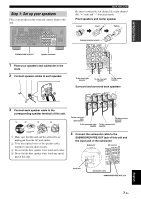
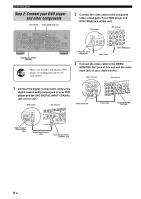
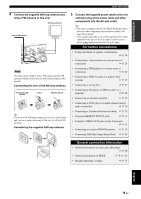
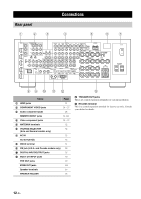
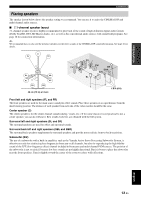
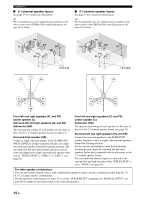
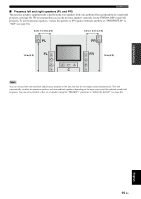
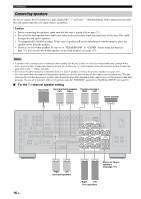
INTRODUCTION Quick start guide What do you want to do with this unit? Using various input sources • Basic operations of this unit ☞ P. 42 • Enjoying FM/AM radio programs ☞ P. 54 • Enjoying XM Satellite Radio programs ☞ P. 58 • Using your iPod with this unit ☞ P. 64 Using various sound features • Using various sound field programs ☞ P. 46 • Using the Pure Direct mode for high fidelity sound ☞ P. 52 • Adjusting the tonal quality of the speakers ☞ P. 52 • Customizing the sound field programs ☞ P. 67 Adjusting the parameters of this unit • Automatically optimizing the speaker parameters for your listening room (AUTO SETUP) ☞ P. 37 • Setting the remote control ☞ P. 100 Additional features • Displaying the current input source signal information in the OSD ☞ P. 44 • Saving and recalling the system settings of this unit (SYSTEM MEMORY) ☞ P. 96 • Using headphones ☞ P. 43 • Using this unit in multiple rooms simultaneously (multi-zone configuration) ☞ P. 111 • Automatically turning off this unit ☞ P. 45 Manually adjusting various parameters of this unit • Setting the basic speaker configuration ☞ P. 80 • Adjusting the balance of the speaker levels ☞ P. 82 • Setting the distance of each speaker ☞ P. 83 • Setting the parameters related to the volume level ☞ P. 84 • Adjusting the tonal quality by using the graphic equalizer ☞ P. 85 • Adjusting the lip sync function for the HDMI connection ☞ P. 87 • Assigning the input/output jacks of this unit ☞ P. 89 • Setting the parameters of the front panel display or OSD ☞ P. 91 • Setting the parameters related to the video signals ☞ P. 92 • Protecting the various settings ☞ P. 93 • Setting the parameters of the multi-zone feature ☞ P. 94 Adjusting the advanced parameters • Setting the speaker impedance of the connected speakers ☞ P. 117 • Setting the parameters of this unit to default values ☞ P. 120 English 11 En
-
 1
1 -
2
-
3
-
4
-
5
-
6
-
7
-
8
-
9
-
 10
10 -
 11
11 -
 12
12 -
 13
13 -
 14
14 -
 15
15 -
 16
16 -
 17
17 -
 18
18 -
 19
19 -
 20
20 -
21
-
22
-
23
-
24
-
25
-
26
-
27
-
28
-
29
-
30
-
31
-
32
-
33
-
34
-
35
-
36
-
37
-
38
-
39
-
40
-
41
-
42
-
43
-
44
-
45
-
46
-
47
-
48
-
49
-
50
-
51
-
52
-
53
-
54
-
55
-
56
-
57
-
58
-
59
-
60
-
61
-
62
-
63
-
64
-
65
-
66
-
67
-
68
-
69
-
70
-
71
-
72
-
73
-
74
-
75
-
76
-
77
-
78
-
79
-
80
-
81
-
82
-
83
-
84
-
85
-
86
-
87
-
88
-
89
-
90
-
91
-
92
-
93
-
94
-
95
-
96
-
97
-
98
-
99
-
100
-
101
-
102
-
103
-
104
-
105
-
106
-
107
-
108
-
109
-
110
-
111
-
112
-
113
-
114
-
115
-
116
-
117
-
118
-
119
-
120
-
121
-
122
-
123
-
124
-
125
-
126
-
127
-
128
-
129
-
130
-
131
-
132
-
133
-
134
-
135
-
136
-
137
-
138
-
139
-
140
-
141
-
142
-
143
-
144
-
145
-
146
-
147
-
148
-
149
-
150
-
151
-
152
-
153
-
154
-
155
-
156
-
157
 |
 |
