Brother International MFC-J6710DW Advanced Users Manual - English - Page 66
Adjusting Brightness, Contrast and Color, Brightness, Contrast, Color Enhancement (True2Life™)
 |
UPC - 012502626633
View all Brother International MFC-J6710DW manuals
Add to My Manuals
Save this manual to your list of manuals |
Page 66 highlights
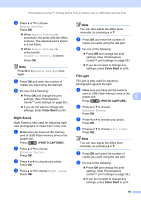
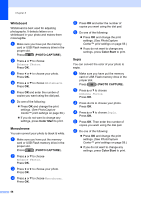
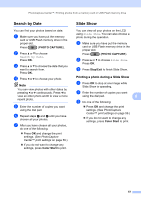
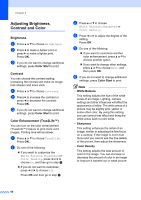
Chapter 8 Adjusting Brightness, Contrast and Color 8 Brightness 8 a Press a or b to choose Brightness. b Press d to make a darker print or press c to make a lighter print. Press OK. c If you do not want to change additional settings, press Color Start to print. Contrast 8 You can choose the contrast setting. Increasing the contrast will make an image look sharper and more vivid. a Press a or b to choose Contrast. b Press c to increase the contrast or press d to decrease the contrast. Press OK. c If you do not want to change additional settings, press Color Start to print. Color Enhancement (True2Life™) 8 You can turn on the color enhancement (True2Life™) feature to print more vivid images. Printing time will be slower. a Press a or b to choose True2Life. Press OK. b Do one of the following: If you want to customize the White Balance, Sharpness or Color Density, press d or c to choose On, and then go to step c. If you do not want to customize, press d or c to choose Off. Press OK and then go to step f. c Press a or b to choose White Balance, Sharpness or Color Density. d Press d or c to adjust the degree of the setting. Press OK. e Do one of the following: If you want to customize another color enhancement, press a or b to choose another option. If you want to change other settings, press a or b to choose Exit, and then press OK. f If you do not want to change additional settings, press Color Start to print. Note • White Balance This setting adjusts the hue of the white areas of an image. Lighting, camera settings and other influences will affect the appearance of white. The white areas of a picture may be slightly pink, yellow or some other color. By using this setting, you can correct that effect and bring the white areas back to pure white. • Sharpness This setting enhances the detail of an image, similar to adjusting the fine focus on a camera. If the image is not in true focus and you cannot see the fine details of the picture, then adjust the sharpness. • Color Density This setting adjusts the total amount of color in the image. You can increase or decrease the amount of color in an image to improve a washed out or weak picture. 60
-
 1
1 -
2
-
3
-
4
-
5
-
6
-
7
-
8
-
9
-
10
-
11
-
12
-
13
-
14
-
15
-
16
-
17
-
18
-
19
-
20
-
21
-
22
-
23
-
24
-
25
-
26
-
27
-
28
-
29
-
30
-
31
-
32
-
33
-
34
-
35
-
36
-
37
-
38
-
39
-
40
-
41
-
42
-
43
-
44
-
45
-
46
-
47
-
48
-
49
-
50
-
51
-
52
-
53
-
54
-
55
-
56
-
57
-
58
-
59
-
60
-
 61
61 -
 62
62 -
 63
63 -
 64
64 -
 65
65 -
 66
66 -
 67
67 -
 68
68 -
 69
69 -
 70
70 -
 71
71 -
72
-
73
-
74
-
75
-
76
-
77
-
78
-
79
-
80
-
81
-
82
-
83
-
84
-
85
-
86
-
87
-
88
-
89
 |
 |