Canon PowerShot A75 ZoomBrowser EX 4.6 Software User Guide - Page 109
Operating the Camera Shutter from the Computer 3/4 - recall
 |
View all Canon PowerShot A75 manuals
Add to My Manuals
Save this manual to your list of manuals |
Page 109 highlights
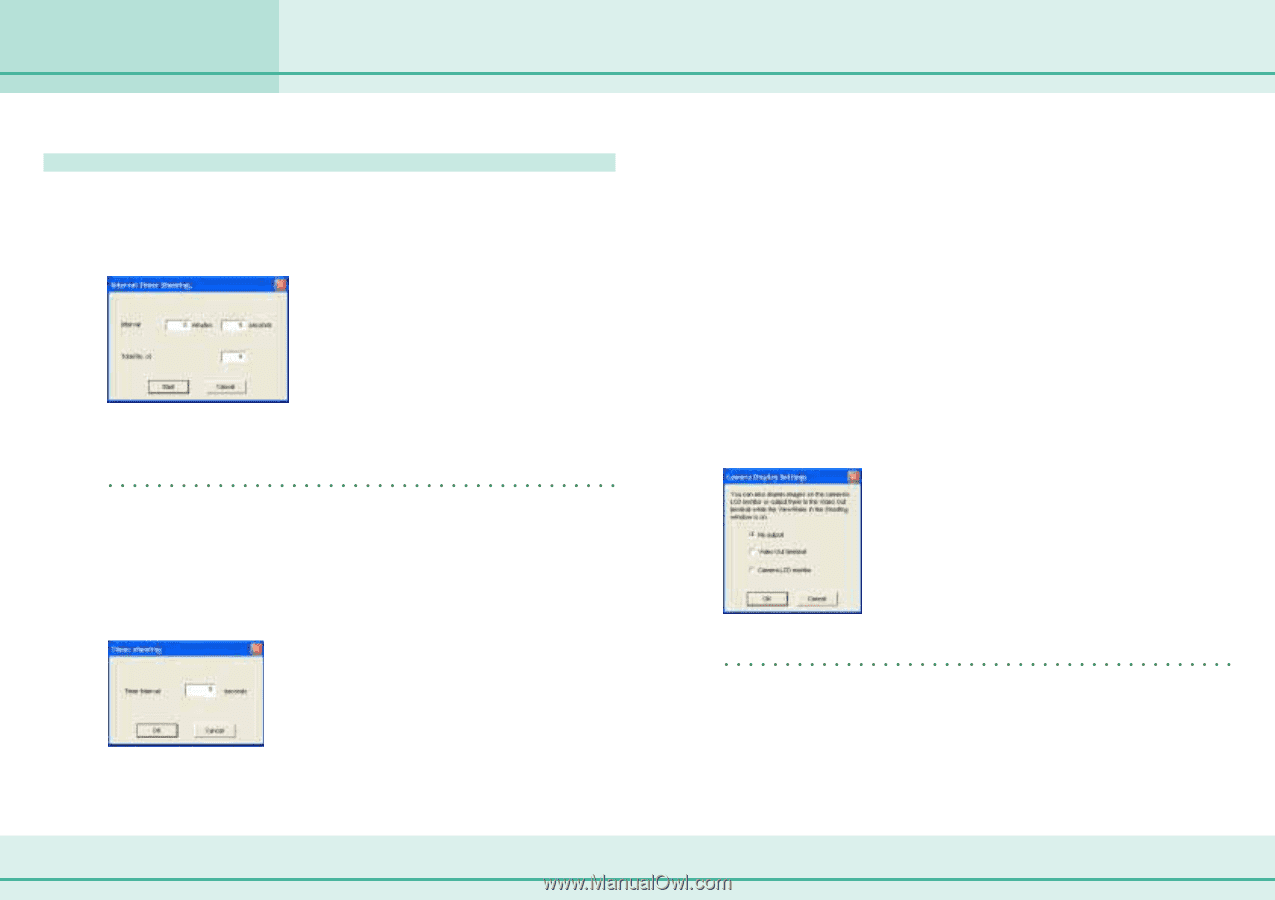
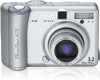
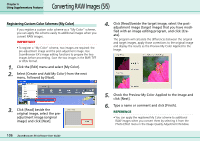
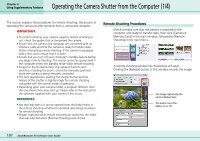
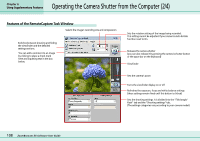
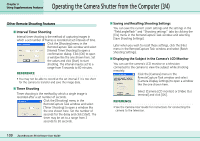
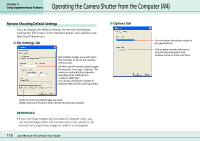
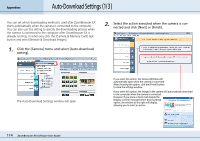
Chapter 6 Using Supplementary Features Operating the Camera Shutter from the Computer (3/4) Other Remote Shooting Features ■ Interval Timer Shooting Interval timer shooting is the method of capturing images in which a set number of frames is recorded at set intervals of time. Click the [Shooting] menu in the RemoteCapture Task window and select [Interval Timer Shooting] to open a confirmation dialog. Click [OK] to open a window like the one shown here. Set the values and click [Start] to start shooting. The interval may be set to a range from 5 seconds to 60 minutes. REFERENCE • You may not be able to record at the set interval if it is too short for the camera to transfer and save the image data. ■ Timer Shooting Timer shooting is the method by which a single image is recorded after a set number of seconds. Click the [Shooting] menu in the RemoteCapture Task window and select [Timer Shooting] to open a window like the one shown here. Set the number of seconds for the delay and click [Start]. The timer may be set to a range from 2 seconds to 30 seconds. 109 ZoomBrowser EX Software User Guide ■ Saving and Recalling Shooting Settings You can save the current zoom settings and the settings in the "Field angle/flash" and "Shooting settings" tabs by clicking the [File] menu in the RemoteCapture Task window and selecting [Save Shooting Settings]. Later when you wish to recall those settings, click the [File] menu in the RemoteCapture Task window and select [Batch Shooting Settings]. ■ Displaying the Subject in the Camera's LCD Monitor You can use the camera's LCD monitor or a television connected to the camera to view the subject while shooting remotely. Click the [Camera] menu in the RemoteCapture Task window and select [Camera Display Settings] to open a window like the one shown here. Select [Camera LCD monitor] or [Video Out terminal] and click [OK]. REFERENCE • See the Camera User Guide for instructions for connecting the camera to the television.
-
 1
1 -
2
-
3
-
4
-
5
-
6
-
7
-
8
-
9
-
10
-
11
-
12
-
13
-
14
-
15
-
16
-
17
-
18
-
19
-
20
-
21
-
22
-
23
-
24
-
25
-
26
-
27
-
28
-
29
-
30
-
31
-
32
-
33
-
34
-
35
-
36
-
37
-
38
-
39
-
40
-
41
-
42
-
43
-
44
-
45
-
46
-
47
-
48
-
49
-
50
-
51
-
52
-
53
-
54
-
55
-
56
-
57
-
58
-
59
-
60
-
61
-
62
-
63
-
64
-
65
-
66
-
67
-
68
-
69
-
70
-
71
-
72
-
73
-
74
-
75
-
76
-
77
-
78
-
79
-
80
-
81
-
82
-
83
-
84
-
85
-
86
-
87
-
88
-
89
-
90
-
91
-
92
-
93
-
94
-
95
-
96
-
97
-
98
-
99
-
100
-
101
-
102
-
103
-
 104
104 -
 105
105 -
 106
106 -
 107
107 -
 108
108 -
 109
109 -
 110
110 -
 111
111 -
 112
112 -
 113
113 -
 114
114 -
115
-
116
-
117
-
118
-
119
-
120
-
121
-
122
-
123
-
124
-
125
-
126
-
127
-
128
-
129
-
130
-
131
 |
 |