Canon PowerShot A75 ZoomBrowser EX 4.6 Software User Guide - Page 78
Adding Images to the Camera
 |
View all Canon PowerShot A75 manuals
Add to My Manuals
Save this manual to your list of manuals |
Page 78 highlights
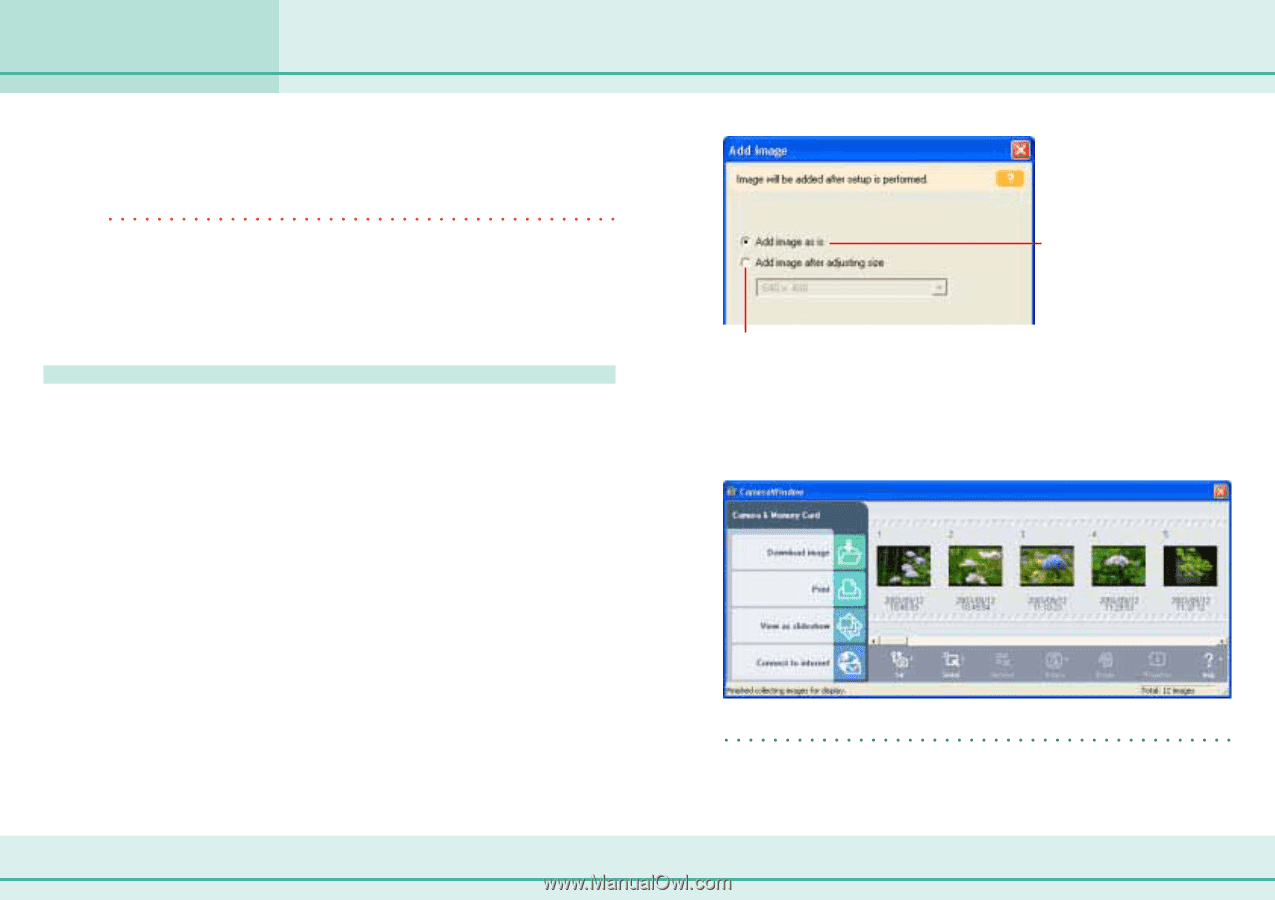
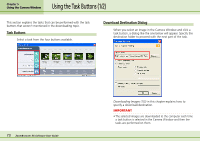
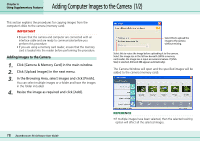
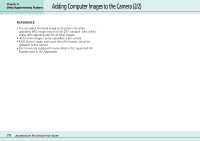
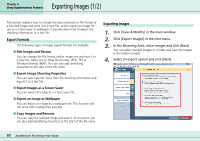
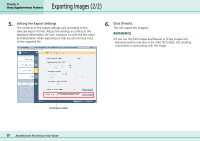
Chapter 6 Using Supplementary Features Adding Computer Images to the Camera (1/2) This section explains the procedures for copying images from the computer's disks to the camera (memory card). IMPORTANT • Ensure that the camera and computer are connected with an interface cable and are ready to communicate before you perform this procedure. • If you are using a memory card reader, ensure that the memory card is loaded into the reader before performing the procedure. Adding Images to the Camera 1. Click [Camera & Memory Card] in the main window. 2. Click [Upload Images] in the next menu. 3. In the Browsing Area, select images and click [Finish]. You can select multiple images or a folder and have the images in the folder included. 4. Resize the image as required and click [Add]. Select this to upload the image to the camera without resizing. Select this to resize the image before uploading it to the camera. Select the image size in the list box beneath. (With a memory card reader, the image size is input as numerical values. If [VGA Size] is selected, 640 and 480 appear automatically.) The Camera Window will open and the specified images will be added to the camera (memory card). 78 ZoomBrowser EX Software User Guide REFERENCE • If multiple images have been selected, then the selected resizing option will affect all the selected images.
-
 1
1 -
2
-
3
-
4
-
5
-
6
-
7
-
8
-
9
-
10
-
11
-
12
-
13
-
14
-
15
-
16
-
17
-
18
-
19
-
20
-
21
-
22
-
23
-
24
-
25
-
26
-
27
-
28
-
29
-
30
-
31
-
32
-
33
-
34
-
35
-
36
-
37
-
38
-
39
-
40
-
41
-
42
-
43
-
44
-
45
-
46
-
47
-
48
-
49
-
50
-
51
-
52
-
53
-
54
-
55
-
56
-
57
-
58
-
59
-
60
-
61
-
62
-
63
-
64
-
65
-
66
-
67
-
68
-
69
-
70
-
71
-
72
-
 73
73 -
 74
74 -
 75
75 -
 76
76 -
 77
77 -
 78
78 -
 79
79 -
 80
80 -
 81
81 -
 82
82 -
 83
83 -
84
-
85
-
86
-
87
-
88
-
89
-
90
-
91
-
92
-
93
-
94
-
95
-
96
-
97
-
98
-
99
-
100
-
101
-
102
-
103
-
104
-
105
-
106
-
107
-
108
-
109
-
110
-
111
-
112
-
113
-
114
-
115
-
116
-
117
-
118
-
119
-
120
-
121
-
122
-
123
-
124
-
125
-
126
-
127
-
128
-
129
-
130
-
131
 |
 |