Compaq ProLiant 1000 User Guide: Online Storage Controller Recovery Option - Page 42
Installing the Controllers
 |
View all Compaq ProLiant 1000 manuals
Add to My Manuals
Save this manual to your list of manuals |
Page 42 highlights
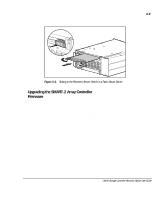
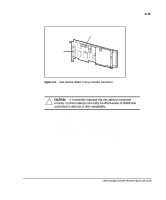
3-14 Planning and Installing the Online Storage Controller Installing the OSCRO software Making one or more controller pairs If the controllers you will be using for OSCRO are already installed and configured, go to the next section, "Labeling the Cables." Installing the Controllers The SMART-2 Array Controllers must be installed and configured using the Array Configuration Utility. For additional information, refer to the SMART-2 Array Controller Installation Guide that came with the controllers you will be using for OSCRO. To install SMART-2 Array Controllers: 1. Back up the entire data environment of the server. 2. Shut down Windows NT, and power down the server. 3. Insert the SMART-2 controller(s) necessary for your OSCRO configuration into available PCI slot(s). 4. Power up the system. 5. Boot the system into the System Configuration Utility (version 2.34A or above) using the System Configuration diskette built from the SmartStart and Support Software CD included in the kit. If you do not have the diskettes required for this step, see Appendix C, "Building Diskettes from the SmartStart and Support Software CD," for instructions on how to create them. 6. Disable the F1 Boot Prompt using the Advanced Mode of the System Configuration Utility by performing these steps: After passing through the initial screen(s), the Main Menu is displayed. Press Ctrl + A. A notice pops up stating that Advanced Mode is enabled. On the Main Menu, select System Configuration.
-
 1
1 -
2
-
3
-
4
-
5
-
6
-
7
-
8
-
9
-
10
-
11
-
12
-
13
-
14
-
15
-
16
-
17
-
18
-
19
-
20
-
21
-
22
-
23
-
24
-
25
-
26
-
27
-
28
-
29
-
30
-
31
-
32
-
33
-
34
-
35
-
36
-
 37
37 -
 38
38 -
 39
39 -
 40
40 -
 41
41 -
 42
42 -
 43
43 -
 44
44 -
 45
45 -
 46
46 -
 47
47 -
48
-
49
-
50
-
51
-
52
-
53
-
54
-
55
-
56
-
57
-
58
-
59
-
60
-
61
-
62
-
63
-
64
-
65
-
66
-
67
-
68
-
69
-
70
-
71
-
72
-
73
-
74
-
75
-
76
-
77
-
78
-
79
-
80
-
81
-
82
-
83
-
84
-
85
-
86
-
87
-
88
-
89
 |
 |