Garmin Forerunner 301 Owner's Manual - Page 38
Navigating with Routes, To create a route, To find and navigate a route - instructions
 |
UPC - 753759047290
View all Garmin Forerunner 301 manuals
Add to My Manuals
Save this manual to your list of manuals |
Page 38 highlights
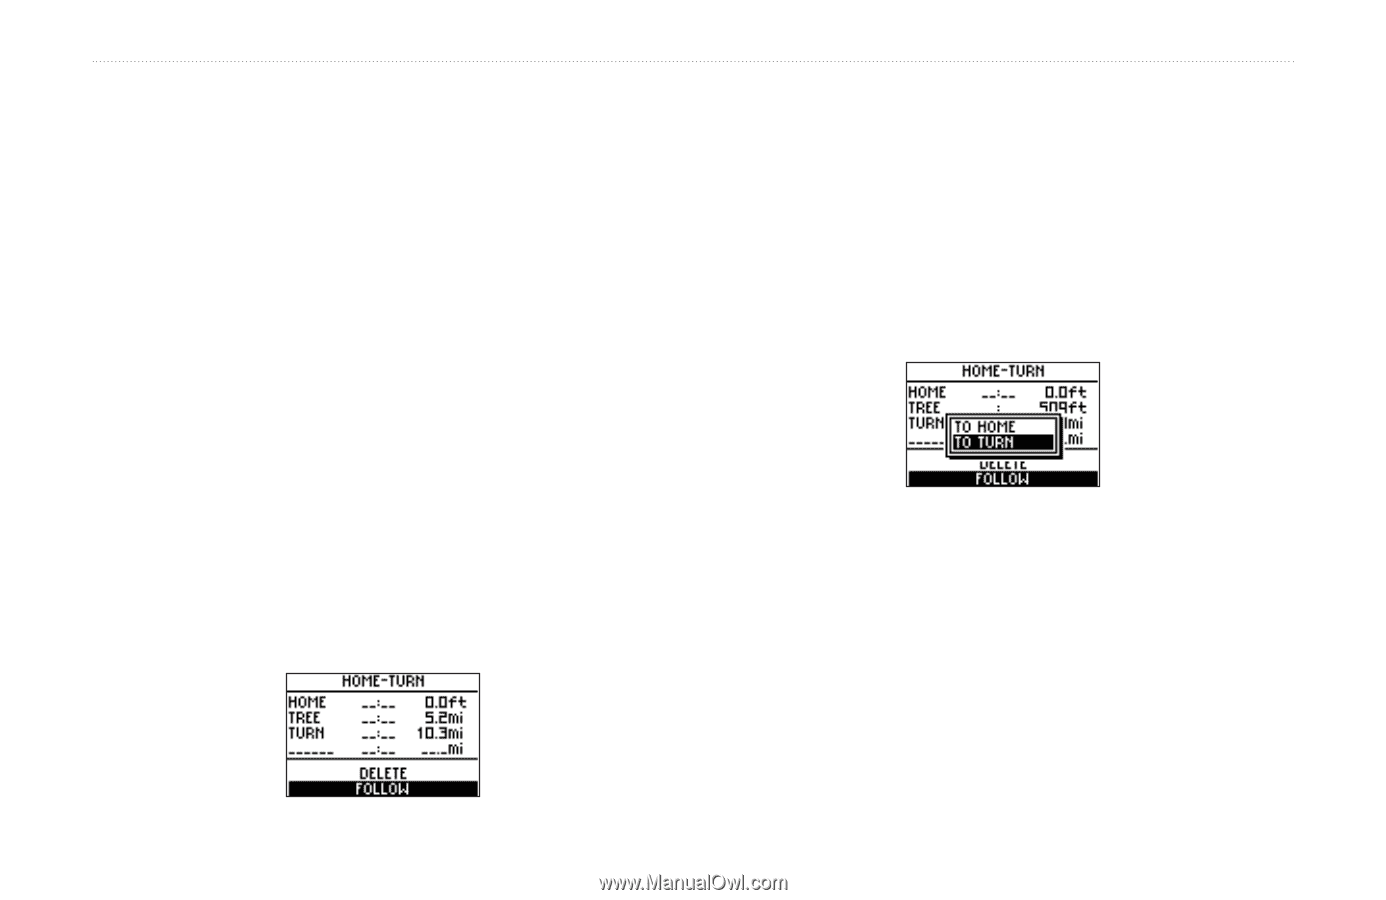
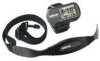
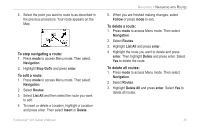
NAVIGATING > NAVIGATING WITH ROUTES Navigating with Routes A route provides straight line directions between two or more points on the Map. After you create Locations, you can use them to build routes involving a few points or many points. Then you can save the routes and use them to navigate at any time. To create a route: 1. Press mode to access Menu mode. Then select Navigation. 2. Highlight Routes and press enter. 3. Highlight and press enter. 4. Press enter to add a Location to your route. Then find the Location you want to add using the instructions for finding Locations (see "To find and go to a Location"). Highlight the correct Location and press enter. 34 5. Repeat step 4 to continue to add Locations to your route. When you are finished adding Locations, highlight Follow and press enter. 6. A menu appears. To follow the route as listed, select the last point in the route from the menu. To invert the route, select the first point in the route from the menu. Your route appears on the Map as a dark line connecting each Location. To find and navigate a route: 1. Press mode to access Menu mode. Then select Navigation. 2. Select Routes. 2. Highlight List All and press enter. 3. Highlight the route you want to follow and press enter. Then highlight Follow and press enter. A menu appears. Forerunner® 301 Owner's Manual
-
 1
1 -
2
-
3
-
4
-
5
-
6
-
7
-
8
-
9
-
10
-
11
-
12
-
13
-
14
-
15
-
16
-
17
-
18
-
19
-
20
-
21
-
22
-
23
-
24
-
25
-
26
-
27
-
28
-
29
-
30
-
31
-
32
-
 33
33 -
 34
34 -
 35
35 -
 36
36 -
 37
37 -
 38
38 -
 39
39 -
 40
40 -
 41
41 -
 42
42 -
 43
43 -
44
-
45
-
46
-
47
-
48
-
49
-
50
-
51
-
52
-
53
-
54
-
55
-
56
-
57
-
58
-
59
-
60
-
61
-
62
-
63
-
64
-
65
-
66
 |
 |