Garmin eTrex Summit Owner's Manual (Software Version 3.00 and above) &nbs
Garmin eTrex Summit - Hiking GPS Receiver Manual
 |
View all Garmin eTrex Summit manuals
Add to My Manuals
Save this manual to your list of manuals |
Garmin eTrex Summit manual content summary:
- Garmin eTrex Summit | Owner's Manual (Software Version 3.00 and above) &nbs - Page 1
eTrex Summit® personal navigator® owner's manual - Garmin eTrex Summit | Owner's Manual (Software Version 3.00 and above) &nbs - Page 2
Site address: www.garmin.com Garmin®, eTrex Summit®, Personal Navigator® , TracBack®, and MapSource® are registered trademarks and WAAS Enabled™ is a trademark of Garmin Ltd. or its subsidiaries and may not be used without the express permission of Garmin. September 2004 Part Number 190-00396-00 - Garmin eTrex Summit | Owner's Manual (Software Version 3.00 and above) &nbs - Page 3
on the home page. Your unit's serial number is in the battery compartment. Serial Number Thank you for choosing the Garmin eTrex Summit. If you have any questions or comments regarding the use of the eTrex Summit you can visit our Web site or contact our Product Support Department M-F, 8:00-5:00 CST - Garmin eTrex Summit | Owner's Manual (Software Version 3.00 and above) &nbs - Page 4
Compliance iii Warnings and Cautions iv-v Consumer Limited Warranty vi Software License Agreement vii Maintenance viii GPS Cleaning viii Lens Cleaning viii Storage viii Water Immersion viii Features ix eTrex Summit Description x Buttons xi Battery Installation xii GETTING STARTED 1-12 - Garmin eTrex Summit | Owner's Manual (Software Version 3.00 and above) &nbs - Page 5
and used in accordance with the instructions, may cause harmful interference to radio receiver is connected. • Consult the dealer or an experienced radio/TV technician for help. The eTrex Summit does not contain any user-serviceable parts. Repairs should only be made by an authorized Garmin service - Garmin eTrex Summit | Owner's Manual (Software Version 3.00 and above) &nbs - Page 6
review and understand all aspects of this Owner's Manual-and thoroughly practice operation using the simulator mode prior to actual use. When in actual use, carefully compare indications from the eTrex Summit to all available navigation for safe navigation - and, as always, the user is responsible - Garmin eTrex Summit | Owner's Manual (Software Version 3.00 and above) &nbs - Page 7
all GPS equipment. Although the Garmin eTrex Summit is a precision electronic NAVigation AID (NAVAID), any NAVAID can be misused or misinterpreted and, therefore, become unsafe. WARNING: For use in vehicles, it is the sole responsibility of the owner/operator of the eTrex Summit to secure the unit - Garmin eTrex Summit | Owner's Manual (Software Version 3.00 and above) &nbs - Page 8
repair or replace the unit or software or offer a full refund of the purchase price at its sole discretion. SUCH REMEDY SHALL BE YOUR SOLE AND EXCLUSIVE REMEDY FOR ANY BREACH OF WARRANTY. To obtain warranty service, call your local Garmin authorized dealer. Or call Garmin Customer Service at one of - Garmin eTrex Summit | Owner's Manual (Software Version 3.00 and above) &nbs - Page 9
LICENSE AGREEMENT BY USING THE ETREX SUMMIT, YOU AGREE TO BE BOUND BY THE TERMS AND CONDITIONS OF THE FOLLOWING SOFTWARE LICENSE AGREEMENT. PLEASE READ THIS AGREEMENT CAREFULLY. Garmin grants you a limited license to use the software embedded in this device (the "Software) in binary executable form - Garmin eTrex Summit | Owner's Manual (Software Version 3.00 and above) &nbs - Page 10
, etc. will be retained in the unit's memory without the need for external power. It is always a good practice to back up important user data by manually recording it or downloading it to a PC (transferring it to MapSource). WATER IMMERSION The eTrex Summit is waterproof to IEC Standard 60529 IPX7 - Garmin eTrex Summit | Owner's Manual (Software Version 3.00 and above) &nbs - Page 11
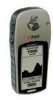
The eTrex Summit is a six ounce, 12-channel, handheld GPS receiver. It has a built-in GPS antenna and only five user-buttons. All buttons are located on either side of the unit, allowing for simple, one-handed operation that won't obstruct your view of the display. It runs for up to 22 hours on two - Garmin eTrex Summit | Owner's Manual (Software Version 3.00 and above) &nbs - Page 12
Introduction eTrex Summit Description x UP Button DOWN Button ENTER/MARK Button Compass Sighting Marks External Power and Data Connector Barometric Pressure Sensor Internal GPS Antenna PAGE/COMPASS Button POWER Button LCD Display (with backlight) Waterproof Case Battery Compartment - Garmin eTrex Summit | Owner's Manual (Software Version 3.00 and above) &nbs - Page 13
options on pages and menus • Adjust Contrast on SkyView Page • Zoom in and out on Map Page • Cycle through trip computer data • Cycle through elevation computer data The ENTER button: : • Press and hold to turn the unit on/off. • Press to turn the display backlight on/off. Introduction Buttons xi - Garmin eTrex Summit | Owner's Manual (Software Version 3.00 and above) &nbs - Page 14
Lanyand Installation Installing the Batteries The eTrex Summit operates on two AA batteries (not included), which are installed at the back of the unit. To install the batteries, remove the battery cover by turning the D-ring at the back of the unit 1/4 turn counter-clockwise. Insert the batteries - Garmin eTrex Summit | Owner's Manual (Software Version 3.00 and above) &nbs - Page 15
eTrex Summit's remaining features. The First Step The eTrex Summit's GPS operates using information gathered from satellites. To initialize the unit's GPS receiver the first time, take your eTrex Summit TO NAVIGATE" message in the status box, eTrex Summit has found your location and the GPS receiver - Garmin eTrex Summit | Owner's Manual (Software Version 3.00 and above) &nbs - Page 16
'TOO SLOW', 'JUST RIGHT' or 'TOO FAST'. Calibrating the Electronic Compass The eTrex Summit's Electronic Compass needs to be calibrated outdoors after the batteries have been changed, before using the unit for navigation. Failure to calibrate the Electronic Compass can result in gross inaccuracy of - Garmin eTrex Summit | Owner's Manual (Software Version 3.00 and above) &nbs - Page 17
Map Pointer Trip Computer Elevation Menu SkyView Page Basics The SkyView Page displays the eTrex Summit's receiver unit displays the status of the receiver. The eTrex Summit displays the message 'Ready to Navigate' when the receiver has gathered enough satellite information to begin navigation - Garmin eTrex Summit | Owner's Manual (Software Version 3.00 and above) &nbs - Page 18
travel, the animated figure "walks" and leaves a "breadcrumb trail" known as a Track Log. The map also shows waypoint names and symbols. To help you better visualize the "real world", eTrex Summit is set to rotate the map automatically as you move, so that waypoints that are ahead of you are always - Garmin eTrex Summit | Owner's Manual (Software Version 3.00 and above) &nbs - Page 19
Page helps guide you to a destination. When you are navigating towards a a direction arrow in the Compass Ring. To navigate, hold the unit as level as possible and follow the arrow. holding the PAGE button. The eTrex Summit will automatically select the correct source (GPS or Compass) for you - Garmin eTrex Summit | Owner's Manual (Software Version 3.00 and above) &nbs - Page 20
Getting Started Page Basics Trip Computer Page Basics Selectable Data Fields Press ENTER to access the Trip Computer 'OPTIONS'. 6 The Trip Computer Page The Trip Computer page displays information about your travels. It contains five data fields. By default, these fields include an odometer (Trip - Garmin eTrex Summit | Owner's Manual (Software Version 3.00 and above) &nbs - Page 21
of Ascent/Descent Current Elevation Getting Started Page Basics Scale Elevation Profile Selectable Data The Elevation Page The Elevation Page provides the user with the current elevation, rate of ascent/descent, and a profile of elevation changes over distance or time. The UP or DOWN buttons - Garmin eTrex Summit | Owner's Manual (Software Version 3.00 and above) &nbs - Page 22
Indicator The Menu Page The Menu Page gives you access to the eTrex Summit's more advanced features. With the Menu Page you can create and view on each of these advanced features is included in the Reference Section of this manual. Changing the Time Zone To change the time zone: 1. Press the PAGE - Garmin eTrex Summit | Owner's Manual (Software Version 3.00 and above) &nbs - Page 23
the Fun of GPS Navigation Discovering the fun of using your eTrex Summit is as easy as taking a quick walk around an open outdoor area. In this brief exercise, you'll mark your current location (your home for example), travel a short distance away, and then have the eTrex Summit guide you back to - Garmin eTrex Summit | Owner's Manual (Software Version 3.00 and above) &nbs - Page 24
Getting Started Make Yourself at Home Edit Waypoint Name Map Page 10 Renaming Your Waypoint As mentioned earlier, the eTrex Summit assigns a numeric name at the time a waypoint is created. The assigned name can be easily changed to something more meaningful to help identify the waypoint. - Garmin eTrex Summit | Owner's Manual (Software Version 3.00 and above) &nbs - Page 25
to select 'HOME', then press ENTER. The REVIEW WAY- POINT Page appears. 5. Press the UP or DOWN button to highlight 'GOTO', then press ENTER. The Compass Page appears and you're ready to begin navigating! Heading in the Right Direction The eTrex Summit guides you back to where you started using the - Garmin eTrex Summit | Owner's Manual (Software Version 3.00 and above) &nbs - Page 26
1. Press the PAGE button to switch to the POINTER or MAP Page. Press ENTER. 2. Highlight 'STOP NAVIGATION' on the OPTIONS Page and press ENTER. Clearing a Cluttered Map Display After you have used the eTrex Summit a few times, the map display will become a bit messy from keeping track of your every - Garmin eTrex Summit | Owner's Manual (Software Version 3.00 and above) &nbs - Page 27
press ENTER. 2. Press the UP or DOWN button to choose the setting that you desire. 3. Press ENTER to save the setting. • Advanced SkyView: When you select the Advanced SkyView feature the eTrex Summit displays a different SkyView Page containing more detailed information on the satellites, including - Garmin eTrex Summit | Owner's Manual (Software Version 3.00 and above) &nbs - Page 28
Advanced SkyView Page Options Advanced SkyView Page Receiver Status Directly Overhead Horizon Advanced SkyView Page described on page 13. • Orient Sky Northward/Orient Sky Ahead: As set from the factory, the eTrex Summit orients the satellite view with your current track toward the top of the - Garmin eTrex Summit | Owner's Manual (Software Version 3.00 and above) &nbs - Page 29
when you move. A blinking "?" means the eTrex Summit has lost satellite reception. You should reposition the eTrex Summit or move to a place that has a clear view of the sky. Map Page Options Selecting 'Orient Map Ahead' from the Map Page options orients the map to the direction you are moving - Garmin eTrex Summit | Owner's Manual (Software Version 3.00 and above) &nbs - Page 30
'N Go' or 'Set Course' feature of the eTrex Summit, hold the unit level and align the user to visually locate a landmark and lock its magnetic bearing. Once a bearing is locked you have the option of creating a projection waypoint or navigating along the locked bearing. Sight 'N' Go requires a GPS - Garmin eTrex Summit | Owner's Manual (Software Version 3.00 and above) &nbs - Page 31
user to visually locate a landmark, lock in a bearing to the point and begin navigation on that bearing. When using the Set Course feature the Pointer points the direction you need to navigate SET COURSE', then press ENTER. The eTrex Summit begins navigation on the locked bearing 6. To end navigation - Garmin eTrex Summit | Owner's Manual (Software Version 3.00 and above) &nbs - Page 32
Pointer Page Options Pointer Page Options User-Selectable Data Field 18 You can also change the fields at the bottom of the Pointer Page to display different POINTER Page, press the UP or DOWN button and scroll through the available options, stopping on the data you want the eTrex Summit to display. - Garmin eTrex Summit | Owner's Manual (Software Version 3.00 and above) &nbs - Page 33
, then press the PAGE button to return to the Trip Computer Page. All available options, including those that display information only when you are actively navigating, are listed on page 20. • Reset Max Speed: Resets your maximum speed to zero. • Reset Trip: Resets all the data in the Trip Computer - Garmin eTrex Summit | Owner's Manual (Software Version 3.00 and above) &nbs - Page 34
are traveling. • Lat/Lon - the current GPS position. • Location - shows your current latitude - (Moving Average) the average speed while the unit is moving. • Next Dest* - (Next Destination location. • Sunset - the time at which the sun sets on this day at the current location. • Time of navigating. - Garmin eTrex Summit | Owner's Manual (Software Version 3.00 and above) &nbs - Page 35
the Elevation Page basics explained on page 7, there are several options that allow the user to customize the elevation profile display. 'PLOT OVER TIME' sets the elevation profile to display changes over a set period of time. Elevation Page Options To select 'PLOT OVER TIME': 1. With the ELEVATION - Garmin eTrex Summit | Owner's Manual (Software Version 3.00 and above) &nbs - Page 36
profile to display data over .2 miles, .5 miles, 1 miles, 5 miles, 10 miles, 15 miles, or 25 miles. To set Zoom Distance: 1. With the ELEVATION Page displayed, press ENTER to display the options list. 2. Press the UP or DOWN button to highlight 'ZOOM DISTANCE', then - Garmin eTrex Summit | Owner's Manual (Software Version 3.00 and above) &nbs - Page 37
The 'VIEW POINTS' options allows you to scroll through the stored elevation profile and view a single point along the profile. When the pointer is stopped at a location along the profile the elevation, time of day and date the point was created are displayed. View Points: 1. With the ELEVATION Page - Garmin eTrex Summit | Owner's Manual (Software Version 3.00 and above) &nbs - Page 38
Page Data Fields The Elevation Page Data Field has 11 user selectable options. On the Elevation Page, the UP and VERTICAL SPEED-Vertical Speed. PRESSURE-Current Normalized or Ambient pressure based on the pressure setting in System Setup, see page 51. 12HRS PRESSR-Tracks pressure changes over a 12 - Garmin eTrex Summit | Owner's Manual (Software Version 3.00 and above) &nbs - Page 39
Menu Page Selections The Menu Page turns the eTrex Summit into a powerful navigation tool. With the Menu Page you can customize the display, transfer information from a computer to the eTrex Summit and back again, and manage and organize all of your waypoints. Now let's take a detailed look at each - Garmin eTrex Summit | Owner's Manual (Software Version 3.00 and above) &nbs - Page 40
the 'OK' field, then press ENTER. Your location with the new latitude/longitude is now stored in memory. The 'EDIT LOCATION' Page displays on-screen instructions on how to edit the 26 waypoint location. - Garmin eTrex Summit | Owner's Manual (Software Version 3.00 and above) &nbs - Page 41
to edit, locate the nine nearest waypoints, or delete all of the user waypoints. To select a waypoint: 1. Press the PAGE button and switch or DOWN button to select the desired waypoint. Once selected, press ENTER. The REVIEW WAYPOINT Page appears. To delete all waypoints: 1. On the WAYPOINT Page, - Garmin eTrex Summit | Owner's Manual (Software Version 3.00 and above) &nbs - Page 42
You can also delete the waypoint, display the waypoint on the Map Page, start a GOTO, view Hunt/Fish and Sun/Moon information for the waypoint, and project a new waypoint using the selected waypoint as a reference. You can access the Review Waypoint Page from the Waypoints Page (see page 27 for more - Garmin eTrex Summit | Owner's Manual (Software Version 3.00 and above) &nbs - Page 43
to highlight the 'OK' field, then press ENTER. The REVIEW WAYPOINT Page appears with the new elevation displayed. To change the Review Waypoint Page The 'ENTER CORRECT ELEVATION' Page allows you to change the elevation for the waypoint. The 'EDIT LOCATION' Page displays on-screen instructions - Garmin eTrex Summit | Owner's Manual (Software Version 3.00 and above) &nbs - Page 44
can press the UP/DOWN buttons to zoom in and out on the map. 3. To return to the Waypoints Page, press the PAGE button. To start a GOTO: 1. Select a waypoint on the WAYPOINTS Page and press ENTER. The REVIEW WAYPOINT Page appears. 2. Press the UP or DOWN button to highlight 'GOTO'. 3. Press ENTER - Garmin eTrex Summit | Owner's Manual (Software Version 3.00 and above) &nbs - Page 45
chosen location (waypoint) and date. To view the Hunt /Fish Page: 1. On the REVIEW WAYPOINT Page, press the UP or DOWN button and highlight 'HUNT/ FISH'. Press the well as the Moon Phase for the waypoint location and date. 3. You can set the date at which you want to view the sun and moon position ( - Garmin eTrex Summit | Owner's Manual (Software Version 3.00 and above) &nbs - Page 46
Distance Field Bearing Field Project Waypoint Page Edit Number Page 32 Using the Project feature, the eTrex Summit can create a waypoint at a specified distance and bearing using an existing waypoint as a 'GOTO' and press ENTER to save the waypoint and begin direct navigation to the point. - Garmin eTrex Summit | Owner's Manual (Software Version 3.00 and above) &nbs - Page 47
guide you to destination waypoints. However, the route feature is more useful for navigating to multiple points along a path. When you reach one waypoint, the eTrex Summit automatically guides , you activate the route feature and the receiver begins navigation toward the first waypoint in the route. - Garmin eTrex Summit | Owner's Manual (Software Version 3.00 and above) &nbs - Page 48
your route. You can also plan a route using Garmin MapSource on a PC and upload the route to the eTrex Summit. See your Garmin dealer for more information on using MapSource (MapSource is an optional accessory and is not included with the eTrex Summit). To activate a route: 1. From the ROUTES Page - Garmin eTrex Summit | Owner's Manual (Software Version 3.00 and above) &nbs - Page 49
Editing a Route You can add and/or remove waypoints into an existing route. To insert a waypoint into a route: 1. Press the PAGE button and switch to the MENU Page. Press the UP or DOWN button and highlight 'ROUTES.' Press ENTER. 2 Select the desired route and press ENTER. 3 Select the waypoint you - Garmin eTrex Summit | Owner's Manual (Software Version 3.00 and above) &nbs - Page 50
in the unit's memory, you can use the Track Log information to navigate. You can also review the saved Track Log on the map, review the Track Log's elevation profile, and use the Track Setup page to change the way tracks are recorded. You can save a total of ten Track Logs in the eTrex Summit. The - Garmin eTrex Summit | Owner's Manual (Software Version 3.00 and above) &nbs - Page 51
'YES' and press ENTER to clear the current Track Log. To show a map of the saved track: 1. With the TRACK LOG page displayed highlight a 'SAVED ' and press ENTER. 2. Press the UP or DOWN button to select 'SHOW MAP', then press ENTER. The 'SAVED TRACK' is graphically displayed. When finished highlight - Garmin eTrex Summit | Owner's Manual (Software Version 3.00 and above) &nbs - Page 52
options are 'TRACBACK,' 'SHOW MAP,' 'ELEVATION,' and 'DELETE'. navigate to 'END'. If you want to track back to the starting point, navigate to 'BEGIN'. 38 Track Log Elevation Profile To start TracBack Navigation point. The POINTER Page appears guiding you to the destination you selected. - Garmin eTrex Summit | Owner's Manual (Software Version 3.00 and above) &nbs - Page 53
the way the eTrex Summit records tracks. This page contains options for turning the track recording on or off, setting the record interval, enter the desired distance or time units for recording track points. Wrap When Full-if you select 'YES,' the eTrex will overwrite the beginning track points - Garmin eTrex Summit | Owner's Manual (Software Version 3.00 and above) &nbs - Page 54
, hold the unit as level as possible for optimum performance. The eTrex Summit calibrates the altimeter automatically using GPS altitude. If you know the exact current elevation or barometric pressure, you can calibrate the altimeter manually. Calibration Page The eTrex Summit can automatically - Garmin eTrex Summit | Owner's Manual (Software Version 3.00 and above) &nbs - Page 55
be asked 'DO YOU WANT TO USE CURRENT GPS ALTITUDE'? If you do highlight 'YES' and manual. Highlight 'OK' and press ENTER to return to the MENU Page. Setup Page The Setup Page allows you to customize the eTrex Summit. On the Setup Page you can change coordinate systems, map datums, and distance units - Garmin eTrex Summit | Owner's Manual (Software Version 3.00 and above) &nbs - Page 56
eight pre-programmed zones. To change the time zone, follow the steps given on page 8. UTC Offset You can use the UTC Offset field to manually set the eTrex Summit to match any time zone in the world. To access the UTC Offset field, select 'OTHER' for the time zone, then enter the desired - Garmin eTrex Summit | Owner's Manual (Software Version 3.00 and above) &nbs - Page 57
'SETUP' page. Units Page Using your eTrex Summit with a paper map increases the navigation power of both. If you are going to use a map in conjunction with the eTrex Summit, you must select the position format (grid), map datum, map units, and north reference to match the map's units. This is the - Garmin eTrex Summit | Owner's Manual (Software Version 3.00 and above) &nbs - Page 58
figure the eTrex Summit for compatibility with custom designed grids. We recommend surfing the net for links to Garmin user-grid and user datum information. There are also excellent navigation and GPS articles available on-line which will enhance your overall knowledge of GPS. Map Datums A map datum - Garmin eTrex Summit | Owner's Manual (Software Version 3.00 and above) &nbs - Page 59
the UP or DOWN button to select the 'MAP DATUMS' field. Press ENTER. 4. Press the UP or DOWN button to select the desired datum. Press ENTER. Distance/Speed Units The eTrex Summit lets you select statute (the default setting), nautical, or metric units of measure for all speed and distance readouts - Garmin eTrex Summit | Owner's Manual (Software Version 3.00 and above) &nbs - Page 60
select 'UNITS'. Press ENTER. The UNITS Page appears. 3. Press the UP or DOWN button to select the 'PRESSURE' field. Press ENTER. 4. Press the UP or DOWN button to select 'INCHES' or 'MILLIBARS'. Press ENTER. Press PAGE to select the page of your choice. Angle You can set the eTrex Summit to display - Garmin eTrex Summit | Owner's Manual (Software Version 3.00 and above) &nbs - Page 61
GPS (DGPS) beacon receivers to the eTrex Summit. Below is a description of the available formats. Input/Output Formats • GARMIN GARMIN DGPS - allows DGPS input using a Garmin beacon receiver and a standard RTCM SC-104 format and DGPS tuning. • NMEA OUT - supports format and supports the output download - Garmin eTrex Summit | Owner's Manual (Software Version 3.00 and above) &nbs - Page 62
to control a Garmin differential beacon receiver directly from your eTrex Summit. You can enter the beacon frequency and bit rate when you select 'User' from the Beacon pop-up list to manually tune the receiver (you can also 'scan' if you don't know what the nearby station is, but the unit could - Garmin eTrex Summit | Owner's Manual (Software Version 3.00 and above) &nbs - Page 63
the UP or DOWN button to select the 'USE GPS HEADING WHEN EXCEEDING' field, then press ENTER. of a map's grid. Map makers try to align the vertical lines on a map with ' eTrex Summit can be set to disable the Electronic Compass above a user selected speed. This helps to conserve battery power. Set - Garmin eTrex Summit | Owner's Manual (Software Version 3.00 and above) &nbs - Page 64
on the map point exactly User Defined Grid' (USER) to correct for the difference between Grid North and True North manually. The eTrex Summit reflects the North Reference setting when using the GPS press ENTER, the UNITS Page returns to the factory settings. To manually set the variation or - Garmin eTrex Summit | Owner's Manual (Software Version 3.00 and above) &nbs - Page 65
of the eTrex Summit inside a closed building where satellite reception is not possible. There is no navigation possible in 'DEMO' mode, but you can simulate many fo the unit's functions. If you select the 'DEMO' mode, a window appears asking you to verify that you want to turn the GPS receiver off - Garmin eTrex Summit | Owner's Manual (Software Version 3.00 and above) &nbs - Page 66
to activate the compass and display the Pointer Page Compass The eTrex Summit allows you to turn the Electronic Compass on and off. to highlight the desired mode and press ENTER. Altimeter The Altimeter can use GPS altitude to perform an automatic calibration. While this is not as accurate as the - Garmin eTrex Summit | Owner's Manual (Software Version 3.00 and above) &nbs - Page 67
desired selection. Press ENTER. Software Version The Software Page shows the eTrex Summit's current software version. To update the eTrex Summit's software, visit the Garmin Web site (www.garmin.com). Defaults The 'DEFAULTS' option resets all of the 'SYSTEM' setting to the factory defaults. Setup - Garmin eTrex Summit | Owner's Manual (Software Version 3.00 and above) &nbs - Page 68
degradation to 100m 2DRMS under the U.S. DOD Selective Availability program. 2With optional Garmin Differential Beacon Receiver Input. 3Subject to proper user calibration. 4The temperature rating for the eTrex Summit may exceed the usable range of some batteries. Alkaline batteries can rupture at - Garmin eTrex Summit | Owner's Manual (Software Version 3.00 and above) &nbs - Page 69
can receive satellite signals anywhere in the world, at any time. One of the biggest benefits over previous land-based navigation systems is GPS works GPS receiver can determine a 3D position fix which includes latitude, longitude, and altitude. By continuously updating your position, a GPS receiver - Garmin eTrex Summit | Owner's Manual (Software Version 3.00 and above) &nbs - Page 70
have received WAAS differential correction, 'DIFF' appears below the 'Ready to Navigate' message. To learn more about the WAAS system, its satellite positions and current state of development, visit the FAA Web site (http://gps.faa.gov). Since WAAS requires CPU resources of the eTrex Summit to - Garmin eTrex Summit | Owner's Manual (Software Version 3.00 and above) &nbs - Page 71
. Can I use the eTrex Summit indoors? Not for navigation, but you can edit existing waypoints and routes, and you can use the Demo mode to practice (see page 51). Do I need to subscribe to a service to use the eTrex Summit? No. The GPS satellites are owned by the United States Department of Defense - Garmin eTrex Summit | Owner's Manual (Software Version 3.00 and above) &nbs - Page 72
Automotive Mounting Bracket Handlebar Mounting Kit Cigarette Lighter Adapter 58 Accessories See your Garmin dealer or visit www.garmin.com for availability. Manuals *Owner's Manual Part No. 190-00396-00 *Quick Start Guide Part No. 190-00396-01 Bracket Mounts Automotive Mounting Bracket - Garmin eTrex Summit | Owner's Manual (Software Version 3.00 and above) &nbs - Page 73
map and downloading them to your eTrex Summit. * Included with unit NOTE: The Cigarette Lighter Adapter (part number 010-10203-00) converts 12 VDC to 3 VDC output for the eTrex Summit. This adapter is not interchangeable with the car power adapters designed for the Garmin VHF 720 and 725, GPS - Garmin eTrex Summit | Owner's Manual (Software Version 3.00 and above) &nbs - Page 74
/or a second GPS receiver. The NMEA 0183 version 2.0 interface format is supported by the eTrex Summit and enables the unit to drive up to three NMEA devices. NMEA 0183 Version 2.0 Approved Sentences: GPGGA, GPGLL, GPGSA, GPGSV, GPRMB, GPRMC, GPRTE, GPWPL, GPBOD, HCHDG Garmin Proprietary Sentences - Garmin eTrex Summit | Owner's Manual (Software Version 3.00 and above) &nbs - Page 75
eTrex Summit coordinates do not match the location on your map: Check to make sure the eTrex Summit is configured to use the same datum as your map. eTrex Summit using the GPS to provide heading information? Press and hold the PAGE key to reactivate the Electronic Compass. Appendix G Troubleshooting - Garmin eTrex Summit | Owner's Manual (Software Version 3.00 and above) &nbs - Page 76
eTrex Summit has problems receiving satellite signals, you will be prompted to answer some questions. A. If you are using the eTrex Summit indoors: The message 'TROUBLE ENTER. 3. eTrex Summit asks: 'IS TODAY dd-mmm-yy?' If you answer 'YES' (the date matches the current date) the unit will continue - Garmin eTrex Summit | Owner's Manual (Software Version 3.00 and above) &nbs - Page 77
eTrex Summit Description x F FAQs 57 FCC Compliance iii Final ETA 20 ETE 20 Final Destination 20 Final Distance 20 G Getting Started 1 GOTO 5, 11, 28, 30, 33 GPS Maintenance viii MapSource 34 Map Datum 44, 45 Map Orientation 4, 15 Map Page 4, 15 Map Scale 4 Mark Waypoint 9, 25, 26 Max Speed - Garmin eTrex Summit | Owner's Manual (Software Version 3.00 and above) &nbs - Page 78
Set Course 17 Sight 'N Go 16, 17 SkyView Page 1, 3, 13 Software License Agreement vii Software Version 53 Specifications 54 Speed 6, 18, 20 Maximum 18, 20 Overall 20 Vertical 20 Stopped Time 20 Stop Navigation , ix Trip Time 18, 20 Troubleshooting 61 True North 49 Turn 20 U Units Page 43, 44, 45, 46 - Garmin eTrex Summit | Owner's Manual (Software Version 3.00 and above) &nbs - Page 79
- Garmin eTrex Summit | Owner's Manual (Software Version 3.00 and above) &nbs - Page 80
free software updates (excluding map data) throughout the life of your Garmin products, visit the Garmin Web site at www.garmin.com. © Copyright 2004 Garmin Ltd. or its subsidiaries Garmin International, Inc. 1200 East 151st Street, Olathe, Kansas 66062, U.S.A. Garmin (Europe) Ltd. Unit 5, The
-
 1
1 -
 2
2 -
 3
3 -
 4
4 -
 5
5 -
 6
6 -
 7
7 -
8
-
9
-
10
-
11
-
12
-
13
-
14
-
15
-
16
-
17
-
18
-
19
-
20
-
21
-
22
-
23
-
24
-
25
-
26
-
27
-
28
-
29
-
30
-
31
-
32
-
33
-
34
-
35
-
36
-
37
-
38
-
39
-
40
-
41
-
42
-
43
-
44
-
45
-
46
-
47
-
48
-
49
-
50
-
51
-
52
-
53
-
54
-
55
-
56
-
57
-
58
-
59
-
60
-
61
-
62
-
63
-
64
-
65
-
66
-
67
-
68
-
69
-
70
-
71
-
72
-
73
-
74
-
75
-
76
-
77
-
78
-
79
-
80
 |
 |

owner’s manual
eTrex Summit
®
personal navigator
®