Garmin eTrex Summit Owner's Manual (Software Version 3.00 and above) &nbs - Page 64
North Reference
 |
View all Garmin eTrex Summit manuals
Add to My Manuals
Save this manual to your list of manuals |
Page 64 highlights
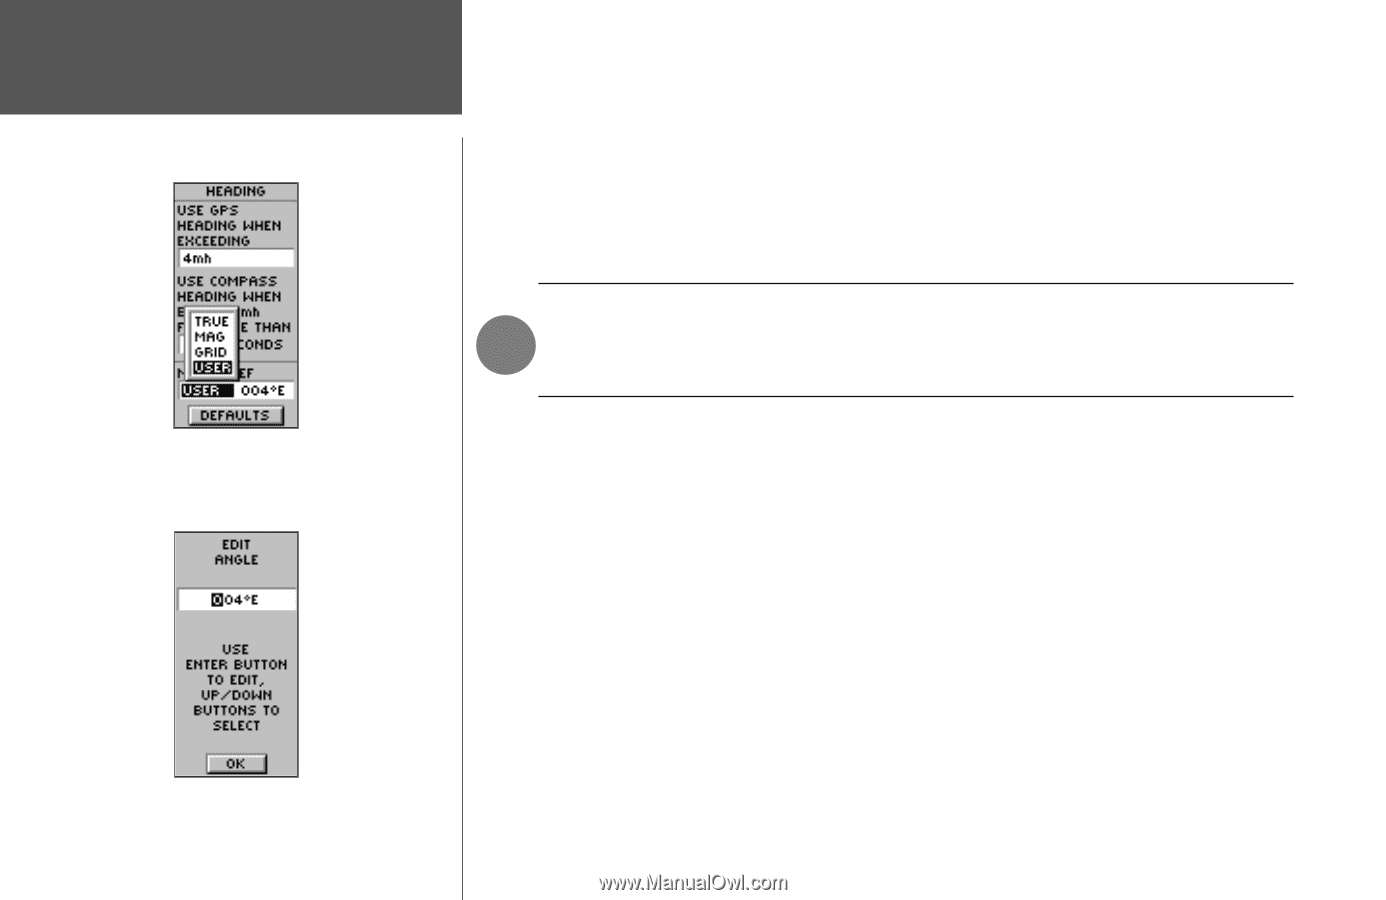
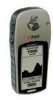
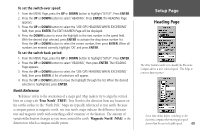
Setup Page North Reference Due to errors introduced when map makers flatten the earth's sphere onto paper, not all of the grid lines drawn on the map point exactly to the north pole, so the north indicated by the grid lines is called 'Grid North' (GRID). But the difference is usually small enough that 'Grid' north can be considered the same as True North for travelling on land. If necessary, you can select a 'User Defined Grid' (USER) to correct for the difference between Grid North and True North manually. The eTrex Summit reflects the North Reference setting when using the GPS or Electronic Compass for a bearing. The Electronic Compass reflects the North Reference setting. If you have selected 'TRUE NORTH' the Electronic Compass points 'TRUE NORTH,' not Magnetic North. The eTrex Summit automatically adjusts the variation/ declination. While it should rarely be needed the user can manually adjust the variation/declination. To change the North Reference: 1. From the MENU Page, press the UP or DOWN button to highlight 'SETUP'. Press ENTER. 2. Press the UP or DOWN button to highlight 'HEADING', then press ENTER. The HEADING Page appears. 3. Press the UP or DOWN button to select the 'NORTH REF' field, then press ENTER. 4. Press the UP or DOWN button to select the desired reference. Press ENTER. Press PAGE to return to the page of your choice. When you select the 'DEFAULTS' field and press ENTER, the UNITS Page returns to the factory settings. To manually set the variation or declination, highlight the Angle field, press ENTER and input a new angle. 50
-
 1
1 -
2
-
3
-
4
-
5
-
6
-
7
-
8
-
9
-
10
-
11
-
12
-
13
-
14
-
15
-
16
-
17
-
18
-
19
-
20
-
21
-
22
-
23
-
24
-
25
-
26
-
27
-
28
-
29
-
30
-
31
-
32
-
33
-
34
-
35
-
36
-
37
-
38
-
39
-
40
-
41
-
42
-
43
-
44
-
45
-
46
-
47
-
48
-
49
-
50
-
51
-
52
-
53
-
54
-
55
-
56
-
57
-
58
-
 59
59 -
 60
60 -
 61
61 -
 62
62 -
 63
63 -
 64
64 -
 65
65 -
 66
66 -
 67
67 -
 68
68 -
 69
69 -
70
-
71
-
72
-
73
-
74
-
75
-
76
-
77
-
78
-
79
-
80
 |
 |