Garmin eTrex Summit Owner's Manual (Software Version 3.00 and above) &nbs - Page 23
Let the Fun Begin
 |
View all Garmin eTrex Summit manuals
Add to My Manuals
Save this manual to your list of manuals |
Page 23 highlights
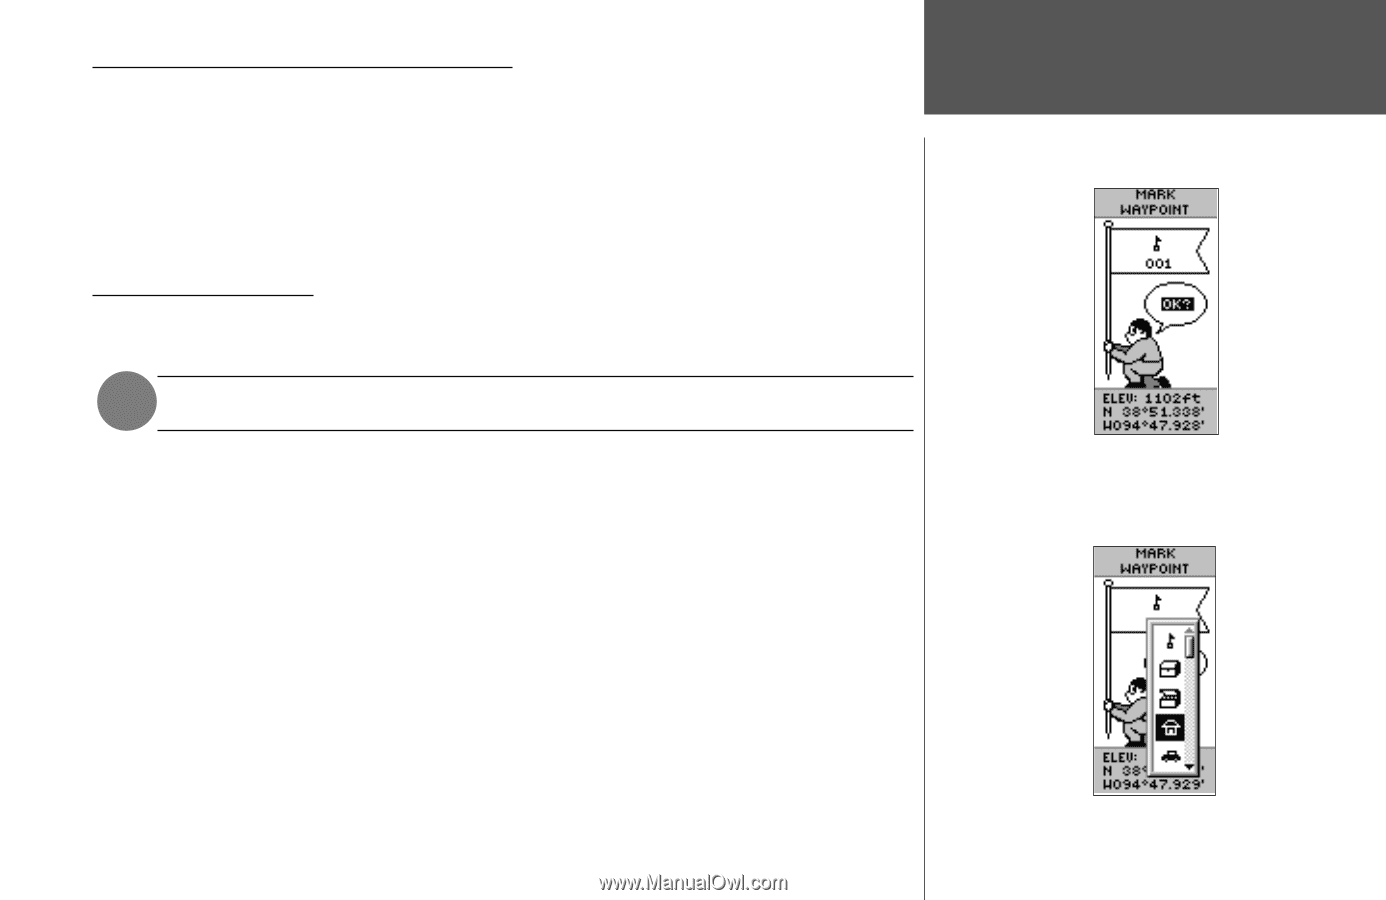
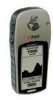
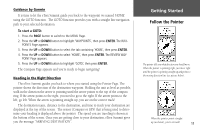
Discovering the Fun of GPS Navigation Discovering the fun of using your eTrex Summit is as easy as taking a quick walk around an open outdoor area. In this brief exercise, you'll mark your current location (your home for example), travel a short distance away, and then have the eTrex Summit guide you back to where you started. (To get the most out of this exercise, make sure to walk for at least the time noted for each step.) Creating a Waypoint The first step in the exercise is to mark your location as a waypoint. NOTE: The unit must be "READY TO NAVIGATE" before you mark a waypoint. To mark a waypoint: Press and hold the ENTER button to activate the MARK WAYPOINT Page. The waypoint is assigned a numeric name at the time it is created. You could press ENTER and save the waypoint now, but for this exercise, you will make some changes to the waypoint first. The eTrex Summit comes equipped with 31 different waypoint symbols that can be displayed on the map to help quickly identify the waypoints. To change the waypoint symbol: 1. On the MARK WAYPOINT Page, press the UP or DOWN button to highlight the waypoint symbol (above the waypoint name), then press ENTER. 2. Press the UP or DOWN button to scroll through the symbols and highlight the house symbol. Press ENTER. Getting Started Let the Fun Begin The Latitude, Longitude, and Elevation are displayed along the bottom of the MARK WAYPOINT and REVIEW WAYPOINT Pages. You can select from 31 symbols to represent a waypoint on the map. 9
-
 1
1 -
2
-
3
-
4
-
5
-
6
-
7
-
8
-
9
-
10
-
11
-
12
-
13
-
14
-
15
-
16
-
17
-
 18
18 -
 19
19 -
 20
20 -
 21
21 -
 22
22 -
 23
23 -
 24
24 -
 25
25 -
 26
26 -
 27
27 -
 28
28 -
29
-
30
-
31
-
32
-
33
-
34
-
35
-
36
-
37
-
38
-
39
-
40
-
41
-
42
-
43
-
44
-
45
-
46
-
47
-
48
-
49
-
50
-
51
-
52
-
53
-
54
-
55
-
56
-
57
-
58
-
59
-
60
-
61
-
62
-
63
-
64
-
65
-
66
-
67
-
68
-
69
-
70
-
71
-
72
-
73
-
74
-
75
-
76
-
77
-
78
-
79
-
80
 |
 |