Garmin eTrex Summit Owner's Manual (Software Version 3.00 and above) &nbs - Page 24
Make Yourself at Home
 |
View all Garmin eTrex Summit manuals
Add to My Manuals
Save this manual to your list of manuals |
Page 24 highlights
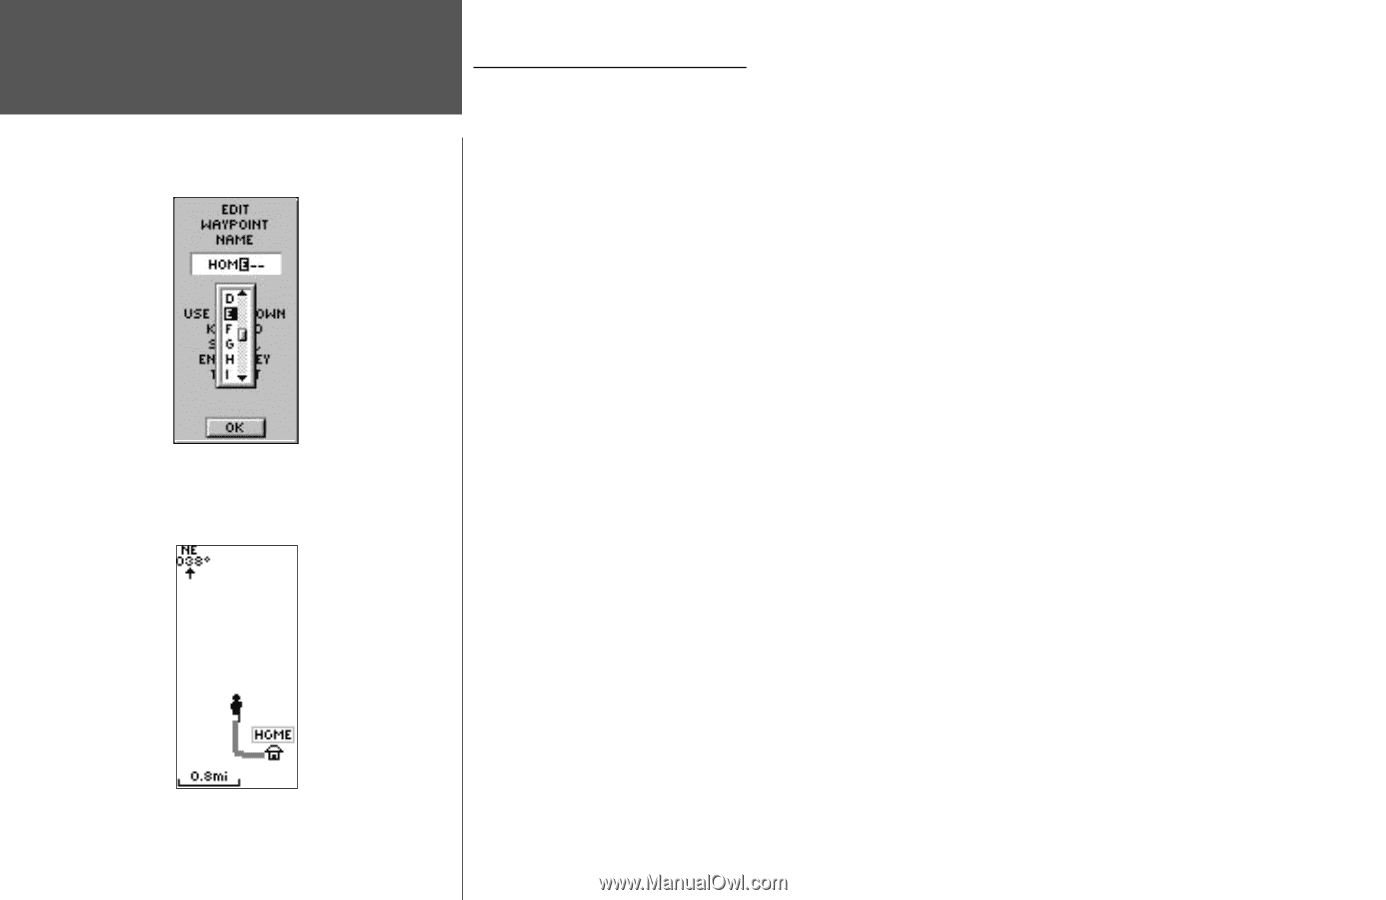
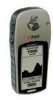
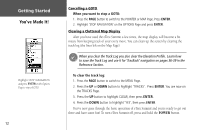
Getting Started Make Yourself at Home Edit Waypoint Name Map Page 10 Renaming Your Waypoint As mentioned earlier, the eTrex Summit assigns a numeric name at the time a waypoint is created. The assigned name can be easily changed to something more meaningful to help identify the waypoint. The name can be up to six characters in length. For this exercise, you will name the waypoint "HOME". To change the waypoint name: 1 On the MARK WAYPOINT Page, press the UP or DOWN button to highlight the Waypoint Name '001'. Press ENTER. The EDIT WAYPOINT NAME Page appears. 2. Press ENTER. Press the UP or DOWN button to scroll through the letter selections. Select 'H' and press ENTER. Repeat this process and finish the word 'HOME'. 3. Press the UP or DOWN button to highlight the 'OK' field, then press ENTER. The MARK WAYPOINT Page appears. 4. Press the UP or DOWN button to highlight the 'OK' field, then press ENTER. Your location, named HOME, is now marked and stored in memory. Now that you've marked your location, it's time to go for a walk. Press the PAGE button and switch to the Map Page. Walk in a straight line for 2-3 minutes at a moderate pace and watch the Map Page. Your location is shown by the figure in the middle of the screen. As you move, the animated figure walks and a line-called a "track"-appears along the path you have just covered. If you do not see the animated figure walk, you may need to zoom in closer by pressing the DOWN button. Now take a sharp right or left turn and walk for another 2-3 minutes.
-
 1
1 -
2
-
3
-
4
-
5
-
6
-
7
-
8
-
9
-
10
-
11
-
12
-
13
-
14
-
15
-
16
-
17
-
18
-
 19
19 -
 20
20 -
 21
21 -
 22
22 -
 23
23 -
 24
24 -
 25
25 -
 26
26 -
 27
27 -
 28
28 -
 29
29 -
30
-
31
-
32
-
33
-
34
-
35
-
36
-
37
-
38
-
39
-
40
-
41
-
42
-
43
-
44
-
45
-
46
-
47
-
48
-
49
-
50
-
51
-
52
-
53
-
54
-
55
-
56
-
57
-
58
-
59
-
60
-
61
-
62
-
63
-
64
-
65
-
66
-
67
-
68
-
69
-
70
-
71
-
72
-
73
-
74
-
75
-
76
-
77
-
78
-
79
-
80
 |
 |