HTC Touch Diamond2 User Manual - WM 6.1 - Page 193
Organizing and searching contacts, File as, Select a, picture, Camera, Ring tone, SIM Contact
 |
View all HTC Touch Diamond2 manuals
Add to My Manuals
Save this manual to your list of manuals |
Page 193 highlights
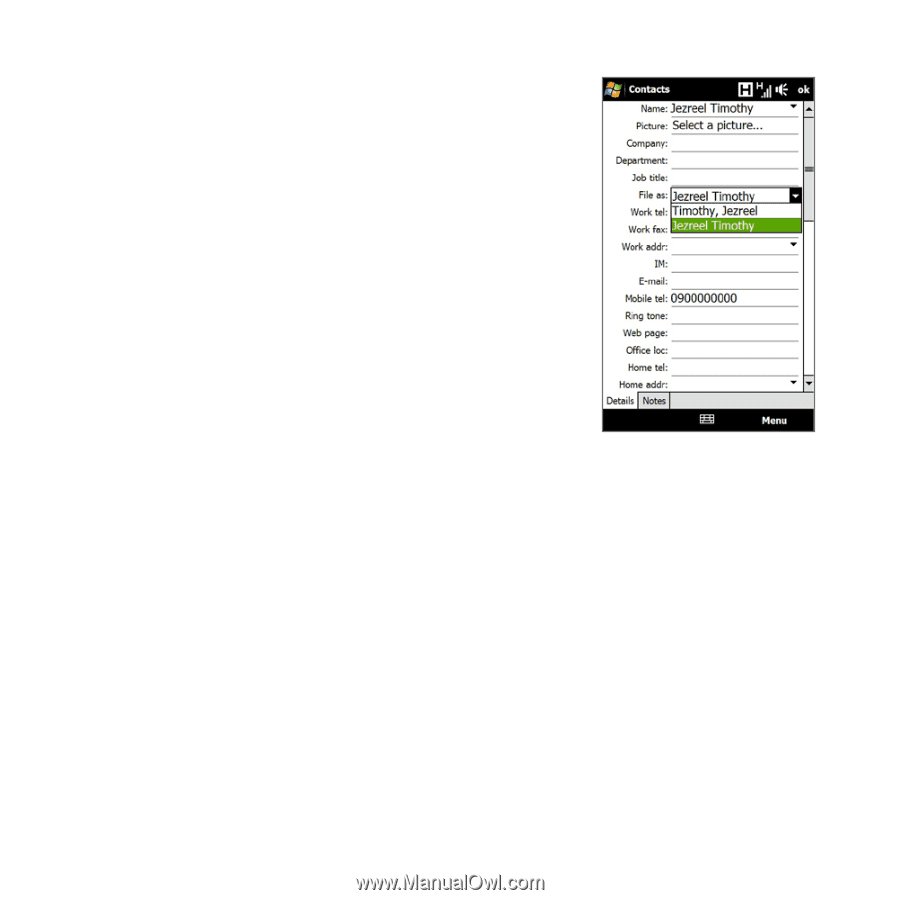
2. In the File as field, choose how you want the contact name to appear in the contact list. 3. To add a photo of the contact, tap Select a picture, and then select the picture file or tap Camera to take a photo of the contact. 4. To assign a ring tone to the contact, tap the Ring tone field, scroll through the list of tones, then select a desired tone. 5. When finished, tap OK. Tip To edit contact information, tap the contact name and then tap Menu > Edit. Programs 193 To add a contact to your SIM card 1. On the Contacts screen, tap New, then select SIM Contact. 2. Enter a contact name and phone number, and then tap OK. Tip You can also use the SIM Manager to add and edit contacts on your SIM card. For more information, see "SIM Manager" in this chapter. Organizing and searching contacts To group similar contacts For easier contact management, you can group contacts by assigning them into categories. 1. Create a new Outlook contact or edit an existing Outlook contact. 2. Tap Categories.
-
 1
1 -
2
-
3
-
4
-
5
-
6
-
7
-
8
-
9
-
10
-
11
-
12
-
13
-
14
-
15
-
16
-
17
-
18
-
19
-
20
-
21
-
22
-
23
-
24
-
25
-
26
-
27
-
28
-
29
-
30
-
31
-
32
-
33
-
34
-
35
-
36
-
37
-
38
-
39
-
40
-
41
-
42
-
43
-
44
-
45
-
46
-
47
-
48
-
49
-
50
-
51
-
52
-
53
-
54
-
55
-
56
-
57
-
58
-
59
-
60
-
61
-
62
-
63
-
64
-
65
-
66
-
67
-
68
-
69
-
70
-
71
-
72
-
73
-
74
-
75
-
76
-
77
-
78
-
79
-
80
-
81
-
82
-
83
-
84
-
85
-
86
-
87
-
88
-
89
-
90
-
91
-
92
-
93
-
94
-
95
-
96
-
97
-
98
-
99
-
100
-
101
-
102
-
103
-
104
-
105
-
106
-
107
-
108
-
109
-
110
-
111
-
112
-
113
-
114
-
115
-
116
-
117
-
118
-
119
-
120
-
121
-
122
-
123
-
124
-
125
-
126
-
127
-
128
-
129
-
130
-
131
-
132
-
133
-
134
-
135
-
136
-
137
-
138
-
139
-
140
-
141
-
142
-
143
-
144
-
145
-
146
-
147
-
148
-
149
-
150
-
151
-
152
-
153
-
154
-
155
-
156
-
157
-
158
-
159
-
160
-
161
-
162
-
163
-
164
-
165
-
166
-
167
-
168
-
169
-
170
-
171
-
172
-
173
-
174
-
175
-
176
-
177
-
178
-
179
-
180
-
181
-
182
-
183
-
184
-
185
-
186
-
187
-
 188
188 -
 189
189 -
 190
190 -
 191
191 -
 192
192 -
 193
193 -
 194
194 -
 195
195 -
 196
196 -
 197
197 -
 198
198 -
199
-
200
-
201
-
202
-
203
-
204
-
205
-
206
-
207
-
208
-
209
-
210
-
211
-
212
-
213
-
214
-
215
-
216
-
217
-
218
-
219
-
220
-
221
-
222
-
223
-
224
-
225
-
226
-
227
-
228
-
229
-
230
-
231
-
232
 |
 |