HP ProBook 6550b HP ProBook User Guide - Windows XP - Page 65
Removing an optical disc (CD, DVD, or BD), Troubleshooting - resolution
 |
View all HP ProBook 6550b manuals
Add to My Manuals
Save this manual to your list of manuals |
Page 65 highlights
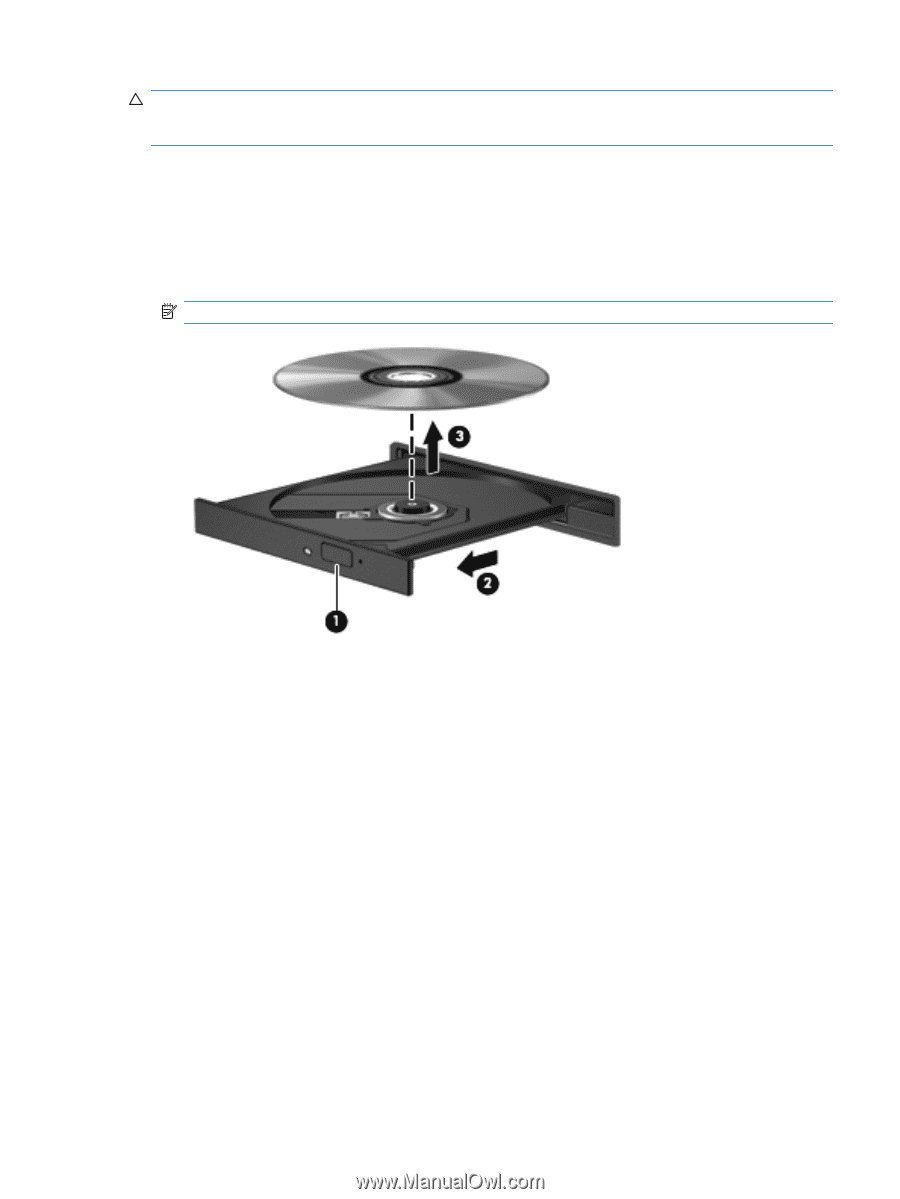
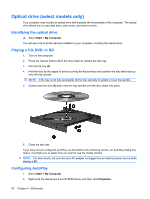
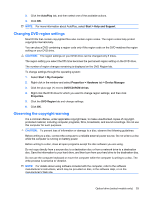
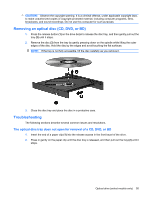
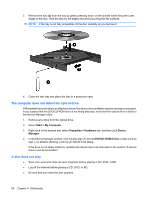
CAUTION: Observe the copyright warning. It is a criminal offense, under applicable copyright laws, to make unauthorized copies of copyright-protected material, including computer programs, films, broadcasts, and sound recordings. Do not use this computer for such purposes. Removing an optical disc (CD, DVD, or BD) 1. Press the release button (1) on the drive bezel to release the disc tray, and then gently pull out the tray (2) until it stops. 2. Remove the disc (3) from the tray by gently pressing down on the spindle while lifting the outer edges of the disc. Hold the disc by the edges and avoid touching the flat surfaces. NOTE: If the tray is not fully accessible, tilt the disc carefully as you remove it. 3. Close the disc tray and place the disc in a protective case. Troubleshooting The following sections describe several common issues and resolutions. The optical disc tray does not open for removal of a CD, DVD, or BD 1. Insert the end of a paper clip (1) into the release access in the front bezel of the drive. 2. Press in gently on the paper clip until the disc tray is released, and then pull out the tray (2) until it stops. Optical drive (select models only) 55
-
 1
1 -
2
-
3
-
4
-
5
-
6
-
7
-
8
-
9
-
10
-
11
-
12
-
13
-
14
-
15
-
16
-
17
-
18
-
19
-
20
-
21
-
22
-
23
-
24
-
25
-
26
-
27
-
28
-
29
-
30
-
31
-
32
-
33
-
34
-
35
-
36
-
37
-
38
-
39
-
40
-
41
-
42
-
43
-
44
-
45
-
46
-
47
-
48
-
49
-
50
-
51
-
52
-
53
-
54
-
55
-
56
-
57
-
58
-
59
-
 60
60 -
 61
61 -
 62
62 -
 63
63 -
 64
64 -
 65
65 -
 66
66 -
 67
67 -
 68
68 -
 69
69 -
 70
70 -
71
-
72
-
73
-
74
-
75
-
76
-
77
-
78
-
79
-
80
-
81
-
82
-
83
-
84
-
85
-
86
-
87
-
88
-
89
-
90
-
91
-
92
-
93
-
94
-
95
-
96
-
97
-
98
-
99
-
100
-
101
-
102
-
103
-
104
-
105
-
106
-
107
-
108
-
109
-
110
-
111
-
112
-
113
-
114
-
115
-
116
-
117
-
118
-
119
-
120
-
121
-
122
-
123
-
124
-
125
-
126
-
127
-
128
-
129
-
130
-
131
-
132
-
133
-
134
-
135
-
136
-
137
-
138
-
139
-
140
-
141
-
142
-
143
-
144
-
145
-
146
-
147
-
148
-
149
-
150
-
151
-
152
-
153
-
154
-
155
-
156
-
157
-
158
-
159
-
160
-
161
-
162
-
163
-
164
-
165
-
166
-
167
-
168
-
169
-
170
-
171
-
172
-
173
-
174
-
175
 |
 |