HP StorageWorks 2/32 SAN switch 2/32 version 4.0.x installation guide - Page 4

Installing the SAN Switch 2/32 in an HP Series 9000 or EIA Cabinet .. 31

Page 4 highlights

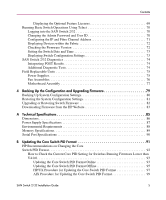
Contents Power Requirements 29 Setting Up the Switch as a Stand-alone Unit 30 Installing the SAN Switch 2/32 in an HP Series 9000 or EIA Cabinet 31 Rack Mount Checklist 31 Installing the Slide Rail Assemblies to the Switch 32 Separating the Inner Slide Rail Assembly from the Outer Slide Rail Assembly 32 Attaching the Inner Slide Rails to the Switch 32 Attaching the Rear or Front Rack Mount Brackets 34 For Rear Rack Access 34 For Front Rack Access 35 Attaching the Outer Slide Rails to the HP 9000 Series Rack 35 Finalizing the Rack Mounting Procedure 38 Positioning the Switch in the HP 9000 Series Rack 38 Securing the Rack Mount Brackets 39 Installing the Switch in the Optional HP System/e Rack 40 Connecting AC Power 45 Power On Self-Test 46 Checking POST Results 46 Configuring SAN Switch 2/32 Network Addressing 47 Requirements 47 Setting Network Addresses via a Serial Connection 47 Connecting the SAN Switch 2/32 to the LAN 51 Core Switch PID Format Summary 52 Important Information on Checking the Core Switch PID Format 52 Optional Configuration Settings 54 Modifying Domain IDs 54 Specifying Custom Status Policies 54 Connecting the SAN Switch 2/32 to the Fabric 56 Verifying Operation 57 Installing Multiple Switches into an Existing SAN 58 Recommendations for Cable Management 59 3 Managing the SAN Switch 2/32 61 Interpreting LED Activity 62 LEDs on the Port Side of the Switch 62 LEDs on the Non-Port Side of the SAN Switch 2/32 65 Management Overview 68 Optional Management Feature - Fabric Manager 69 4 SAN Switch 2/32 Installation Guide

  • 1
  • 2
  • 3
  • 4
  • 5
  • 6
  • 7
  • 8
  • 9
  • 10
  • 11
  • 12
  • 13
  • 14
  • 15
  • 16
  • 17
  • 18
  • 19
  • 20
  • 21
  • 22
  • 23
  • 24
  • 25
  • 26
  • 27
  • 28
  • 29
  • 30
  • 31
  • 32
  • 33
  • 34
  • 35
  • 36
  • 37
  • 38
  • 39
  • 40
  • 41
  • 42
  • 43
  • 44
  • 45
  • 46
  • 47
  • 48
  • 49
  • 50
  • 51
  • 52
  • 53
  • 54
  • 55
  • 56
  • 57
  • 58
  • 59
  • 60
  • 61
  • 62
  • 63
  • 64
  • 65
  • 66
  • 67
  • 68
  • 69
  • 70
  • 71
  • 72
  • 73
  • 74
  • 75
  • 76
  • 77
  • 78
  • 79
  • 80
  • 81
  • 82
  • 83
  • 84
  • 85
  • 86
  • 87
  • 88
  • 89
  • 90
  • 91
  • 92
  • 93
  • 94
  • 95
  • 96
  • 97
  • 98
  • 99
  • 100
  • 101
  • 102
  • 103
  • 104
  • 105
  • 106
  • 107
  • 108
  • 109
  • 110
  • 111
  • 112
  • 113
  • 114
  • 115
  • 116
  • 117
  • 118
  • 119
  • 120
  • 121
  • 122
  • 123
  • 124
  • 125
  • 126

Contents
4
SAN Switch 2/32 Installation Guide
Power Requirements . . . . . . . . . . . . . . . . . . . . . . . . . . . . . . . . . . . . . . . . . . . . . . . . . . . . 29
Setting Up the Switch as a Stand-alone Unit . . . . . . . . . . . . . . . . . . . . . . . . . . . . . . . . . . . . . 30
Installing the SAN Switch 2/32 in an HP Series 9000 or EIA Cabinet . . . . . . . . . . . . . . . . . 31
Rack Mount Checklist . . . . . . . . . . . . . . . . . . . . . . . . . . . . . . . . . . . . . . . . . . . . . . . . . . . 31
Installing the Slide Rail Assemblies to the Switch . . . . . . . . . . . . . . . . . . . . . . . . . . . . . 32
Separating the Inner Slide Rail Assembly from the
Outer Slide Rail Assembly . . . . . . . . . . . . . . . . . . . . . . . . . . . . . . . . . . . . . . . . . . . . 32
Attaching the Inner Slide Rails to the Switch . . . . . . . . . . . . . . . . . . . . . . . . . . . . . . 32
Attaching the Rear or Front Rack Mount Brackets . . . . . . . . . . . . . . . . . . . . . . . . . . . . . 34
For Rear Rack Access . . . . . . . . . . . . . . . . . . . . . . . . . . . . . . . . . . . . . . . . . . . . . . . . 34
For Front Rack Access . . . . . . . . . . . . . . . . . . . . . . . . . . . . . . . . . . . . . . . . . . . . . . . 35
Attaching the Outer Slide Rails to the HP 9000 Series Rack . . . . . . . . . . . . . . . . . . . . . 35
Finalizing the Rack Mounting Procedure . . . . . . . . . . . . . . . . . . . . . . . . . . . . . . . . . . . . 38
Positioning the Switch in the HP 9000 Series Rack . . . . . . . . . . . . . . . . . . . . . . . . . 38
Securing the Rack Mount Brackets . . . . . . . . . . . . . . . . . . . . . . . . . . . . . . . . . . . . . . 39
Installing the Switch in the Optional HP System/e Rack . . . . . . . . . . . . . . . . . . . . . . . . . . . . 40
Connecting AC Power . . . . . . . . . . . . . . . . . . . . . . . . . . . . . . . . . . . . . . . . . . . . . . . . . . . . . . 45
Power On Self-Test. . . . . . . . . . . . . . . . . . . . . . . . . . . . . . . . . . . . . . . . . . . . . . . . . . . . . . . . . 46
Checking POST Results. . . . . . . . . . . . . . . . . . . . . . . . . . . . . . . . . . . . . . . . . . . . . . . . . . 46
Configuring SAN Switch 2/32 Network Addressing . . . . . . . . . . . . . . . . . . . . . . . . . . . . . . . 47
Requirements . . . . . . . . . . . . . . . . . . . . . . . . . . . . . . . . . . . . . . . . . . . . . . . . . . . . . . . . . . 47
Setting Network Addresses via a Serial Connection . . . . . . . . . . . . . . . . . . . . . . . . . . . . 47
Connecting the SAN Switch 2/32 to the LAN . . . . . . . . . . . . . . . . . . . . . . . . . . . . . . . . . . . . 51
Core Switch PID Format Summary . . . . . . . . . . . . . . . . . . . . . . . . . . . . . . . . . . . . . . . . . . . . 52
Important Information on Checking the Core Switch PID Format . . . . . . . . . . . . . . . . . 52
Optional Configuration Settings . . . . . . . . . . . . . . . . . . . . . . . . . . . . . . . . . . . . . . . . . . . . . . . 54
Modifying Domain IDs . . . . . . . . . . . . . . . . . . . . . . . . . . . . . . . . . . . . . . . . . . . . . . . . . . 54
Specifying Custom Status Policies. . . . . . . . . . . . . . . . . . . . . . . . . . . . . . . . . . . . . . . . . . 54
Connecting the SAN Switch 2/32 to the Fabric . . . . . . . . . . . . . . . . . . . . . . . . . . . . . . . . . . . 56
Verifying Operation . . . . . . . . . . . . . . . . . . . . . . . . . . . . . . . . . . . . . . . . . . . . . . . . . . . . . 57
Installing Multiple Switches into an Existing SAN . . . . . . . . . . . . . . . . . . . . . . . . . . . . . . . . 58
Recommendations for Cable Management. . . . . . . . . . . . . . . . . . . . . . . . . . . . . . . . . . . . . . . 59
3
Managing the SAN Switch 2/32 . . . . . . . . . . . . . . . . . . . . . . . . . . . . . . . . . . . . . . .61
Interpreting LED Activity. . . . . . . . . . . . . . . . . . . . . . . . . . . . . . . . . . . . . . . . . . . . . . . . . . . . 62
LEDs on the Port Side of the Switch . . . . . . . . . . . . . . . . . . . . . . . . . . . . . . . . . . . . . . . . 62
LEDs on the Non-Port Side of the SAN Switch 2/32 . . . . . . . . . . . . . . . . . . . . . . . . . . . 65
Management Overview. . . . . . . . . . . . . . . . . . . . . . . . . . . . . . . . . . . . . . . . . . . . . . . . . . . . . . 68
Optional Management Feature – Fabric Manager . . . . . . . . . . . . . . . . . . . . . . . . . . . . . . 69