HP StorageWorks 2/32 SAN switch 2/32 version 4.0.x installation guide - Page 44
Connecting AC Power, Go to the next
 |
View all HP StorageWorks 2/32 manuals
Add to My Manuals
Save this manual to your list of manuals |
Page 44 highlights
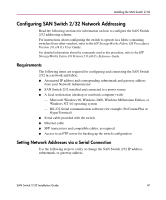
Installing the SAN Switch 2/32 7. Assemble the two inner rails (one on each side) to the switch using (6) #8-32 x 5/16 inch Phillips pan-head screws, and #8 flat washer as shown in Figure 11. Figure 11: Assembling the inner rails Caution: Do not use any screws other than the six that are provided. Use of any longer lengths can cause damage to internal components of the switch. Before tightening screws, make sure that the rails are centered to the overall height of the switch. 8. Insert the switch with the attached inner rails into the outer rails. 9. Install the (2) remaining M5 Torx screws to complete the installation. 10. Go to the next section, "Connecting AC Power" for steps on applying power to the switch. Caution: Do not connect the switch to the network until the IP address is correctly set. For instructions on how to set the IP address, see "Configuring SAN Switch 2/32 Network Addressing," later in this chapter. 44 SAN Switch 2/32 Installation Guide
-
 1
1 -
2
-
3
-
4
-
5
-
6
-
7
-
8
-
9
-
10
-
11
-
12
-
13
-
14
-
15
-
16
-
17
-
18
-
19
-
20
-
21
-
22
-
23
-
24
-
25
-
26
-
27
-
28
-
29
-
30
-
31
-
32
-
33
-
34
-
35
-
36
-
37
-
38
-
 39
39 -
 40
40 -
 41
41 -
 42
42 -
 43
43 -
 44
44 -
 45
45 -
 46
46 -
 47
47 -
 48
48 -
 49
49 -
50
-
51
-
52
-
53
-
54
-
55
-
56
-
57
-
58
-
59
-
60
-
61
-
62
-
63
-
64
-
65
-
66
-
67
-
68
-
69
-
70
-
71
-
72
-
73
-
74
-
75
-
76
-
77
-
78
-
79
-
80
-
81
-
82
-
83
-
84
-
85
-
86
-
87
-
88
-
89
-
90
-
91
-
92
-
93
-
94
-
95
-
96
-
97
-
98
-
99
-
100
-
101
-
102
-
103
-
104
-
105
-
106
-
107
-
108
-
109
-
110
-
111
-
112
-
113
-
114
-
115
-
116
-
117
-
118
-
119
-
120
-
121
-
122
-
123
-
124
-
125
-
126
 |
 |
