HP StorageWorks 2/32 SAN switch 2/32 version 4.0.x installation guide - Page 42
brackets. Install them as shown
 |
View all HP StorageWorks 2/32 manuals
Add to My Manuals
Save this manual to your list of manuals |
Page 42 highlights
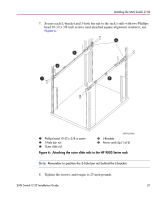
Installing the SAN Switch 2/32 SHR-2582A Figure 9: Installing the Tinnerman clips 5. Assemble the outer rails by completing the following steps: a. As an aid in assembly, two rubber washers have been included to help keep the rear slotted portion of the outer rail flush against the rear rail-tray brackets. Install them as shown in Figure 10. b. Insert the alignment pins attached to the outer rail front flange into the center opening in the rack. 42 SAN Switch 2/32 Installation Guide
-
 1
1 -
2
-
3
-
4
-
5
-
6
-
7
-
8
-
9
-
10
-
11
-
12
-
13
-
14
-
15
-
16
-
17
-
18
-
19
-
20
-
21
-
22
-
23
-
24
-
25
-
26
-
27
-
28
-
29
-
30
-
31
-
32
-
33
-
34
-
35
-
36
-
 37
37 -
 38
38 -
 39
39 -
 40
40 -
 41
41 -
 42
42 -
 43
43 -
 44
44 -
 45
45 -
 46
46 -
 47
47 -
48
-
49
-
50
-
51
-
52
-
53
-
54
-
55
-
56
-
57
-
58
-
59
-
60
-
61
-
62
-
63
-
64
-
65
-
66
-
67
-
68
-
69
-
70
-
71
-
72
-
73
-
74
-
75
-
76
-
77
-
78
-
79
-
80
-
81
-
82
-
83
-
84
-
85
-
86
-
87
-
88
-
89
-
90
-
91
-
92
-
93
-
94
-
95
-
96
-
97
-
98
-
99
-
100
-
101
-
102
-
103
-
104
-
105
-
106
-
107
-
108
-
109
-
110
-
111
-
112
-
113
-
114
-
115
-
116
-
117
-
118
-
119
-
120
-
121
-
122
-
123
-
124
-
125
-
126
 |
 |
Installing the SAN Switch 2/32
42
SAN Switch 2/32 Installation Guide
Figure 9:
Installing the Tinnerman clips
5.
Assemble the outer rails by completing the following steps:
a.
As an aid in assembly, two rubber washers have been included to help
keep the rear slotted portion of the outer rail flush against the rear rail-tray
brackets. Install them as shown in
Figure 10
.
b.
Insert the alignment pins attached to the outer rail front flange into the
center opening in the rack.
SHR-2582A