HP StorageWorks 4/16 HP StorageWorks DC and DC04 SAN Backbone Director Switche - Page 189
Table 38, admin, password, haShow, Do you wish to, continue [y/n]?
 |
View all HP StorageWorks 4/16 manuals
Add to My Manuals
Save this manual to your list of manuals |
Page 189 highlights
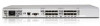
3. Check the error message indicating the status of the WWN unit (see Table 38). Type the chassisShow command to determine the status of the WWN unit. Table 38 WWN card related system log messages Type of message WWN unit removal was detected System message (errshow or errdump) , [EM-1050], ,, INFO, , FRU WWN # removal detected. WWN unit insertion was detected WWN unit fails to power on , [EM-1049], ,, INFO, , FRU WWN # insertion detected. , [EM-1004], ,, CRITICAL, , WWN # failed to power on WWN unit is being faulted , [EM-1034], ,, ERROR, , WWN # set to faulty, rc= Removing the WWN bezel (logo plate) and WWN card To remove the WWN bezel and WWN card: CAUTION: Wear a grounded ESD strap when handling the WWN card. Use the grounding connections above the power connectors on the chassis. 1. Open a Telnet session to the DC04 SAN Director and log in to the active CP as admin. The default password is password. 2. Verify that you are logged into the active CP. Run the haShow command to determine the active CP. 3. Remove the two screws from the WWN bezel. Pull the bezel away from the chassis and set it aside. The WWN cards and their status LEDs are visible. See Figure 72 4. Type fruReplace wwn from the active CP blade and wait for the phrase Do you wish to continue [y/n]? to be displayed, and then type y. HP StorageWorks DC and DC04 SAN Backbone Director Switches 189
-
 1
1 -
2
-
3
-
4
-
5
-
6
-
7
-
8
-
9
-
10
-
11
-
12
-
13
-
14
-
15
-
16
-
17
-
18
-
19
-
20
-
21
-
22
-
23
-
24
-
25
-
26
-
27
-
28
-
29
-
30
-
31
-
32
-
33
-
34
-
35
-
36
-
37
-
38
-
39
-
40
-
41
-
42
-
43
-
44
-
45
-
46
-
47
-
48
-
49
-
50
-
51
-
52
-
53
-
54
-
55
-
56
-
57
-
58
-
59
-
60
-
61
-
62
-
63
-
64
-
65
-
66
-
67
-
68
-
69
-
70
-
71
-
72
-
73
-
74
-
75
-
76
-
77
-
78
-
79
-
80
-
81
-
82
-
83
-
84
-
85
-
86
-
87
-
88
-
89
-
90
-
91
-
92
-
93
-
94
-
95
-
96
-
97
-
98
-
99
-
100
-
101
-
102
-
103
-
104
-
105
-
106
-
107
-
108
-
109
-
110
-
111
-
112
-
113
-
114
-
115
-
116
-
117
-
118
-
119
-
120
-
121
-
122
-
123
-
124
-
125
-
126
-
127
-
128
-
129
-
130
-
131
-
132
-
133
-
134
-
135
-
136
-
137
-
138
-
139
-
140
-
141
-
142
-
143
-
144
-
145
-
146
-
147
-
148
-
149
-
150
-
151
-
152
-
153
-
154
-
155
-
156
-
157
-
158
-
159
-
160
-
161
-
162
-
163
-
164
-
165
-
166
-
167
-
168
-
169
-
170
-
171
-
172
-
173
-
174
-
175
-
176
-
177
-
178
-
179
-
180
-
181
-
182
-
183
-
 184
184 -
 185
185 -
 186
186 -
 187
187 -
 188
188 -
 189
189 -
 190
190 -
 191
191 -
 192
192 -
 193
193 -
 194
194 -
195
-
196
-
197
-
198
-
199
-
200
-
201
-
202
-
203
-
204
-
205
-
206
-
207
-
208
-
209
-
210
-
211
-
212
-
213
-
214
-
215
-
216
-
217
-
218
-
219
-
220
-
221
-
222
-
223
-
224
-
225
-
226
-
227
-
228
-
229
-
230
-
231
-
232
-
233
-
234
-
235
-
236
-
237
-
238
-
239
-
240
-
241
-
242
-
243
-
244
-
245
-
246
-
247
-
248
-
249
-
250
-
251
-
252
-
253
-
254
-
255
-
256
 |
 |
