HP StorageWorks 4/16 HP StorageWorks DC and DC04 SAN Backbone Director Switche - Page 193
Replacing the DC04 SAN Director chassis, Recording critical DC04 Director and SAN information
 |
View all HP StorageWorks 4/16 manuals
Add to My Manuals
Save this manual to your list of manuals |
Page 193 highlights
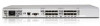
Figure 73 Optical transceiver (SFP and XFP) extraction tool Replacing the DC04 SAN Director chassis This section describes how to remove and replace the DC04 SAN Director chassis (with its backplane). The basic steps are: 1. Verifying the need for replacing the chassis. 2. Recording critical DC04 Director and SAN information. 3. Disconnecting from the network and the fabric. 4. Removing components from the chassis. 5. Instaling the replacement chassis. 6. Installing components into the new chassis. 7. Configuring the new chassis serial number. 8. Verifying that the system is operating correctly. 9. Reconnecting to the network and the fabric. 10. Verifying that the configuration of the fabric is correct. NOTE: The DC04 SAN Director must be removed from the fabric and powered off to perform this procedure. Contact HP if you have any questions about whether the chassis requires replacement. The chassis replacement takes approximately 3 hours. The following items are required for the chassis replacement: CAUTION: Wear a grounded ESD strap when handling DC04 SAN Director components and port blades. The Director chassis provides a grounding connection above the power connectors. Also, store ESD-sensitive components in antistatic packaging. • Electrostatic discharge (ESD) grounding strap • ESD grounding pads for protecting all blades and WWN cards • Serial cable and workstation computer with a terminal emulator application (such as HyperTerminal for Windows systems or TIP for Solaris systems), required only if serial console session used HP StorageWorks DC and DC04 SAN Backbone Director Switches 193
-
 1
1 -
2
-
3
-
4
-
5
-
6
-
7
-
8
-
9
-
10
-
11
-
12
-
13
-
14
-
15
-
16
-
17
-
18
-
19
-
20
-
21
-
22
-
23
-
24
-
25
-
26
-
27
-
28
-
29
-
30
-
31
-
32
-
33
-
34
-
35
-
36
-
37
-
38
-
39
-
40
-
41
-
42
-
43
-
44
-
45
-
46
-
47
-
48
-
49
-
50
-
51
-
52
-
53
-
54
-
55
-
56
-
57
-
58
-
59
-
60
-
61
-
62
-
63
-
64
-
65
-
66
-
67
-
68
-
69
-
70
-
71
-
72
-
73
-
74
-
75
-
76
-
77
-
78
-
79
-
80
-
81
-
82
-
83
-
84
-
85
-
86
-
87
-
88
-
89
-
90
-
91
-
92
-
93
-
94
-
95
-
96
-
97
-
98
-
99
-
100
-
101
-
102
-
103
-
104
-
105
-
106
-
107
-
108
-
109
-
110
-
111
-
112
-
113
-
114
-
115
-
116
-
117
-
118
-
119
-
120
-
121
-
122
-
123
-
124
-
125
-
126
-
127
-
128
-
129
-
130
-
131
-
132
-
133
-
134
-
135
-
136
-
137
-
138
-
139
-
140
-
141
-
142
-
143
-
144
-
145
-
146
-
147
-
148
-
149
-
150
-
151
-
152
-
153
-
154
-
155
-
156
-
157
-
158
-
159
-
160
-
161
-
162
-
163
-
164
-
165
-
166
-
167
-
168
-
169
-
170
-
171
-
172
-
173
-
174
-
175
-
176
-
177
-
178
-
179
-
180
-
181
-
182
-
183
-
184
-
185
-
186
-
187
-
 188
188 -
 189
189 -
 190
190 -
 191
191 -
 192
192 -
 193
193 -
 194
194 -
 195
195 -
 196
196 -
 197
197 -
 198
198 -
199
-
200
-
201
-
202
-
203
-
204
-
205
-
206
-
207
-
208
-
209
-
210
-
211
-
212
-
213
-
214
-
215
-
216
-
217
-
218
-
219
-
220
-
221
-
222
-
223
-
224
-
225
-
226
-
227
-
228
-
229
-
230
-
231
-
232
-
233
-
234
-
235
-
236
-
237
-
238
-
239
-
240
-
241
-
242
-
243
-
244
-
245
-
246
-
247
-
248
-
249
-
250
-
251
-
252
-
253
-
254
-
255
-
256
 |
 |
