Konica Minolta Kodak Truper 3610 User Guide - Page 13

Installation, Installation checklist, Contents

Page 13 highlights

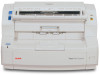
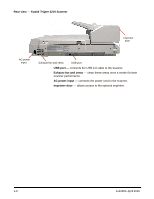
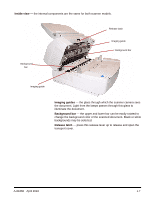
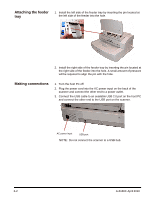
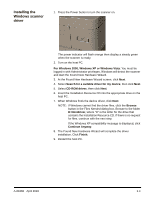
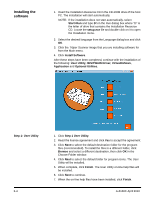
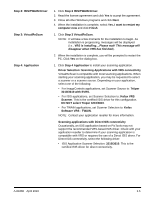
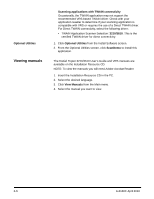
2 Installation Contents Installation checklist 2-1 Attaching the feeder tray 2-2 Making connections 2-2 Installing the Windows scanner driver 2-3 Installing the software 2-4 Step 1: User utility 2-4 Step 2: ISIS/TWAIN Driver 2-5 Step 3: VirtualReScan 2-5 Step 4: Applications 2-5 User Utilities 2-6 Viewing manuals 2-6 Installation checklist • After the scanner has been unpacked, it is recommended that you keep the original carton and all packing materials in case you need them later. See Appendix E, Repacking the Scanner for more information. • Verify the computer system requirements. Refer to Appendix A, Specifications. • Attach the feeder tray to the scanner. See the section entitled, "Attaching the feeder tray" later in this chapter. • Connect the scanner. See the section entitled, "Making connections" later in this chapter. • Install the software. See the section entitled, "Installing the software" later in this chapter. You are now ready to scan. Refer to the instructions for your scanning or document management software application. A-61660 April 2010 2-1

  • 1
  • 2
  • 3
  • 4
  • 5
  • 6
  • 7
  • 8
  • 9
  • 10
  • 11
  • 12
  • 13
  • 14
  • 15
  • 16
  • 17
  • 18
  • 19
  • 20
  • 21
  • 22
  • 23
  • 24
  • 25
  • 26
  • 27
  • 28
  • 29
  • 30
  • 31
  • 32
  • 33
  • 34
  • 35
  • 36
  • 37
  • 38
  • 39
  • 40
  • 41
  • 42
  • 43
  • 44
  • 45
  • 46
  • 47
  • 48
  • 49
  • 50
  • 51
  • 52
  • 53
  • 54
  • 55
  • 56
  • 57
  • 58
  • 59
  • 60
  • 61
  • 62
  • 63
  • 64
  • 65
  • 66
  • 67
  • 68
  • 69
  • 70
  • 71
  • 72
  • 73
  • 74
  • 75
  • 76
  • 77
  • 78
  • 79
  • 80
  • 81
  • 82
  • 83

A-61660
April 2010
2-1
2 Installation
Contents
Installation checklist
........................................................................
2-1
Attaching the feeder tray
.................................................................
2-2
Making connections
........................................................................
2-2
Installing the Windows scanner driver
............................................
2-3
Installing the software
.....................................................................
2-4
Step 1: User utility
.......................................................................
2-4
Step 2: ISIS/TWAIN Driver
.........................................................
2-5
Step 3: VirtualReScan
................................................................
2-5
Step 4: Applications
....................................................................
2-5
User Utilities
...............................................................................
2-6
Viewing manuals
.............................................................................
2-6
Installation checklist
After the scanner has been unpacked, it is recommended that you
keep the original carton and all packing materials in case you need
them later. See
Appendix E, Repacking the Scanner
for more
information.
Verify the computer system requirements. Refer to
Appendix A,
Specifications.
Attach the feeder tray to the scanner. See the section entitled,
“Attaching the feeder tray” later in this chapter.
Connect the scanner. See the section entitled, “Making connections”
later in this chapter.
Install the software. See the section entitled, “Installing the software”
later in this chapter.
You are now ready to scan. Refer to the instructions for your scanning
or document management software application.