Konica Minolta Kodak Truper 3610 User Guide - Page 19
Using the Scanner, Getting your scanner ready to scan, Contents, Getting your scanner, ready to scan
 |
View all Konica Minolta Kodak Truper 3610 manuals
Add to My Manuals
Save this manual to your list of manuals |
Page 19 highlights
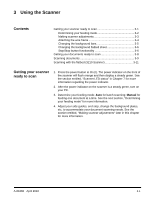
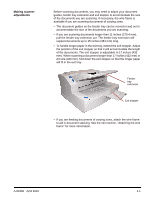
3 Using the Scanner Contents Getting your scanner ready to scan 3-1 Determining your feeding mode 3-2 Making scanner adjustments 3-3 Attaching the wire frame 3-4 Changing the background bars 3-5 Changing the background flatbed sheet 3-6 Stop/Stop button functionality 3-6 Getting your documents ready to scan 3-8 Scanning documents 3-9 Scanning with the flatbed (3210 Scanner 3-11 Getting your scanner ready to scan 1. Press the power button to On (I). The power indicator on the front of the scanner will flash orange and then display a steady green. See the section entitled, "Scanner LED status" in Chapter 7 for more information regarding the power indicator. 2. After the power indicator on the scanner is a steady green, turn on your PC. 3. Determine your feeding mode: Auto for batch scanning; Manual for feeding one document at a time. See the next section, "Determining your feeding mode" for more information. 4. Adjust your side guides, end stop, change the background plates, etc. to accommodate your document scanning needs. See the section entitled, "Making scanner adjustments" later in this chapter for more information. A-61660 April 2010 3-1
-
 1
1 -
2
-
3
-
4
-
5
-
6
-
7
-
8
-
9
-
10
-
11
-
12
-
13
-
 14
14 -
 15
15 -
 16
16 -
 17
17 -
 18
18 -
 19
19 -
 20
20 -
 21
21 -
 22
22 -
 23
23 -
 24
24 -
25
-
26
-
27
-
28
-
29
-
30
-
31
-
32
-
33
-
34
-
35
-
36
-
37
-
38
-
39
-
40
-
41
-
42
-
43
-
44
-
45
-
46
-
47
-
48
-
49
-
50
-
51
-
52
-
53
-
54
-
55
-
56
-
57
-
58
-
59
-
60
-
61
-
62
-
63
-
64
-
65
-
66
-
67
-
68
-
69
-
70
-
71
-
72
-
73
-
74
-
75
-
76
-
77
-
78
-
79
-
80
-
81
-
82
-
83
 |
 |