Konica Minolta bizhub 25e bizhub 25e Printer Guide - Page 47
Registering custom paper settings, Click [Custom Paper Settings].
 |
View all Konica Minolta bizhub 25e manuals
Add to My Manuals
Save this manual to your list of manuals |
Page 47 highlights
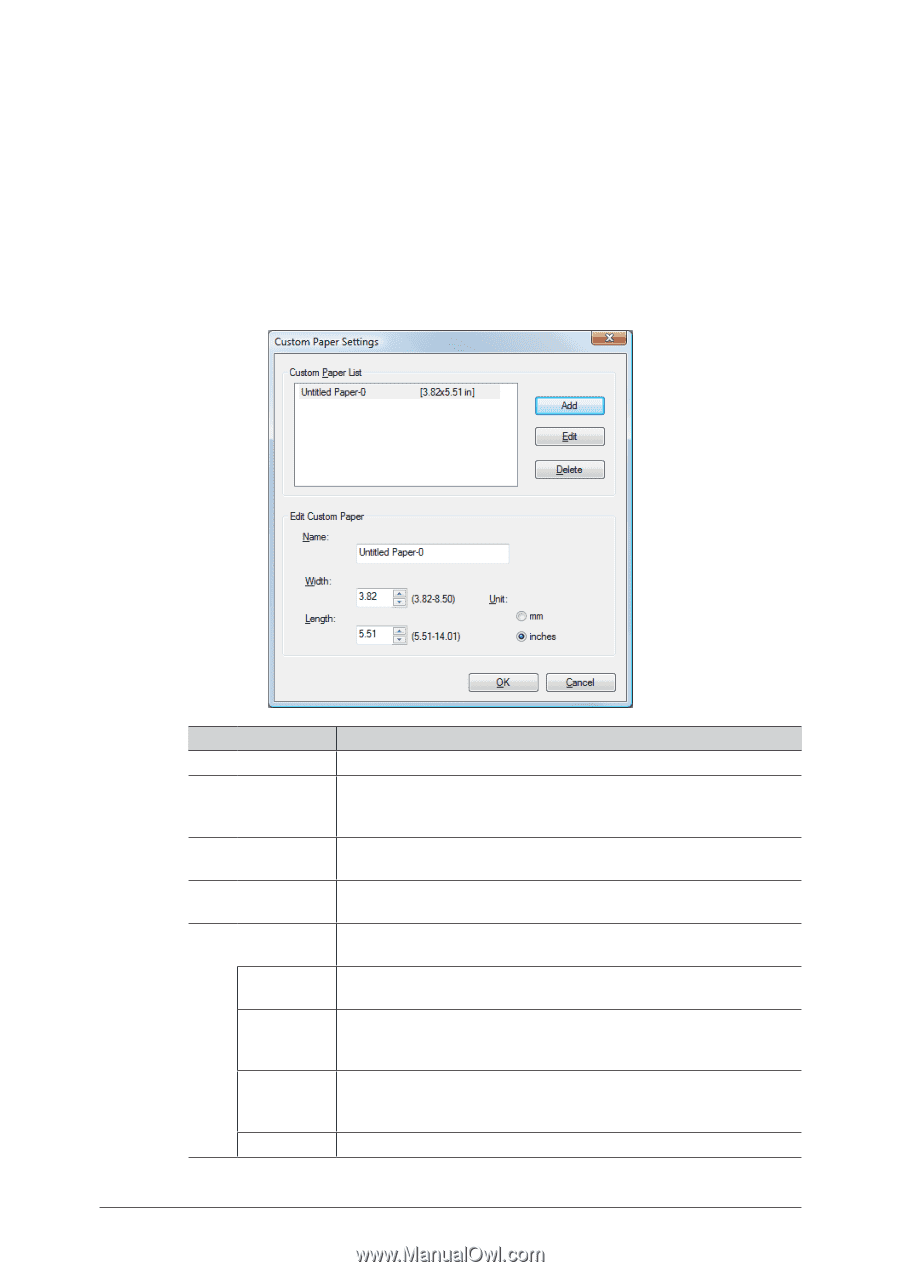
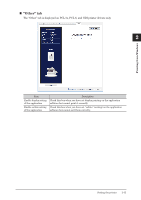
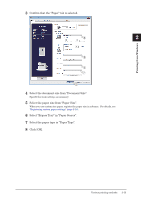
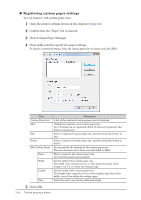
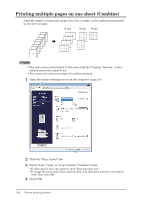
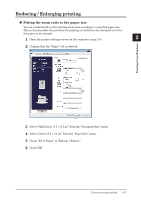
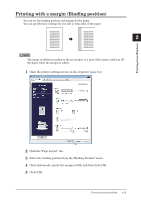
„„ Registering custom paper settings You can register / edit custom paper sizes. 1 Open the printer settings screen on the computer (page 2-4). 2 Confirm that the "Paper" tab is selected. 3 Click [Custom Paper Settings]. 4 Click [Add] and then specify the paper settings. To change a registered setting, select the custom paper size to change and click [Edit]. Item Custom Paper List Add Edit Delete Edit Custom Paper Name Width Length Unit Description A list of the registered custom paper sizes is displayed. Click this to register a new custom paper size. Up to 50 sizes can be registered. When 50 sizes are registered, this button is grayed out. Select a registered custom paper size, and then click this button to edit. Select a registered custom paper size, and then click this button to delete. You can specify the settings for the custom paper size. This area becomes active when you click [Add] or [Edit]. Enter a name for the custom paper size. Up to 20 characters can be entered. Set the width of the custom paper size. The width value cannot be set to a value larger than that of the length, even if it is within the setting range. Set the length of the custom paper size. The length value cannot be set to a value smaller than that of the width, even if it is within the setting range. Select the unit to use for the width and length. 5 Click [OK]. 2-14 Various printing methods
-
 1
1 -
2
-
3
-
4
-
5
-
6
-
7
-
8
-
9
-
10
-
11
-
12
-
13
-
14
-
15
-
16
-
17
-
18
-
19
-
20
-
21
-
22
-
23
-
24
-
25
-
26
-
27
-
28
-
29
-
30
-
31
-
32
-
33
-
34
-
35
-
36
-
37
-
38
-
39
-
40
-
41
-
 42
42 -
 43
43 -
 44
44 -
 45
45 -
 46
46 -
 47
47 -
 48
48 -
 49
49 -
 50
50 -
 51
51 -
 52
52 -
53
-
54
-
55
-
56
-
57
-
58
-
59
-
60
-
61
-
62
-
63
-
64
-
65
-
66
-
67
-
68
-
69
-
70
-
71
-
72
-
73
-
74
-
75
-
76
-
77
-
78
-
79
-
80
-
81
-
82
-
83
-
84
-
85
-
86
-
87
-
88
-
89
-
90
-
91
-
92
-
93
-
94
-
95
-
96
-
97
-
98
-
99
-
100
-
101
-
102
-
103
-
104
-
105
-
106
-
107
-
108
-
109
-
110
-
111
-
112
-
113
-
114
-
115
-
116
-
117
-
118
-
119
-
120
 |
 |