Konica Minolta bizhub C552 bizhub C452/C552/C552DS/C652/C652DS Print Operation - Page 66
For network connection LPR, Settings for the machine, Installing the printer driver using the Add
 |
View all Konica Minolta bizhub C552 manuals
Add to My Manuals
Save this manual to your list of manuals |
Page 66 highlights
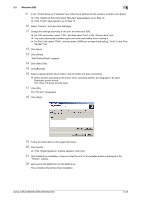
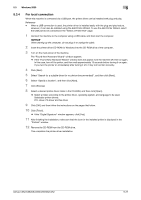
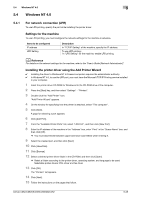
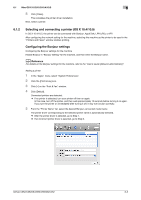
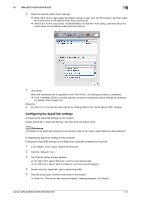
5.4 Windows NT 4.0 5 5.4 Windows NT 4.0 5.4.1 For network connection (LPR) To use LPR printing, specify the port while installing the printer driver. Settings for the machine To use LPR printing, you must configure the network settings for the machine in advance. Items to be configured IP address LPD Setting Description In "TCP/IP Setting" of the machine, specify the IP address. To use LPR printing: In "LPD Setting" for the machine, enable LPD printing. d Reference For details on the network settings for the machine, refer to the "User's Guide [Network Administrator]". Installing the printer driver using the Add Printer Wizard 0 Installing the driver to Windows NT 4.0-based computers requires the administrator authority. 0 In Windows NT 4.0, to use the LPR port, you must have the Microsoft TCP/IP Printing service installed in your computer. 1 Insert the printer driver CD-ROM for Windows into the CD-ROM drive of the computer. 2 Press the [Start] key, and then select "Settings" - "Printers". 3 Double-click the "Add Printer" icon. "Add Printer Wizard" appears. 4 On the window for specifying how the printer is attached, select "This computer". 5 Click [Next]. A page for selecting a port appears. 6 Click [Add Port]. 7 From the "Available Printer Ports" list, select "LPR Port", and then click [New Port]. 8 Enter the IP address of the machine in the "Address" box, enter "Print" in the "Queue Name" box, and then click [OK]. % You must discriminate between upper and lower case letters when entering it. 9 Select the created port, and then click [Next]. 10 Click [Have Disk]. 11 Click [Browse]. 12 Select a desired printer driver folder in the CD-ROM, and then click [Open]. % Select a folder according to the printer driver, operating system, and language to be used. Selectable printer drivers: PCL driver and fax driver 13 Click [OK]. The "Printers" list appears. 14 Click [Next]. 15 Follow the instructions on the pages that follow. bizhub C652/C652DS/C552/C552DS/C452 5-28
-
 1
1 -
2
-
3
-
4
-
5
-
6
-
7
-
8
-
9
-
10
-
11
-
12
-
13
-
14
-
15
-
16
-
17
-
18
-
19
-
20
-
21
-
22
-
23
-
24
-
25
-
26
-
27
-
28
-
29
-
30
-
31
-
32
-
33
-
34
-
35
-
36
-
37
-
38
-
39
-
40
-
41
-
42
-
43
-
44
-
45
-
46
-
47
-
48
-
49
-
50
-
51
-
52
-
53
-
54
-
55
-
56
-
57
-
58
-
59
-
60
-
 61
61 -
 62
62 -
 63
63 -
 64
64 -
 65
65 -
 66
66 -
 67
67 -
 68
68 -
 69
69 -
 70
70 -
 71
71 -
72
-
73
-
74
-
75
-
76
-
77
-
78
-
79
-
80
-
81
-
82
-
83
-
84
-
85
-
86
-
87
-
88
-
89
-
90
-
91
-
92
-
93
-
94
-
95
-
96
-
97
-
98
-
99
-
100
-
101
-
102
-
103
-
104
-
105
-
106
-
107
-
108
-
109
-
110
-
111
-
112
-
113
-
114
-
115
-
116
-
117
-
118
-
119
-
120
-
121
-
122
-
123
-
124
-
125
-
126
-
127
-
128
-
129
-
130
-
131
-
132
-
133
-
134
-
135
-
136
-
137
-
138
-
139
-
140
-
141
-
142
-
143
-
144
-
145
-
146
-
147
-
148
-
149
-
150
-
151
-
152
-
153
-
154
-
155
-
156
-
157
-
158
-
159
-
160
-
161
-
162
-
163
-
164
-
165
-
166
-
167
-
168
-
169
-
170
-
171
-
172
-
173
-
174
-
175
-
176
-
177
-
178
-
179
-
180
-
181
-
182
-
183
-
184
-
185
-
186
-
187
-
188
-
189
-
190
-
191
-
192
-
193
-
194
-
195
-
196
-
197
-
198
-
199
-
200
-
201
-
202
-
203
-
204
-
205
-
206
-
207
-
208
-
209
-
210
-
211
-
212
-
213
-
214
-
215
-
216
-
217
-
218
-
219
-
220
-
221
-
222
-
223
-
224
-
225
-
226
-
227
-
228
-
229
-
230
-
231
-
232
-
233
-
234
-
235
-
236
-
237
-
238
-
239
-
240
-
241
-
242
-
243
-
244
-
245
-
246
-
247
-
248
-
249
-
250
-
251
-
252
-
253
-
254
-
255
-
256
-
257
-
258
-
259
-
260
-
261
-
262
-
263
-
264
-
265
-
266
-
267
-
268
-
269
-
270
-
271
-
272
-
273
-
274
-
275
-
276
-
277
-
278
-
279
-
280
-
281
-
282
-
283
-
284
-
285
-
286
-
287
-
288
-
289
-
290
-
291
-
292
-
293
-
294
-
295
-
296
-
297
-
298
-
299
-
300
-
301
-
302
-
303
-
304
-
305
-
306
-
307
-
308
-
309
-
310
-
311
-
312
 |
 |