Konica Minolta bizhub C650 bizhub C650 Box Operations User Manual - Page 149
Inserting a header/footer (Header/Footer), For details on registering headers/footers
 |
View all Konica Minolta bizhub C650 manuals
Add to My Manuals
Save this manual to your list of manuals |
Page 149 highlights
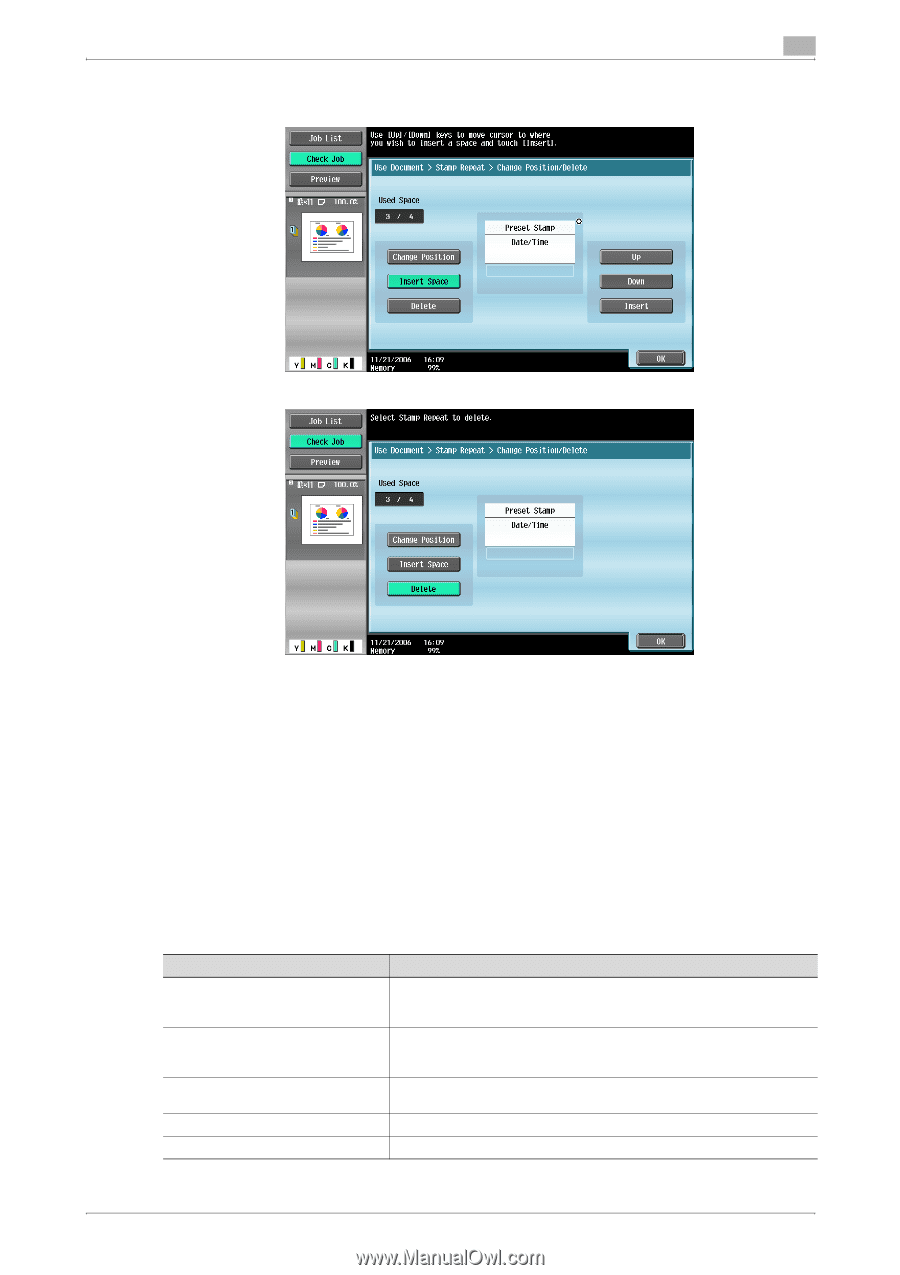
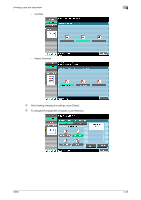
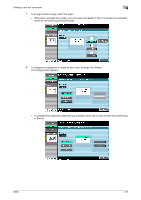
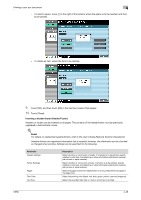
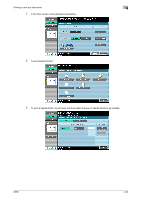
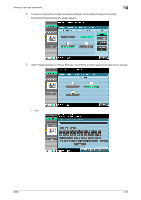
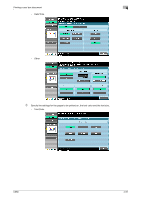
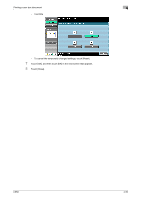
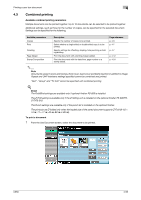
Printing a user box document 4 - To insert a space, move o to the right of the location where the space is to be inserted, and then touch [Insert]. - To delete an item, select the item to be deleted. 9 Touch [OK], and then touch [OK] in the next two screens that appear. 10 Touch [Close]. Inserting a header/footer (Header/Footer) Headers or footers can be inserted on all pages. The contents of the header/footer must be previously registered in Administrator mode. ! Detail For details on registering headers/footers, refer to the User's Guide [Network Scanner Operations]. Headers/footers use registered information that is recalled; however, the information can be checked or changed when printing. Settings can be specified for the following. Parameter Header Settings Footer Settings Pages Text Color Text Size Description Select whether or not to print a header. If a header is to be printed, specify whether to print text, the date/time or other information (distribution number, job number or serial number). Select whether or not to print a footer. If a footer is to be printed, specify whether to print text, the date/time or other information (distribution number, job number or serial number). Select the pages where the header/footer is to be printed (either all pages or 1st page only). Select the printing color (black, red, blue, green, yellow, cyan and magenta). Select the size (8pt,10pt,12pt or 14pt) in which text is printed. C650 4-48
-
 1
1 -
2
-
3
-
4
-
5
-
6
-
7
-
8
-
9
-
10
-
11
-
12
-
13
-
14
-
15
-
16
-
17
-
18
-
19
-
20
-
21
-
22
-
23
-
24
-
25
-
26
-
27
-
28
-
29
-
30
-
31
-
32
-
33
-
34
-
35
-
36
-
37
-
38
-
39
-
40
-
41
-
42
-
43
-
44
-
45
-
46
-
47
-
48
-
49
-
50
-
51
-
52
-
53
-
54
-
55
-
56
-
57
-
58
-
59
-
60
-
61
-
62
-
63
-
64
-
65
-
66
-
67
-
68
-
69
-
70
-
71
-
72
-
73
-
74
-
75
-
76
-
77
-
78
-
79
-
80
-
81
-
82
-
83
-
84
-
85
-
86
-
87
-
88
-
89
-
90
-
91
-
92
-
93
-
94
-
95
-
96
-
97
-
98
-
99
-
100
-
101
-
102
-
103
-
104
-
105
-
106
-
107
-
108
-
109
-
110
-
111
-
112
-
113
-
114
-
115
-
116
-
117
-
118
-
119
-
120
-
121
-
122
-
123
-
124
-
125
-
126
-
127
-
128
-
129
-
130
-
131
-
132
-
133
-
134
-
135
-
136
-
137
-
138
-
139
-
140
-
141
-
142
-
143
-
 144
144 -
 145
145 -
 146
146 -
 147
147 -
 148
148 -
 149
149 -
 150
150 -
 151
151 -
 152
152 -
 153
153 -
 154
154 -
155
-
156
-
157
-
158
-
159
-
160
-
161
-
162
-
163
-
164
-
165
-
166
-
167
-
168
-
169
-
170
-
171
-
172
-
173
-
174
-
175
-
176
-
177
-
178
-
179
-
180
-
181
-
182
-
183
-
184
-
185
-
186
-
187
-
188
-
189
-
190
-
191
-
192
-
193
-
194
-
195
-
196
-
197
-
198
-
199
-
200
-
201
-
202
-
203
-
204
-
205
-
206
-
207
-
208
-
209
-
210
-
211
-
212
-
213
-
214
-
215
-
216
-
217
-
218
-
219
-
220
-
221
-
222
-
223
-
224
-
225
-
226
-
227
-
228
-
229
-
230
-
231
-
232
-
233
-
234
-
235
-
236
-
237
-
238
-
239
-
240
-
241
-
242
-
243
-
244
-
245
-
246
-
247
-
248
-
249
-
250
-
251
-
252
-
253
-
254
-
255
-
256
-
257
-
258
-
259
-
260
-
261
-
262
-
263
-
264
-
265
-
266
-
267
-
268
-
269
-
270
-
271
-
272
-
273
-
274
-
275
-
276
-
277
-
278
-
279
-
280
 |
 |