Konica Minolta bizhub C650 bizhub C650 Box Operations User Manual - Page 260
Overwrite Temporary Data, Touch [2 Overwrite Temporary Data] in the HDD Setting screen.
 |
View all Konica Minolta bizhub C650 manuals
Add to My Manuals
Save this manual to your list of manuals |
Page 260 highlights
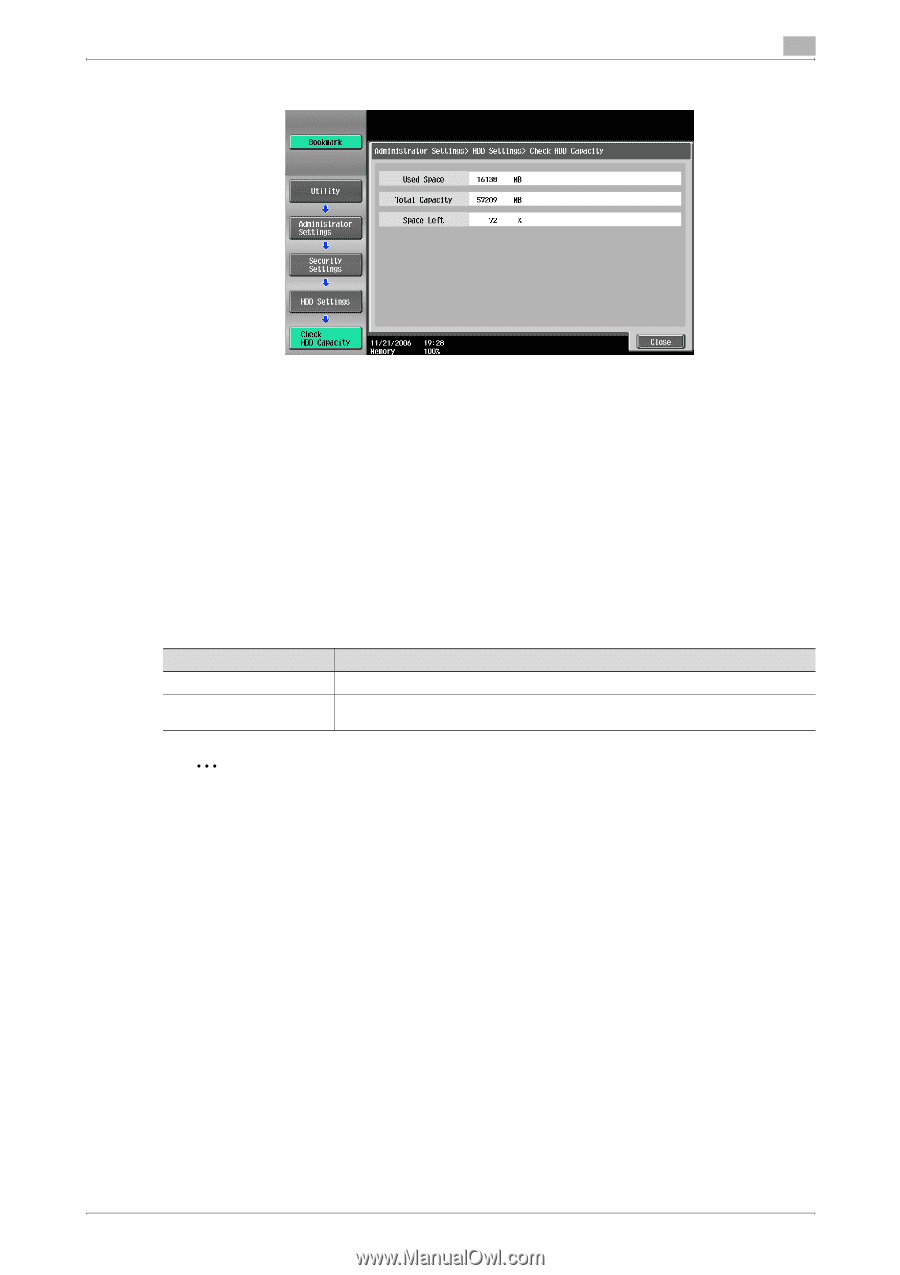
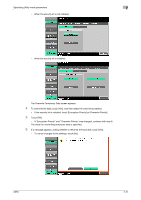
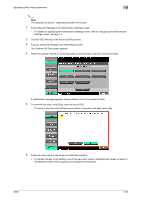
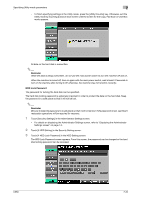
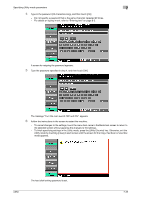
Specifying Utility mode parameters 7 The Check HDD Capacity screen appears. 4 Touch [Close]. - To cancel changes to the settings, touch the menu item name in the Bookmark screen to return to the selected screen without applying the changes to the settings. - To finish specifying settings in the Utility mode, press the [Utility/Counter] key. Otherwise, exit the Utility mode by touching [Close] in each screen until the screen for the Copy, Fax/Scan or User Box mode appears. The HDD Setting screen appears again. Overwrite Temporary Data The setting for overwriting data on the hard disk can be specified. (The default setting is "Mode 1".) This machine destroys data by overwriting all data in the entire area where an image was stored when that image data on the hard disk is considered unnecessary. In addition, destroying the structure of data other than image data prevents the disclosure of the data in case the hard disk is stolen. Setting Mode 1 Mode 2 Description Overwritten with 0x00 Overwritten with 0x00 → Overwritten with 0xff → Overwritten with the letter "A" (0x61) → Verified 2 Reminder When the setting for giving priority to encryption or overwriting is changed, the hard disk must be formatted. 1 Touch [Security Settings] in the Administrator Settings screen. - For details on displaying the Administrator Settings screen, refer to "Displaying the Administrator Settings screen" on page 7-4. 2 Touch [6 HDD Setting] in the Security Setting screen. 3 Touch [2 Overwrite Temporary Data] in the HDD Setting screen. - Select "Encryption Priority" when performing high-level security encryption processing. However, data overwriting with encryption of the hard disk differs depending on whether "Mode 1" or "Mode 2" is selected. Normally, "Encryption Priority" is selected. - If "Overwrite Priority" is selected, data overwriting with encryption of the hard disk is performed depending on whether "Mode 1" or "Mode 2" is selected. Select this setting when the format of the data written to the hard disk is considered important. C650 7-30
-
 1
1 -
2
-
3
-
4
-
5
-
6
-
7
-
8
-
9
-
10
-
11
-
12
-
13
-
14
-
15
-
16
-
17
-
18
-
19
-
20
-
21
-
22
-
23
-
24
-
25
-
26
-
27
-
28
-
29
-
30
-
31
-
32
-
33
-
34
-
35
-
36
-
37
-
38
-
39
-
40
-
41
-
42
-
43
-
44
-
45
-
46
-
47
-
48
-
49
-
50
-
51
-
52
-
53
-
54
-
55
-
56
-
57
-
58
-
59
-
60
-
61
-
62
-
63
-
64
-
65
-
66
-
67
-
68
-
69
-
70
-
71
-
72
-
73
-
74
-
75
-
76
-
77
-
78
-
79
-
80
-
81
-
82
-
83
-
84
-
85
-
86
-
87
-
88
-
89
-
90
-
91
-
92
-
93
-
94
-
95
-
96
-
97
-
98
-
99
-
100
-
101
-
102
-
103
-
104
-
105
-
106
-
107
-
108
-
109
-
110
-
111
-
112
-
113
-
114
-
115
-
116
-
117
-
118
-
119
-
120
-
121
-
122
-
123
-
124
-
125
-
126
-
127
-
128
-
129
-
130
-
131
-
132
-
133
-
134
-
135
-
136
-
137
-
138
-
139
-
140
-
141
-
142
-
143
-
144
-
145
-
146
-
147
-
148
-
149
-
150
-
151
-
152
-
153
-
154
-
155
-
156
-
157
-
158
-
159
-
160
-
161
-
162
-
163
-
164
-
165
-
166
-
167
-
168
-
169
-
170
-
171
-
172
-
173
-
174
-
175
-
176
-
177
-
178
-
179
-
180
-
181
-
182
-
183
-
184
-
185
-
186
-
187
-
188
-
189
-
190
-
191
-
192
-
193
-
194
-
195
-
196
-
197
-
198
-
199
-
200
-
201
-
202
-
203
-
204
-
205
-
206
-
207
-
208
-
209
-
210
-
211
-
212
-
213
-
214
-
215
-
216
-
217
-
218
-
219
-
220
-
221
-
222
-
223
-
224
-
225
-
226
-
227
-
228
-
229
-
230
-
231
-
232
-
233
-
234
-
235
-
236
-
237
-
238
-
239
-
240
-
241
-
242
-
243
-
244
-
245
-
246
-
247
-
248
-
249
-
250
-
251
-
252
-
253
-
254
-
 255
255 -
 256
256 -
 257
257 -
 258
258 -
 259
259 -
 260
260 -
 261
261 -
 262
262 -
 263
263 -
 264
264 -
 265
265 -
266
-
267
-
268
-
269
-
270
-
271
-
272
-
273
-
274
-
275
-
276
-
277
-
278
-
279
-
280
 |
 |