Lexmark E260dn User Guide - Page 114
that jammed does not reprint after the jam is cleared, Solving print quality problems - test page
 |
View all Lexmark E260dn manuals
Add to My Manuals
Save this manual to your list of manuals |
Page 114 highlights
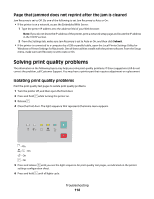
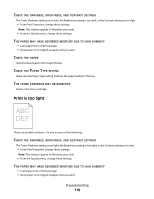
Page that jammed does not reprint after the jam is cleared Jam Recovery is set to Off. Do one of the following to set Jam Recovery to Auto or On: • If the printer is on a network, access the Embedded Web Server: 1 Type the printer IP address into the address field of your Web browser. Note: If you do not know the IP address of the printer, print a network setup page and locate the IP address in the TCP/IP section. 2 From the Settings tab, make sure Jam Recovery is set to Auto or On, and then click Submit. • If the printer is connected to a computer by a USB or parallel cable, open the Local Printer Settings Utility for Windows or Printer Settings for Macintosh. One of these utilities installs with the printer software. From the Setup menu, make sure Jam Recovery is set to Auto or On. Solving print quality problems The information in the following topics may help you solve print quality problems. If these suggestions still do not correct the problem, call Customer Support. You may have a printer part that requires adjustment or replacement. Isolating print quality problems Print the print quality test pages to isolate print quality problems. 1 Turn the printer off, and then open the front door. 2 Press and hold while turning the printer on. 3 Release . 4 Close the front door. The light sequence that represents the Home menu appears. - On - On - On - On 5 Press and release until you see the light sequence for print quality test pages, as indicated on the printer settings configuration sheet. 6 Press and hold until all lights cycle. Troubleshooting 114
-
 1
1 -
2
-
3
-
4
-
5
-
6
-
7
-
8
-
9
-
10
-
11
-
12
-
13
-
14
-
15
-
16
-
17
-
18
-
19
-
20
-
21
-
22
-
23
-
24
-
25
-
26
-
27
-
28
-
29
-
30
-
31
-
32
-
33
-
34
-
35
-
36
-
37
-
38
-
39
-
40
-
41
-
42
-
43
-
44
-
45
-
46
-
47
-
48
-
49
-
50
-
51
-
52
-
53
-
54
-
55
-
56
-
57
-
58
-
59
-
60
-
61
-
62
-
63
-
64
-
65
-
66
-
67
-
68
-
69
-
70
-
71
-
72
-
73
-
74
-
75
-
76
-
77
-
78
-
79
-
80
-
81
-
82
-
83
-
84
-
85
-
86
-
87
-
88
-
89
-
90
-
91
-
92
-
93
-
94
-
95
-
96
-
97
-
98
-
99
-
100
-
101
-
102
-
103
-
104
-
105
-
106
-
107
-
108
-
 109
109 -
 110
110 -
 111
111 -
 112
112 -
 113
113 -
 114
114 -
 115
115 -
 116
116 -
 117
117 -
 118
118 -
 119
119 -
120
-
121
-
122
-
123
-
124
-
125
-
126
-
127
-
128
-
129
-
130
-
131
-
132
-
133
-
134
-
135
-
136
-
137
-
138
-
139
-
140
-
141
 |
 |
