Lexmark E260dn User Guide - Page 64
Setting Jam Recovery
 |
View all Lexmark E260dn manuals
Add to My Manuals
Save this manual to your list of manuals |
Page 64 highlights
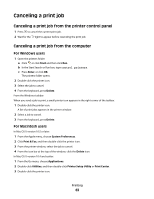
4 From the printer window, select the job to cancel. 5 From the icon bar at the top of the window, click the Delete icon. Setting Jam Recovery To ensure that a page will reprint after a paper jam, set Jam Recovery to Auto or On. If the printer is connected to a computer by a USB or parallel cable, open the Local Printer Settings Utility for Windows or Printer Settings for Macintosh. Under the Setup menu, ensure that Jam Recovery is set to Auto or On. Printing 64
-
 1
1 -
2
-
3
-
4
-
5
-
6
-
7
-
8
-
9
-
10
-
11
-
12
-
13
-
14
-
15
-
16
-
17
-
18
-
19
-
20
-
21
-
22
-
23
-
24
-
25
-
26
-
27
-
28
-
29
-
30
-
31
-
32
-
33
-
34
-
35
-
36
-
37
-
38
-
39
-
40
-
41
-
42
-
43
-
44
-
45
-
46
-
47
-
48
-
49
-
50
-
51
-
52
-
53
-
54
-
55
-
56
-
57
-
58
-
 59
59 -
 60
60 -
 61
61 -
 62
62 -
 63
63 -
 64
64 -
 65
65 -
 66
66 -
 67
67 -
 68
68 -
 69
69 -
70
-
71
-
72
-
73
-
74
-
75
-
76
-
77
-
78
-
79
-
80
-
81
-
82
-
83
-
84
-
85
-
86
-
87
-
88
-
89
-
90
-
91
-
92
-
93
-
94
-
95
-
96
-
97
-
98
-
99
-
100
-
101
-
102
-
103
-
104
-
105
-
106
-
107
-
108
-
109
-
110
-
111
-
112
-
113
-
114
-
115
-
116
-
117
-
118
-
119
-
120
-
121
-
122
-
123
-
124
-
125
-
126
-
127
-
128
-
129
-
130
-
131
-
132
-
133
-
134
-
135
-
136
-
137
-
138
-
139
-
140
-
141
 |
 |

4
From the printer window, select the job to cancel.
5
From the icon bar at the top of the window, click the
Delete
icon.
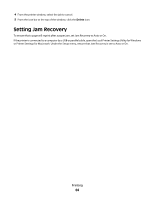
Setting Jam Recovery
To ensure that a page will reprint after a paper jam, set Jam Recovery to Auto or On.
If the printer is connected to a computer by a USB or parallel cable, open the Local Printer Settings Utility for Windows
or Printer Settings for Macintosh. Under the Setup menu, ensure that Jam Recovery is set to Auto or On.
Printing
64