Lexmark E260dn User Guide - Page 67
Using the Finishing menu, Paper menu, Default Source menu, Size/Type menu - print network settings
 |
View all Lexmark E260dn manuals
Add to My Manuals
Save this manual to your list of manuals |
Page 67 highlights
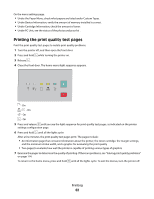
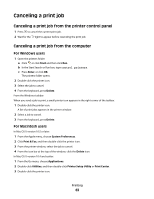
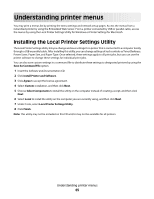
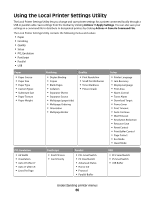
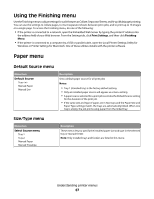
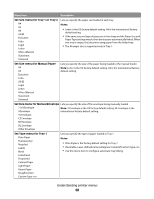
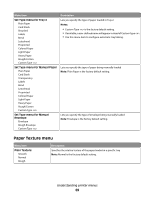
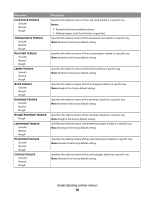
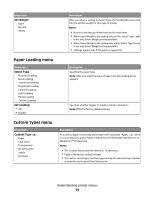
Using the Finishing menu Use the Finishing menu to adjust settings for such features as Collate, Separator Sheets, and N-up (Multipage) printing. You can use the settings to collate pages, to insert separator sheets between print jobs, and to print up to 16 images on a single page. To access the Finishing menu, do one of the following: • If the printer is connected to a network, open the Embedded Web Server by typing the printer IP address into the address field of your Web browser. From the Settings tab, click Print Settings, and then click Finishing Menu. • If the printer is connected to a computer by a USB or parallel cable, open the Local Printer Settings Utility for Windows or Printer Settings for Macintosh. One of these utilities installs with the printer software. Paper menu Default Source menu Menu item Default Source Tray Manual Paper Manual Env Description Sets a default paper source for all print jobs Notes: • Tray 1 (standard tray) is the factory default setting. • Only an installed paper source will appear as a menu setting. • A paper source selected for a print job overrides the Default Source setting for the duration of the print job. • If the same size and type of paper are in two trays and the Paper Size and Paper Type settings match, the trays are automatically linked. When one tray is empty, the job prints using paper from the linked tray. Size/Type menu Menu item Select Source menu Tray 1 Tray 2 Manual Paper Manual Envelope Description These menus let you specify the installed paper size and type in the selected tray or manual feeder. Note: Only installed trays and feeders are listed in this menu. Understanding printer menus 67
-
 1
1 -
2
-
3
-
4
-
5
-
6
-
7
-
8
-
9
-
10
-
11
-
12
-
13
-
14
-
15
-
16
-
17
-
18
-
19
-
20
-
21
-
22
-
23
-
24
-
25
-
26
-
27
-
28
-
29
-
30
-
31
-
32
-
33
-
34
-
35
-
36
-
37
-
38
-
39
-
40
-
41
-
42
-
43
-
44
-
45
-
46
-
47
-
48
-
49
-
50
-
51
-
52
-
53
-
54
-
55
-
56
-
57
-
58
-
59
-
60
-
61
-
 62
62 -
 63
63 -
 64
64 -
 65
65 -
 66
66 -
 67
67 -
 68
68 -
 69
69 -
 70
70 -
 71
71 -
 72
72 -
73
-
74
-
75
-
76
-
77
-
78
-
79
-
80
-
81
-
82
-
83
-
84
-
85
-
86
-
87
-
88
-
89
-
90
-
91
-
92
-
93
-
94
-
95
-
96
-
97
-
98
-
99
-
100
-
101
-
102
-
103
-
104
-
105
-
106
-
107
-
108
-
109
-
110
-
111
-
112
-
113
-
114
-
115
-
116
-
117
-
118
-
119
-
120
-
121
-
122
-
123
-
124
-
125
-
126
-
127
-
128
-
129
-
130
-
131
-
132
-
133
-
134
-
135
-
136
-
137
-
138
-
139
-
140
-
141
 |
 |