Lexmark E260dn User Guide - Page 90
Moving the printer, Moving the printer to another location - warning lights
 |
View all Lexmark E260dn manuals
Add to My Manuals
Save this manual to your list of manuals |
Page 90 highlights
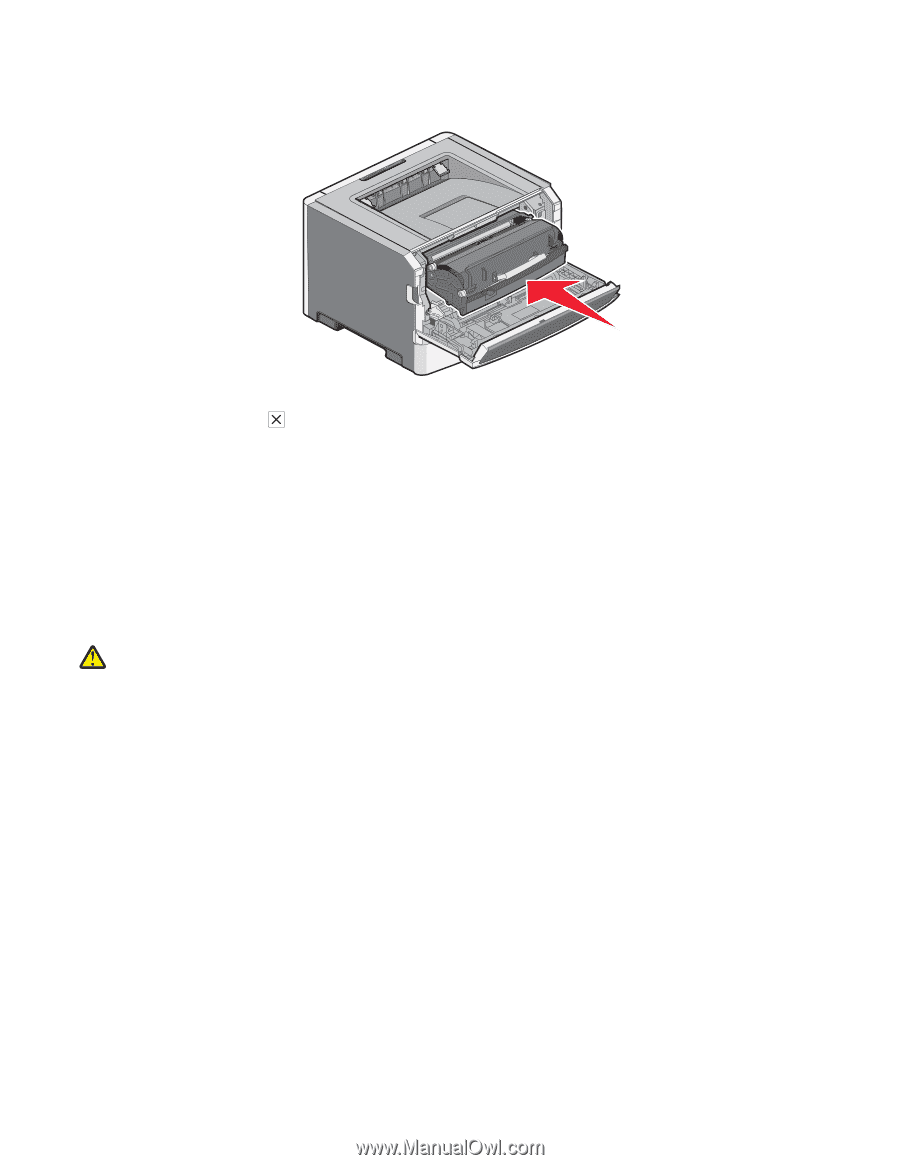
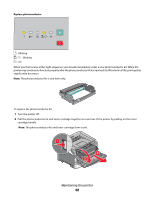
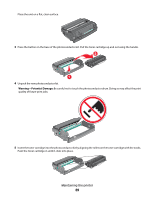
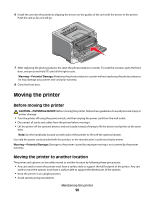
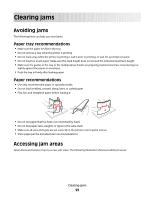
6 Install the unit into the printer by aligning the arrows on the guides of the unit with the arrows in the printer. Push the unit as far as it will go. 7 After replacing the photoconductor kit, reset the photoconductor counter. To reset the counter, open the front door, and press and hold until all the lights cycle. Warning-Potential Damage: Resetting the photoconductor counter without replacing the photoconductor kit may damage your printer and void your warranty. 8 Close the front door. Moving the printer Before moving the printer CAUTION-POTENTIAL INJURY: Before moving the printer, follow these guidelines to avoid personal injury or printer damage: • Turn the printer off using the power switch, and then unplug the power cord from the wall outlet. • Disconnect all cords and cables from the printer before moving it. • Lift the printer off the optional drawer, and set it aside instead of trying to lift the drawer and printer at the same time. Note: Use the handholds located on both sides of the printer to lift it off the optional drawer. Use only the power cord provided with this product or the manufacturer's authorized replacement. Warning-Potential Damage: Damage to the printer caused by improper moving is not covered by the printer warranty. Moving the printer to another location The printer and options can be safely moved to another location by following these precautions: • Any cart used to move the printer must have a surface able to support the full footprint of the printer. Any cart used to move the options must have a surface able to support the dimensions of the options. • Keep the printer in an upright position. • Avoid severe jarring movements. Maintaining the printer 90
-
 1
1 -
2
-
3
-
4
-
5
-
6
-
7
-
8
-
9
-
10
-
11
-
12
-
13
-
14
-
15
-
16
-
17
-
18
-
19
-
20
-
21
-
22
-
23
-
24
-
25
-
26
-
27
-
28
-
29
-
30
-
31
-
32
-
33
-
34
-
35
-
36
-
37
-
38
-
39
-
40
-
41
-
42
-
43
-
44
-
45
-
46
-
47
-
48
-
49
-
50
-
51
-
52
-
53
-
54
-
55
-
56
-
57
-
58
-
59
-
60
-
61
-
62
-
63
-
64
-
65
-
66
-
67
-
68
-
69
-
70
-
71
-
72
-
73
-
74
-
75
-
76
-
77
-
78
-
79
-
80
-
81
-
82
-
83
-
84
-
 85
85 -
 86
86 -
 87
87 -
 88
88 -
 89
89 -
 90
90 -
 91
91 -
 92
92 -
 93
93 -
 94
94 -
 95
95 -
96
-
97
-
98
-
99
-
100
-
101
-
102
-
103
-
104
-
105
-
106
-
107
-
108
-
109
-
110
-
111
-
112
-
113
-
114
-
115
-
116
-
117
-
118
-
119
-
120
-
121
-
122
-
123
-
124
-
125
-
126
-
127
-
128
-
129
-
130
-
131
-
132
-
133
-
134
-
135
-
136
-
137
-
138
-
139
-
140
-
141
 |
 |