Lexmark E260dn User Guide - Page 62
Printing the print quality test s, After a few minutes - photoconductor kit
 |
View all Lexmark E260dn manuals
Add to My Manuals
Save this manual to your list of manuals |
Page 62 highlights
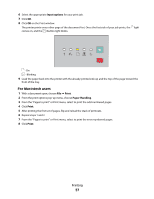
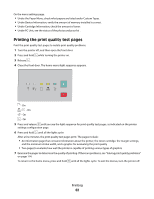
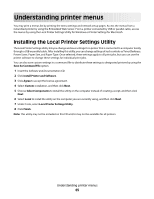
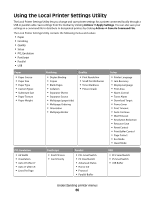
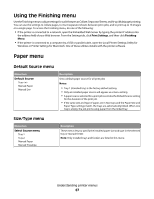
On the menu settings page: • Under the Paper Menu, check what papers are listed under Custom Types. • Under Device Information, verify the amount of memory installed is correct . • Under Cartridge Information, check the amount of toner. • Under PC Unit, see the status of the photoconductor kit . Printing the print quality test pages Print the print quality test pages to isolate print quality problems. 1 Turn the printer off, and then open the front door. 2 Press and hold while turning the printer on. 3 Release . 4 Close the front door. The home menu light sequence appears. - On - On - On - On 5 Press and release until you see the light sequence for print quality test pages, as indicated on the printer settings configuration page. 6 Press and hold until all the lights cycle. After a few minutes, the print quality test pages print. The pages include: • An information page that contains information about the printer, the toner cartridge, the margin settings, and the minimum stroke width, and a graphic for evaluating the print quality • Two pages to evaluate how well the printer is capable of printing various types of graphics 7 Examine the pages to determine the quality of printing. If there are problems, see "Solving print quality problems" on page 114. To return to the home menu, press and hold until all the lights cycle. To exit the menus, turn the printer off. Printing 62
-
 1
1 -
2
-
3
-
4
-
5
-
6
-
7
-
8
-
9
-
10
-
11
-
12
-
13
-
14
-
15
-
16
-
17
-
18
-
19
-
20
-
21
-
22
-
23
-
24
-
25
-
26
-
27
-
28
-
29
-
30
-
31
-
32
-
33
-
34
-
35
-
36
-
37
-
38
-
39
-
40
-
41
-
42
-
43
-
44
-
45
-
46
-
47
-
48
-
49
-
50
-
51
-
52
-
53
-
54
-
55
-
56
-
 57
57 -
 58
58 -
 59
59 -
 60
60 -
 61
61 -
 62
62 -
 63
63 -
 64
64 -
 65
65 -
 66
66 -
 67
67 -
68
-
69
-
70
-
71
-
72
-
73
-
74
-
75
-
76
-
77
-
78
-
79
-
80
-
81
-
82
-
83
-
84
-
85
-
86
-
87
-
88
-
89
-
90
-
91
-
92
-
93
-
94
-
95
-
96
-
97
-
98
-
99
-
100
-
101
-
102
-
103
-
104
-
105
-
106
-
107
-
108
-
109
-
110
-
111
-
112
-
113
-
114
-
115
-
116
-
117
-
118
-
119
-
120
-
121
-
122
-
123
-
124
-
125
-
126
-
127
-
128
-
129
-
130
-
131
-
132
-
133
-
134
-
135
-
136
-
137
-
138
-
139
-
140
-
141
 |
 |
