Panasonic PV-GS29 Digital Video Camera - English/ Spanish - Page 17
How To Remove The Sensor Tag (for U.s.a. Customers), Re-attaching The Lens Cap
 |
UPC - 037988980123
View all Panasonic PV-GS29 manuals
Add to My Manuals
Save this manual to your list of manuals |
Page 17 highlights
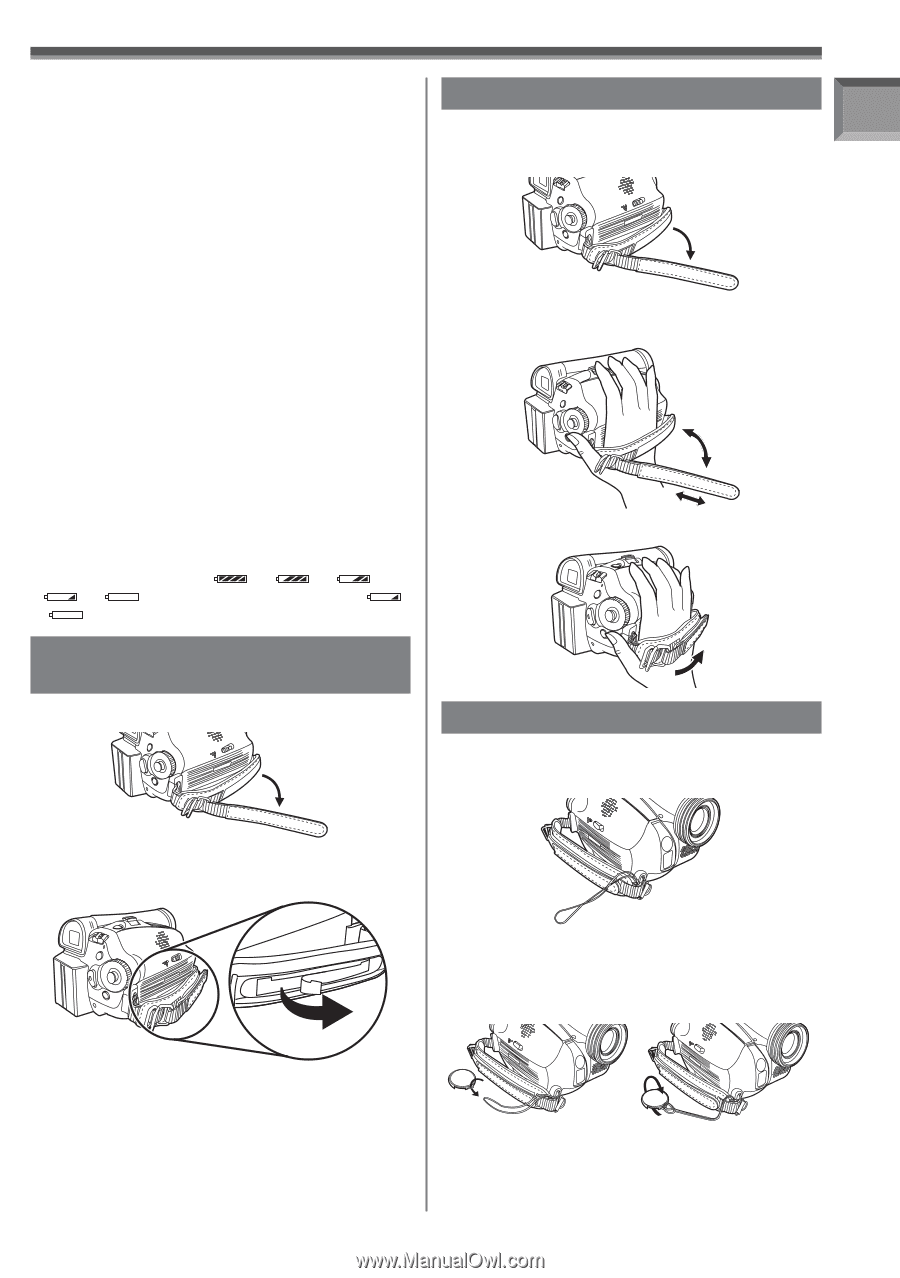
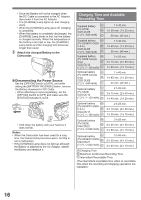
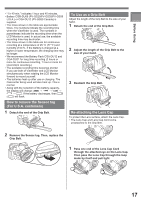
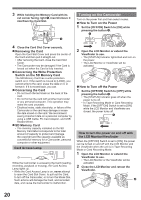
Before Using • "1 h 40 min." indicates 1 hour and 40 minutes. • Battery CGR-DU06 (PV-GS29/PV-GS39/PV-GS59 U.S.A.) or CGA-DU12 (PV-GS59 Canada) is supplied. • The times shown in the table are approximate times. The numbers indicate the recording time when the Viewfinder is used. The numbers in parentheses indicate the recording time when the LCD Monitor is used. In actual use, the available recording time may be shorter. • The times shown in the table are for continuous recording at a temperature of 25 °C (77 °F) and humidity of 60 %. If the Battery is charged at a higher or lower temperature, the charging time may be longer. • We recommend the Battery Pack CGA-DU12 and CGA-DU21 for long time recording (2 hours or more for continuous recording, 1 hour or more for intermittent recording.) • The available recording time becomes shorter if you use both of Viewfinder and LCD Monitor simultaneously when rotating the LCD Monitor forward to record yourself. • The batteries heat up after use or charging. The Camcorder being used will also heat up. This is normal. • Along with the reduction of the battery capacity, the display will change: → → → → . If the battery discharges, then ( ) will flash. How to remove the Sensor tag (For U.S.A. customers) 1 Detach the end of the Grip Belt. To Use as a Grip Belt Adjust the length of the Grip Belt to the size of your hand. 1 Detach the end of the Grip Belt. 2 Adjust the length of the Grip Belt to the size of your hand. 3 Reattach the Grip Belt. Re-attaching the Lens Cap To protect the Lens surface, attach the Lens Cap. • The Lens Cap and Lens Cap Cord come preattached to the Grip Belt. 2 Remove the Sensor tag. Then, replace the Grip Belt. 1 Pass one end of the Lens Cap Cord through the attached eye on the Lens Cap. Then pass the Lens Cap through the loop made by itself and pull tight. 17
-
 1
1 -
2
-
3
-
4
-
5
-
6
-
7
-
8
-
9
-
10
-
11
-
 12
12 -
 13
13 -
 14
14 -
 15
15 -
 16
16 -
 17
17 -
 18
18 -
 19
19 -
 20
20 -
 21
21 -
 22
22 -
23
-
24
-
25
-
26
-
27
-
28
-
29
-
30
-
31
-
32
-
33
-
34
-
35
-
36
-
37
-
38
-
39
-
40
-
41
-
42
-
43
-
44
-
45
-
46
-
47
-
48
-
49
-
50
-
51
-
52
-
53
-
54
-
55
-
56
-
57
-
58
-
59
-
60
-
61
-
62
-
63
-
64
-
65
-
66
-
67
-
68
-
69
-
70
-
71
-
72
-
73
-
74
-
75
-
76
-
77
-
78
-
79
-
80
-
81
-
82
-
83
-
84
-
85
-
86
-
87
-
88
-
89
-
90
-
91
-
92
 |
 |