Panasonic PV-GS29 Digital Video Camera - English/ Spanish - Page 54
Copying Onto A Dvd Recorder Or A Vcr (dubbing), Using The Dv Cable For Recording (digital Dubbing)
 |
UPC - 037988980123
View all Panasonic PV-GS29 manuals
Add to My Manuals
Save this manual to your list of manuals |
Page 54 highlights
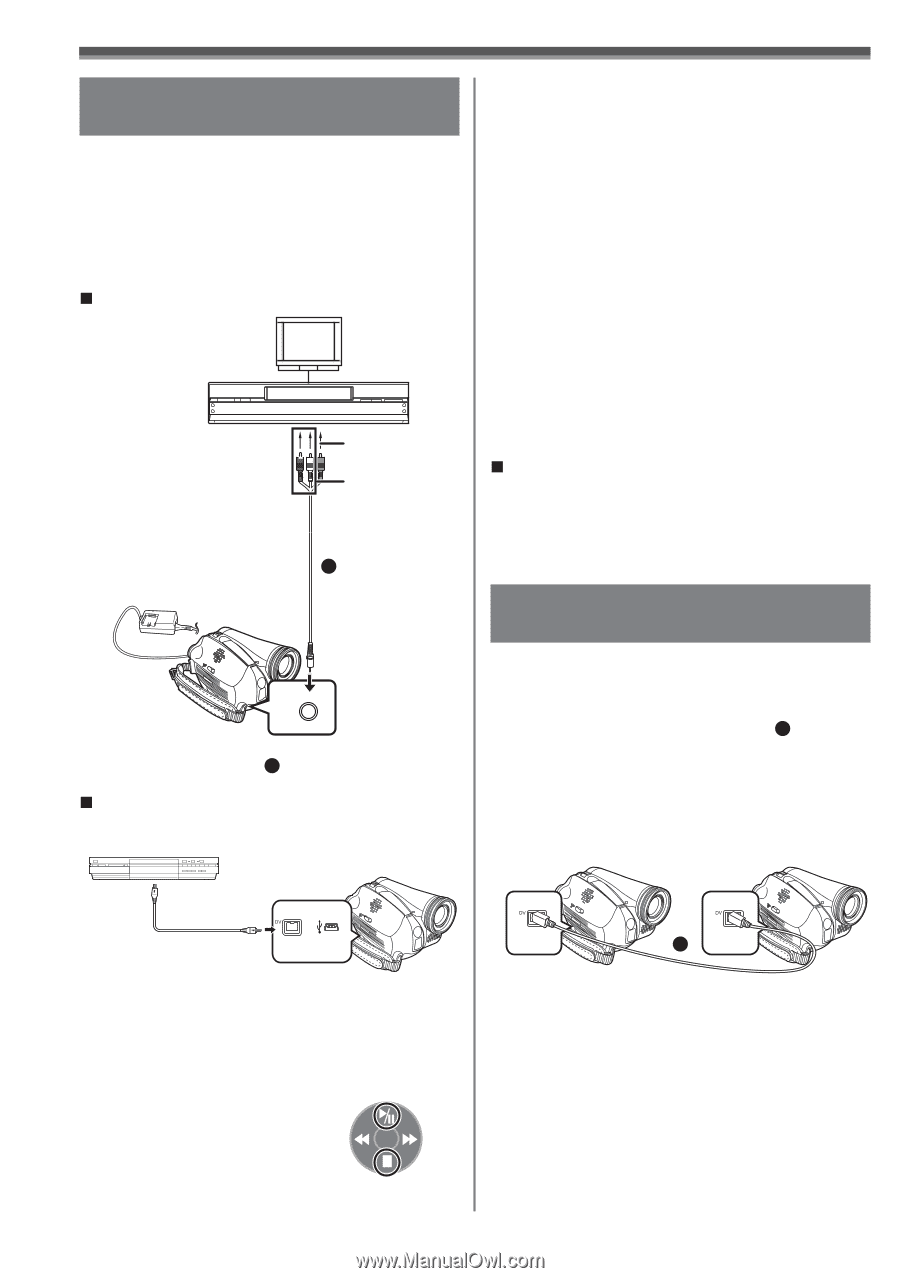
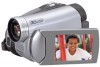
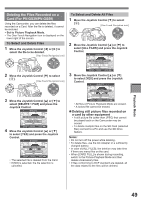
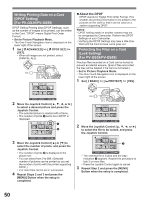
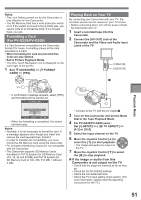
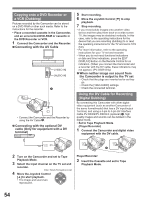
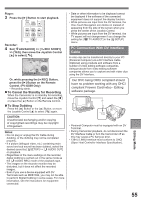
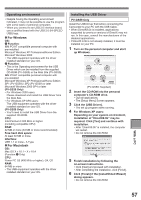
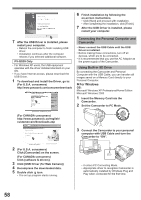
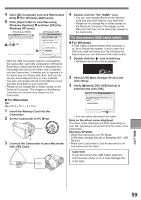
Copying onto a DVD Recorder or a VCR (Dubbing) Pictures recorded by the Camcorder can be stored on a DVD-RAM or other such media. Refer to the instructions for the recorder. • Place a recorded cassette in the Camcorder, and an unrecorded DVD-RAM or cassette in the DVD Recorder or VCR. 1 Connect the Camcorder and the Recorder. „ Connecting with the AV Cable [VIDEO IN] [AUDIO IN] 1 A/V • Connect the Camcorder and the Recorder by using the AV Cable 1 . „ Connecting with the optional DV cable (Only for equipment with a DV terminal) 5 Start recording. 6 Move the Joystick Control [▼] to stop playback. 7 Stop recording. • If you record (dub) images onto another video device and then play them back on a wide screen TV, the images may be stretched vertically. In this case, refer to the operating instructions for the device that you are recording (dubbing) to or read the operating instructions for the TV and set to 16:9 (full). • For more information, refer to the operating instructions for your TV set and recorder. • When you do not need functional indications or date and time indications, press the [EXT DISPLAY] Button on the Remote Control for no indication. (When you connect the Camcorder and a recorder with the DV cable, these indications may not appear.) (PV-GS59 Only) „ When neither image nor sound from the Camcorder is output to the TV set • Check that the plugs are inserted as far as they go. • Check the [12bit AUDIO] settings. • Check the connected terminal. Using the DV Cable for Recording (Digital Dubbing) By connecting this Camcorder with other digital video equipment (such as another Camcorder of the same format/model) that has a DV input/output Terminal, and using a 4-pin to 4-pin DV Interface Cable PV-DDC9/PV-DDC9-K (optional) 1 , high quality images and sounds can be dubbed in the digital mode. • Set to Tape Playback Mode (Player/Recorder) 1 Connect the Camcorder and digital video equipment with the DV cable. 1 2 Turn on the Camcorder and set to Tape Playback Mode. 3 Select the input channel on the TV set and recorder. [One-Touch Navigation icon] 4 Move the Joystick Control [▲] to start playback. • The image and sound are reproduced. Player/Recorder: 2 Insert the Cassette and set to Tape Playback Mode. 54
-
 1
1 -
2
-
3
-
4
-
5
-
6
-
7
-
8
-
9
-
10
-
11
-
12
-
13
-
14
-
15
-
16
-
17
-
18
-
19
-
20
-
21
-
22
-
23
-
24
-
25
-
26
-
27
-
28
-
29
-
30
-
31
-
32
-
33
-
34
-
35
-
36
-
37
-
38
-
39
-
40
-
41
-
42
-
43
-
44
-
45
-
46
-
47
-
48
-
 49
49 -
 50
50 -
 51
51 -
 52
52 -
 53
53 -
 54
54 -
 55
55 -
 56
56 -
 57
57 -
 58
58 -
 59
59 -
60
-
61
-
62
-
63
-
64
-
65
-
66
-
67
-
68
-
69
-
70
-
71
-
72
-
73
-
74
-
75
-
76
-
77
-
78
-
79
-
80
-
81
-
82
-
83
-
84
-
85
-
86
-
87
-
88
-
89
-
90
-
91
-
92
 |
 |