Panasonic PV-GS29 Digital Video Camera - English/ Spanish - Page 19
USING A MEMORY CARD (OPTIONAL) (FOR PV-GS39/PV-GS59), Inserting/Removing a Card
 |
UPC - 037988980123
View all Panasonic PV-GS29 manuals
Add to My Manuals
Save this manual to your list of manuals |
Page 19 highlights
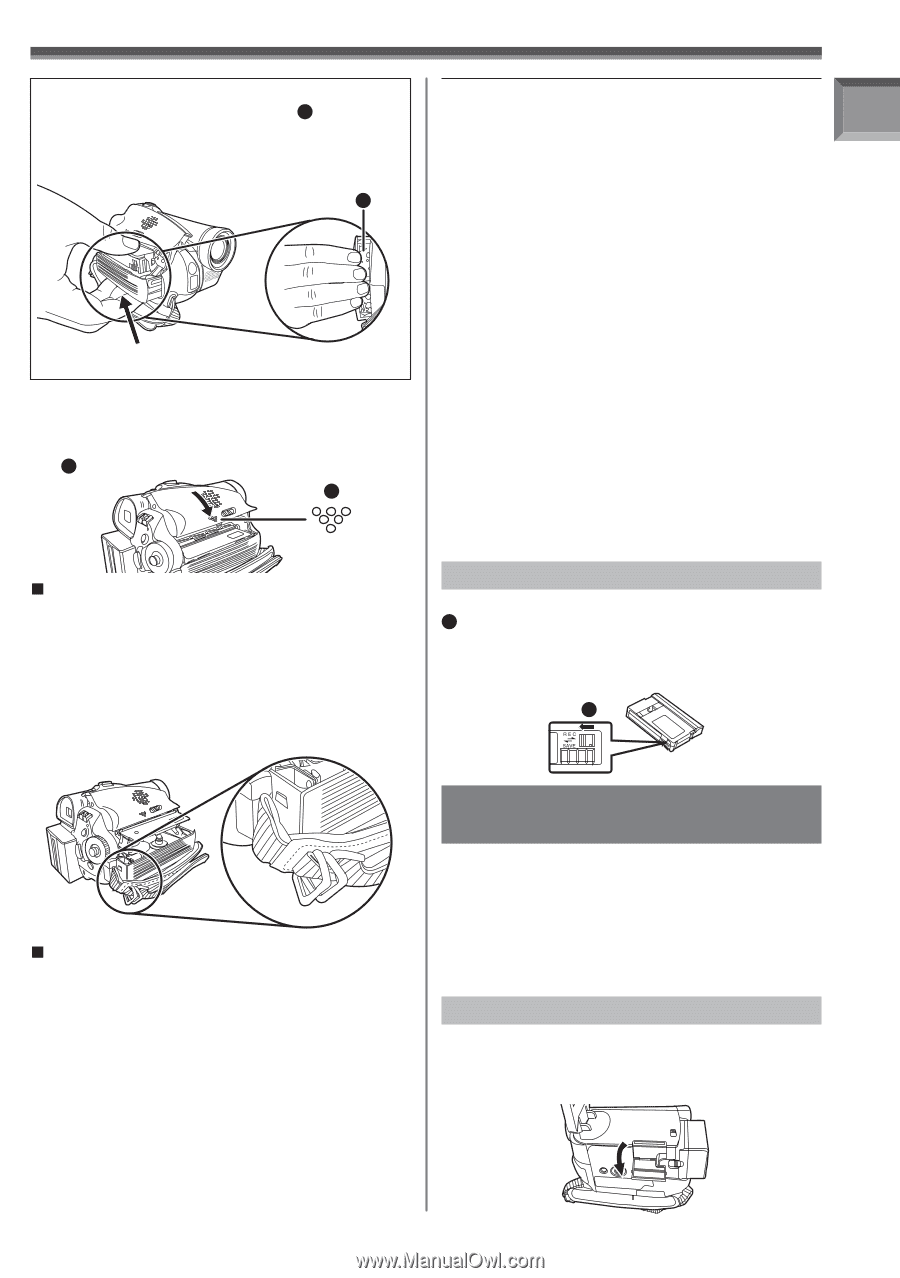
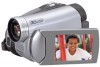
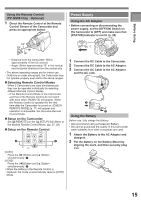
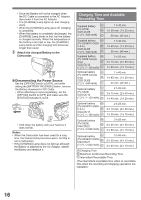
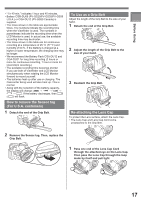
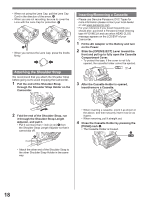
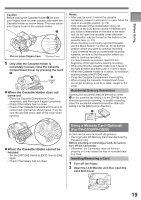
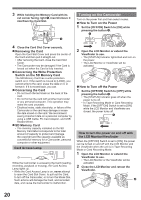
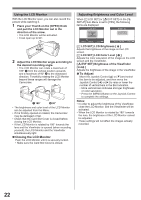
Before Using Caution : Before closing the Cassette Holder 2 , be sure your fingers have not been placed underneath the Cassette Holder as shown below. This may cause your fingers to jam in the cassette holder. 2 Do not place fingers here. [Bottom View] 5 Only after the Cassette Holder is completely housed, close the Cassette Compartment Cover by pressing the mark 3. 3 „ When the Cassette Holder does not come out • Close the Cassette Compartment Cover completely, and then open it again completely. • Check if the battery has run down. • Check if the Cassette Compartment Cover is in contact with grip belt as shown below. If so, be sure the grip belt stays clear of the cover when opening. Notes: • After use, be sure to rewind the cassette completely, remove it and put it in a case. Store the case in an upright position. (p. 74) • If the indicator of the condensation does not display on the LCD screen and/or Viewfinder and you notice condensation on the lens or the main unit, do not open the cassette cover otherwise condensation may be formed on the heads or the cassette tape. (p. 73) • When inserting a previously recorded Cassette, use the Blank Search Function (p. 31) to find the position where you want to continue recording. If you overwrite-record on a previously recorded cassette, be sure to find the position where you want to continue recording. • If a new Cassette is inserted, rewind to the beginning of the tape before starting recording. • When inserting the cassette, make sure it faces in the right direction and then push it in until it stops. • When the Cassette Holder is in action, do not touch anything except the [PUSH] mark. • Close the Cassette Compartment Cover tightly. • When closing the Cassette Compartment Cover, do not get anything, such as a cable, caught in the cover. Accidental Erasure Prevention Opening the accidental erasure prevention slider 1 on the cassette (by sliding it to the [SAVE] arrow direction) prevents recording. To enable recording, close the accidental erasure prevention slider (by sliding it to the [REC] arrow direction). 1 „ When the Cassette Holder cannot be housed • Set the [OFF/ON] Switch to [OFF], then to [ON] again. • Check if the battery has run down. Using a Memory Card (Optional) (For PV-GS39/PV-GS59) A Card can be used to record still pictures. • Use a genuine SD Memory Card manufactured by Panasonic only. Before inserting or removing a Card, be sure to turn off the Camcorder. • Otherwise, the Camcorder may not function properly or it may cause the loss of recorded data in a Card. Inserting/Removing a Card 1 Turn off the Power. 2 Open the LCD Monitor and then open the Card Slot Cover. 19
-
 1
1 -
2
-
3
-
4
-
5
-
6
-
7
-
8
-
9
-
10
-
11
-
12
-
13
-
 14
14 -
 15
15 -
 16
16 -
 17
17 -
 18
18 -
 19
19 -
 20
20 -
 21
21 -
 22
22 -
 23
23 -
 24
24 -
25
-
26
-
27
-
28
-
29
-
30
-
31
-
32
-
33
-
34
-
35
-
36
-
37
-
38
-
39
-
40
-
41
-
42
-
43
-
44
-
45
-
46
-
47
-
48
-
49
-
50
-
51
-
52
-
53
-
54
-
55
-
56
-
57
-
58
-
59
-
60
-
61
-
62
-
63
-
64
-
65
-
66
-
67
-
68
-
69
-
70
-
71
-
72
-
73
-
74
-
75
-
76
-
77
-
78
-
79
-
80
-
81
-
82
-
83
-
84
-
85
-
86
-
87
-
88
-
89
-
90
-
91
-
92
 |
 |