Pioneer VSX-1121-K Owner's Manual - Page 57
Setting the Video options, VIDEO PARAMETER, V. CONV, Press, then press
 |
View all Pioneer VSX-1121-K manuals
Add to My Manuals
Save this manual to your list of manuals |
Page 57 highlights
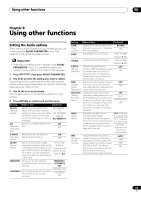
Using other functions 08 k.• You can't use the Virtual Front Height mode when the headphones are connected to this receiver or when any of the stereo, Front Stage Surround Advance, Sound Retriever Air or Stream Direct modes is selected. • The Virtual Front Height mode cannot be used when no surround speaker is connected. • When inputting Dolby True HD, DTS-HD or DTS Express audio signals, the Virtual Front Height mode cannot be used if no surround signals are recorded in the source. Setting the Video options There are a number of additional picture settings you can make using the VIDEO PARAMETER menu. The defaults, if not stated, are listed in bold. Important • Note that if an option cannot be selected on the VIDEO PARAMETER menu, it is unavailable due to the current source, setting and status of the receiver. • All of the setting items can be set for each input function. • Setting items other than V. CONV can only be selected when V. CONV is set to ON. 1 Press RECEIVER , then press VIDEO PARAMETER. 2 Use / to select the setting you want to adjust. Depending on the current status/mode of the receiver, certain options may not be able to be selected. Check the table below for notes on this. 3 Use / to set as necessary. See the table below for the options available for each setting. 4 Press RETURN to confirm and exit the menu. Setting What it does Option(s) V. CONVa Converts video signals for output ON (Digital Video from the MONITOR OUT jacks OFF Conversion) (including HDMI OUT connector) for all video types (see page 21). RESb (Resolution) Specifies the output resolution of the video signal (when video input signals are output at the HDMI OUT connector, select this according to the resolution of your monitor and the images you wish to watch). AUTO PURE 480p/576p 720p 1080i 1080p ASPc (Aspect) Specifies the aspect ratio when input signals are output at the HDMI output. Make your desired settings while checking each setting on your display (if the image doesn't match your monitor type, cropping or black bands appear). 1080/24p THROUGH NORMAL Setting What it does Option(s) PCINEMAd,e This setting optimizes the (PureCinema) operation of the progressive scanning circuit for playing film materials. Normally set it to AUTO. If the picture seems unnatural, switch this to ON or OFF. AUTO ON OFF P.MOTIONd,e Adjusts the motion and still picture (Progressive quality when video output is set to Motion) progressive. -4 to +4 Default: 0 YNRd Reduces noise in the luminance (Y) signal. 0 to +8 Default: 0 CNRd Reduces noise in the input's color 0 to +8 (C) signal. Default: 0 BNRd Reduces block noise (blockshaped distortion generated upon MPEG compression) in the picture. 0 to +8 Default: 0 MNRd Reduces mosquito noise (distortion generated at the contours of the picture upon MPEG compression) in the picture. 0 to +8 Default: 0 DETAILd Adjusts how sharp edges appear. 0 to +8 Default: 0 BRIGHTd Adjusts the overall brightness. (Brightness) -6 to +6 Default: 0 CONTRASTd Adjusts the contrast between light -6 to +6 and dark. Default: 0 HUEd Adjusts the red/green balance. -6 to +6 Default: 0 CHROMAd (Chroma Level) Adjusts saturation from dull to bright. -6 to +6 Default: 0 BLK SETUPf Corrects the black depth in the 7.5 brightness signal. 0 Normally select 7.5. If the dark parts of the picture are all black with this setting, select 0. a.If the video picture deteriorates when this settings is switched ON, switch it OFF. b.• When set to a resolution with which the TV (monitor) is not compatible, no picture is output. Also, in some cases no picture will be output due to copyright protection signals. In this case, change the setting. • When AUTO is selected, the resolution is selected automatically according to the capacity of the TV (monitor) connected by HDMI. When PURE is selected, the signals are output with the same resolution as when input (see About the video converter on page 21). • If this is set to something other than AUTO, PURE and 480i/576i analog signals are input, 480p/576p signals are output from the component output terminals. c.• If the image doesn't match your monitor type, adjust the aspect ratio on the source component or on the monitor. • This setting is only displayed when 480i/p or 576i/p video signals are being input. 57 En
-
 1
1 -
2
-
3
-
4
-
5
-
6
-
7
-
8
-
9
-
10
-
11
-
12
-
13
-
14
-
15
-
16
-
17
-
18
-
19
-
20
-
21
-
22
-
23
-
24
-
25
-
26
-
27
-
28
-
29
-
30
-
31
-
32
-
33
-
34
-
35
-
36
-
37
-
38
-
39
-
40
-
41
-
42
-
43
-
44
-
45
-
46
-
47
-
48
-
49
-
50
-
51
-
 52
52 -
 53
53 -
 54
54 -
 55
55 -
 56
56 -
 57
57 -
 58
58 -
 59
59 -
 60
60 -
 61
61 -
 62
62 -
63
-
64
-
65
-
66
-
67
-
68
-
69
-
70
-
71
-
72
-
73
-
74
-
75
-
76
-
77
-
78
-
79
-
80
-
81
-
82
-
83
-
84
-
85
-
86
-
87
-
88
-
89
-
90
-
91
-
92
-
93
-
94
-
95
-
96
-
97
-
98
-
99
-
100
-
101
-
102
-
103
-
104
-
105
-
106
-
107
-
108
 |
 |
