Pioneer VSX-1121-K Owner's Manual - Page 64
Erasing all learnt settings that are in one input function, Direct function
 |
View all Pioneer VSX-1121-K manuals
Add to My Manuals
Save this manual to your list of manuals |
Page 64 highlights
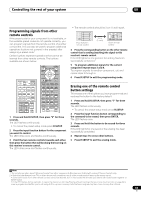
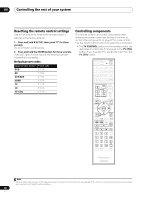
09 Controlling the rest of your system Erasing all learnt settings that are in one input function This operation erases all the operational settings of other devices that have been programmed in one input function, and restores the factory default. This function is handy for erasing all data programmed for devices no longer being used. 1 Press and hold R.SETUP, then press "9" for three seconds. The LED flashes continuously. • To cancel the preset setup mode press R.SETUP. 2 Press and hold the input function button corresponding to the command to be erased for three seconds. If the LED lights for one second, the erasing has been successfully completed. Direct function • Default setting: On You can use the direct function feature to control one component using the remote control while at the same time using your receiver to play a different component. This could let you, for example, use the remote control to set up and listen to a CD on the receiver, and then use the remote control to rewind a tape in your VCR while you continue to listen to your CD player. When direct function is on, any component you select (using the input function buttons) will be selected by both the receiver and the remote control. When you turn direct function off, you can operate the remote control without affecting the receiver. 1 Press and hold R.SETUP, then press "5" for three seconds. The LED flashes continuously. • To cancel the preset setup mode press R.SETUP. 2 Press the input function button for the component you want to control. 3 Press "1" (On) or "0" (Off) to switch the direct function mode. If the LED lights for one second, the setting has been successfully completed. If the LED flashes three times, the setting has failed. 4 Press R.SETUP to exit the setup. Setting the backlight mode • Default setting: 1 (normal mode) The backlight lighting pattern can be selected from among four modes, in consideration of convenience and battery service life. 1 Press and hold R.SETUP, then press "6" for three seconds. The LED flashes continuously. • To cancel the preset setup mode press R.SETUP. 2 Press the number button for the backlight mode you want to set. • "1" (normal mode) - The backlight is turned on and off with the light button. After it lights, it turns off automatically if no operation is performed for 10 seconds. • "2" (frequent lighting mode) - The backlight turns on when any button on the remote control is pressed. It is turned off with the light button. After it lights, it turns off automatically if no operation is performed for 10 seconds. • "3" (eco mode) - The backlight is turned on and off with the light button. After it lights, it turns off automatically if no operation is performed for 5 seconds. • "4" (off mode) - The backlight does not turn on even when the light button is pressed. If the LED lights for one second, the setting has been successfully completed. If the LED flashes three, the setting has failed. 3 Press R.SETUP to exit the setup. Multi operation and System off The Multi operation feature allows you to program a series of up to 5 commands for the components in your system. • Be sure to call up the preset codes of devices or perform programming signals for other remote controls before multi operation memory programming (page 63). The Multi operation feature makes it easy to perform the following operations by pressing just two buttons. Press MULTI OPERATION and then the DVD input function button to: 1. Switch this receiver on. 2. Switch this receiver's input to DVD. 3. Transmit a sequence of up to five programmed commands. 64 En
-
 1
1 -
2
-
3
-
4
-
5
-
6
-
7
-
8
-
9
-
10
-
11
-
12
-
13
-
14
-
15
-
16
-
17
-
18
-
19
-
20
-
21
-
22
-
23
-
24
-
25
-
26
-
27
-
28
-
29
-
30
-
31
-
32
-
33
-
34
-
35
-
36
-
37
-
38
-
39
-
40
-
41
-
42
-
43
-
44
-
45
-
46
-
47
-
48
-
49
-
50
-
51
-
52
-
53
-
54
-
55
-
56
-
57
-
58
-
 59
59 -
 60
60 -
 61
61 -
 62
62 -
 63
63 -
 64
64 -
 65
65 -
 66
66 -
 67
67 -
 68
68 -
 69
69 -
70
-
71
-
72
-
73
-
74
-
75
-
76
-
77
-
78
-
79
-
80
-
81
-
82
-
83
-
84
-
85
-
86
-
87
-
88
-
89
-
90
-
91
-
92
-
93
-
94
-
95
-
96
-
97
-
98
-
99
-
100
-
101
-
102
-
103
-
104
-
105
-
106
-
107
-
108
 |
 |
