Pioneer VSX-1121-K Owner's Manual - Page 79
Speaker system setting, Speaker Setting, Manual SP Setup
 |
View all Pioneer VSX-1121-K manuals
Add to My Manuals
Save this manual to your list of manuals |
Page 79 highlights
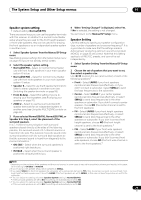
The System Setup and Other Setup menus 11 Speaker system setting • Default setting: Normal(SB/FH) There are several ways you can use the speaker terminals with this receiver. In addition to a normal home theater setup where they are used for the front height speakers or front wide speakers, they can be used for bi-amping the front speakers or as an independent speaker system in another room. 1 Select 'Speaker System' from the Manual SP Setup menu. See Making receiver settings from the System Setup menu on page 78 if you're not already at this screen. 2 Select the speaker system setting. • Normal(SB/FH) - Select for normal home theater use with front height speakers in your main (speaker system A) setup. • Normal(SB/FW) - Select for normal home theater use with front wide speakers in your main (speaker system A) setup. • Speaker B - Select to use the B speaker terminals to listen to stereo playback in another room (see Switching the speaker terminals on page 58). • Front Bi-Amp - Select this setting if you're biamping your front speakers (see Bi-amping your speakers on page 20). • ZONE 2 - Select to use the (surround back) B speaker terminals for an independent system in another zone (see Using the MULTI-ZONE controls on page 58). 3 If you selected Normal(SB/FH), Normal(SB/FW), or Speaker B in Step 2, select the placement of the surround speakers. In a 7.1-channel surround system with surround speakers placed directly at the sides of the listening position, the surround sound of 5.1-channel sources is heard from the side. This function mixes the sound of the surround speakers with the surround back speakers so that the surround sound is heard from diagonally to the rear as it should be.1 • ON SIDE - Select when the surround speakers is positioned right beside you. • IN REAR - Select when the surround speaker is positioned obliquely behind you. 4 When 'Setting Change?' is displayed, select Yes. If No is selected, the setting is not changed. You will return to the Manual SP Setup menu. Speaker Setting Use this setting to specify your speaker configuration (size, number of speakers and crossover frequency)2. It is a good idea to make sure that the settings made in Automatically conducting optimum sound tuning (Auto MCACC) on page 35 are correct. Note that this setting applies to all MCACC presets, and cannot be set independently. 1 Select 'Speaker Setting' from the Manual SP Setup menu. 2 Choose the set of speakers that you want to set, then select a speaker size. Use / to select the size (and number) of each of the following speakers:3 • Front - Select LARGE if your front speakers reproduce bass frequencies effectively, or if you didn't connect a subwoofer. Select SMALL to send the bass frequencies to the subwoofer. • Center - Select LARGE if your center speaker reproduces bass frequencies effectively, or select SMALL to send bass frequencies to the other speakers or subwoofer. If you didn't connect a center speaker, choose NO (the center channel is sent to the front speakers). • FH - Select LARGE if your front height speakers reproduce bass frequencies effectively, or select SMALL to send bass frequencies to the other speakers or subwoofer. If you didn't connect front height speakers, choose NO (the front height channel is sent to the front speakers).4 • FW - Select LARGE if your front wide speakers reproduce bass frequencies effectively, or select SMALL to send bass frequencies to the other speakers or subwoofer. If you didn't connect front wide speakers, choose NO (the front wide channel is sent to the front speakers).5 Note 1 Depending on the positions of the speakers and the sound source, in some cases it may not be possible to achieve good results. In this case, set the setting to ON SIDE or IN REAR. 2 If you're using a THX speaker setup, set all speakers to SMALL. 3 If you select SMALL for the front speakers the subwoofer will automatically be fixed to YES. Also, the center, surround, surround back, front height and front wide speakers can't be set to LARGE if the front speakers are set to SMALL. In this case, all bass frequencies are sent to the subwoofer. 4 • You can adjust this setting only when Speaker System setting is Normal(SB/FH). • If the surround speakers are set to NO, this setting will automatically be set to NO. 5 • You can adjust this setting only when Speaker System setting is Normal(SB/FW). • If the surround speakers are set to NO, this setting will automatically be set to NO. 79 En
-
 1
1 -
2
-
3
-
4
-
5
-
6
-
7
-
8
-
9
-
10
-
11
-
12
-
13
-
14
-
15
-
16
-
17
-
18
-
19
-
20
-
21
-
22
-
23
-
24
-
25
-
26
-
27
-
28
-
29
-
30
-
31
-
32
-
33
-
34
-
35
-
36
-
37
-
38
-
39
-
40
-
41
-
42
-
43
-
44
-
45
-
46
-
47
-
48
-
49
-
50
-
51
-
52
-
53
-
54
-
55
-
56
-
57
-
58
-
59
-
60
-
61
-
62
-
63
-
64
-
65
-
66
-
67
-
68
-
69
-
70
-
71
-
72
-
73
-
 74
74 -
 75
75 -
 76
76 -
 77
77 -
 78
78 -
 79
79 -
 80
80 -
 81
81 -
 82
82 -
 83
83 -
 84
84 -
85
-
86
-
87
-
88
-
89
-
90
-
91
-
92
-
93
-
94
-
95
-
96
-
97
-
98
-
99
-
100
-
101
-
102
-
103
-
104
-
105
-
106
-
107
-
108
 |
 |