Samsung SGH-A667 User Manual (user Manual) (ver.f10) (English) - Page 39
Favorites URL, Contact Info - reviews
 |
View all Samsung SGH-A667 manuals
Add to My Manuals
Save this manual to your list of manuals |
Page 39 highlights
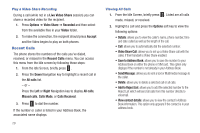
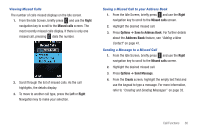
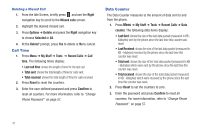
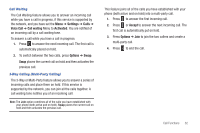
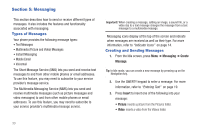
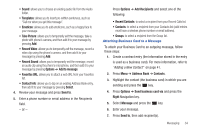
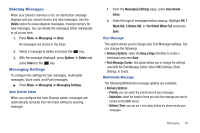
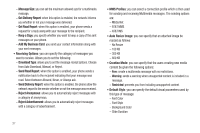
• Sound: allows you to choose an existing audio file from the Audio folder. • Templates: allows you to insert pre-written sentences, such as "Call me when you get this message". • Emoticon: allows you to add emoticons, such as a happy face to your message. • Take Picture: allows you to temporarily exit the message, take a photo with phone's camera, and then add it to your message by pressing Add. • Record Video: allows you to temporarily exit the message, record a video clip using the phone's camera, and then add it to your message by pressing Add. • Record Sound: allows you to temporarily exit the message, record an audio clip using the phone's microphone, and then add it to your message by pressing Options ➔ Add to message. • Favorites URL: allows you to attach a web URL from your Favorites list. • Contact Info: allows you to tap on an existing Address Book entry, then add it to your message by pressing Select. 4. Review your message and press Send to. 5. Enter a phone number or email address in the Recipients field. - or - Press Options ➔ Add Recipients and select one of the following: • Recent Contacts: to select a recipient from your Recent Calls list. • Contacts: to select a recipient from your Contacts list (valid entries must have a wireless phone number or email address). • Groups: to select a recipient from the Group list. Attaching Business Card to a Message To attach your Business Card to an outgoing message, follow these steps: 1. Create a contract entry (the information stored in the entry is used as a business card). For more information, refer to "Adding a New Contact" on page 41. 2. Press Menu ➔ Address Book ➔ Contacts. 3. Highlight the contact (the business card) in which you are sending and press the key. 4. Press Options ➔ Send business card via and press the Right Navigation key. 5. Select Message and press the key. 6. Enter your message. 7. Press Send to, then add recipient(s). Messaging 34
-
 1
1 -
2
-
3
-
4
-
5
-
6
-
7
-
8
-
9
-
10
-
11
-
12
-
13
-
14
-
15
-
16
-
17
-
18
-
19
-
20
-
21
-
22
-
23
-
24
-
25
-
26
-
27
-
28
-
29
-
30
-
31
-
32
-
33
-
 34
34 -
 35
35 -
 36
36 -
 37
37 -
 38
38 -
 39
39 -
 40
40 -
 41
41 -
 42
42 -
 43
43 -
 44
44 -
45
-
46
-
47
-
48
-
49
-
50
-
51
-
52
-
53
-
54
-
55
-
56
-
57
-
58
-
59
-
60
-
61
-
62
-
63
-
64
-
65
-
66
-
67
-
68
-
69
-
70
-
71
-
72
-
73
-
74
-
75
-
76
-
77
-
78
-
79
-
80
-
81
-
82
-
83
-
84
-
85
-
86
-
87
-
88
-
89
-
90
-
91
-
92
-
93
-
94
-
95
-
96
-
97
-
98
-
99
-
100
-
101
-
102
-
103
-
104
-
105
-
106
-
107
-
108
-
109
-
110
-
111
-
112
-
113
-
114
-
115
-
116
-
117
-
118
-
119
-
120
-
121
-
122
-
123
-
124
-
125
-
126
-
127
-
128
-
129
-
130
-
131
-
132
-
133
-
134
-
135
-
136
-
137
-
138
-
139
-
140
-
141
-
142
-
143
-
144
-
145
-
146
-
147
-
148
-
149
-
150
-
151
-
152
-
153
 |
 |